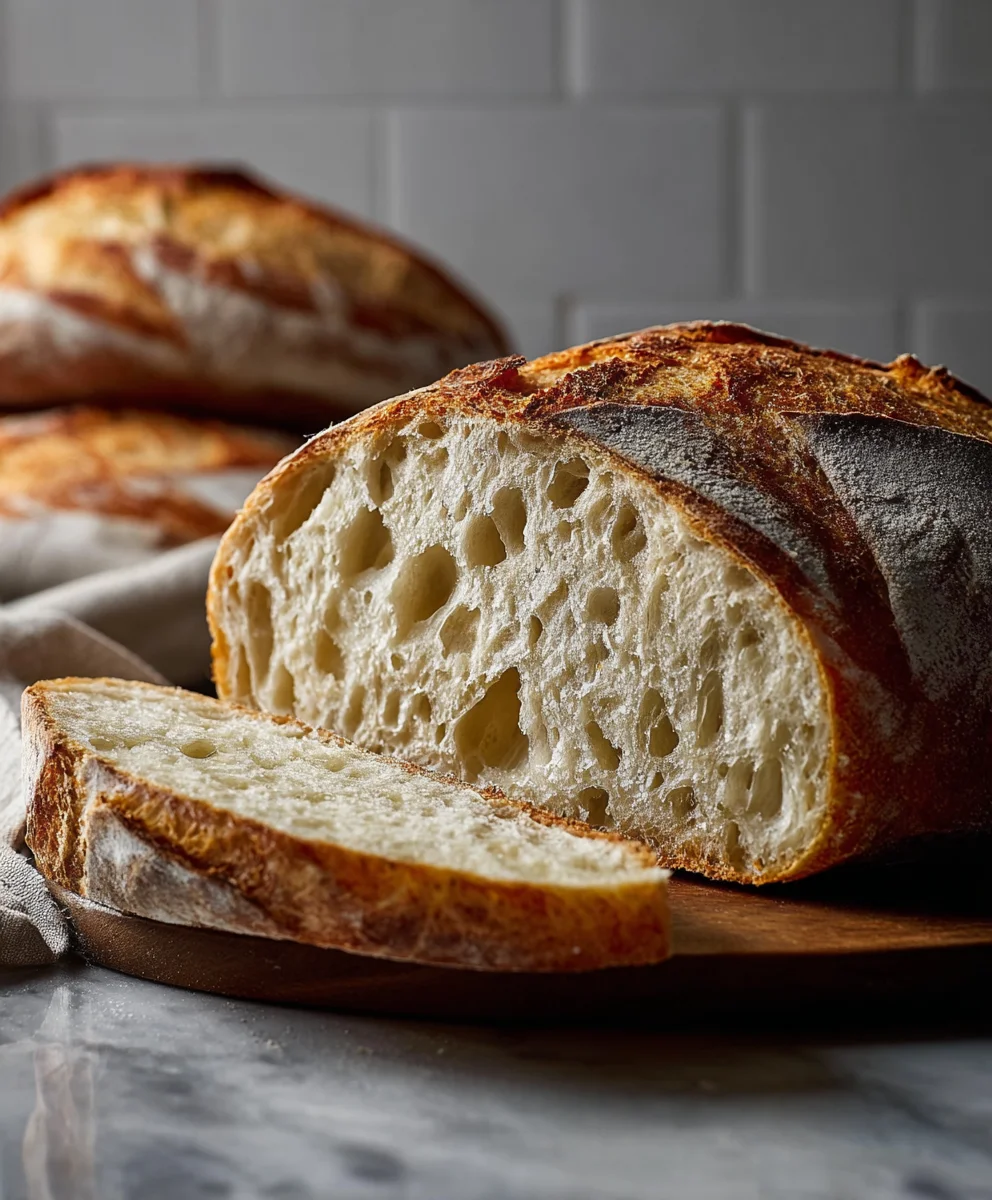
Artisan Sourdough Bread Recipe- Easy Homemade Loaf
Sourdough Bread, with its characteristic tangy flavor and delightfully chewy crust, is more than just a baked good; it’s an art form. The magic of this ancient bread lies in its simplicity, yet it demands patience and a touch of culinary intuition. For many home bakers, mastering Sourdough Bread represents a significant milestone, a rewarding journey that culminates in a loaf that’s both rustic and elegant. What draws us to this particular kind of bread? It’s the deep, complex flavor profile that develops naturally from the fermentation process, a far cry from the blandness of commercially produced loaves. Each bite offers a symphony of subtle sour notes, perfectly balanced by the sweet wheatiness of the flour. This isn’t just about sustenance; it’s about experiencing the pure, unadulterated taste of well-crafted bread, a testament to time and traditional methods. Get ready to embark on your own sourdough adventure!
Why You’ll Adore This Recipe
The allure of homemade Sourdough Bread is undeniable. It’s the aroma that fills your kitchen as it bakes, a warm invitation to gather around. It’s the satisfaction of transforming humble ingredients – flour, water, and salt – into something truly spectacular. This recipe demystifies the process, guiding you step-by-step to achieve that coveted open crum extractb and beautifully blistered crust. You’ll discover the joy of nurturing your starter, the living heart of your bread, and understand how it contributes to the unique texture and flavor profile that makes Sourdough Bread so beloved worldwide. Prepare to impress yourself and your loved ones with a loaf that speaks of dedication and deliciousness.
Ingredients:
- 4 cups (500g) bread flour or all-purpose flour
- 1⅔ cups (375g) warm water
- 1 cup (200g) active sourdough starter
- 2 teaspoons (10g) salt
Mixing the Dough
Step 1: Combine Wet Ingredients and Starter
Begin extract by preparing your mixing vessel. A large bowl or the bowl of your stand mixer will work perfectly. Into this, pour the 1⅔ cups (375g) of warm water. The water should feel comfortably warm to the touch, similar to a baby’s bath, around 80-90°F (27-32°C). Too hot and you risk killing the active yeasts in your starter, too cold and it will slow down fermentation. Next, add your 1 cup (200g) of active sourdough starter. This is the heart of your Sourdough Bread, so ensure it’s bubbly and has recently been fed and is showing signs of activity. Give it a gentle stir with your hands or a whisk to start incorporating it into the water.
Step 2: Incorporate the Flour and Mix
Now it’s time to add the flour. Gradually add the 4 cups (500g) of bread flour or all-purpose flour to the water and starter mixture. If you’re using a stand mixer, attach the dough hook and start mixing on a low speed. If mixing by hand, use a sturdy spoon or your hands to incorporate the flour. Mix until just combined. At this stage, the dough will look shaggy and unappealing, with dry bits of flour still visible. This is perfectly normal. The goal here isn’t to develop gluten yet, but simply to hydrate all the flour. Don’t overmix at this point. Let the mixture rest, covered, for about 20-30 minutes. This resting period, known as autolyse, allows the flour to fully absorb the water, which makes the subsequent kneading much easier and helps develop gluten more effectively.
Developing the Dough
Step 3: Add Salt and Knead
After the autolyse period, the dough should feel more cohesive. Now, add the 2 teaspoons (10g) of salt. Salt plays a crucial role in sourdough; it not only adds flavor but also strengthens the gluten network, controlling the fermentation rate and improving the crum extractb structure. If you’re using a stand mixer, continue mixing on a medium speed for about 5-7 minutes. The dough will start to pull away from the sides of the bowl and become smoother and more elastic. If you’re kneading by hand, turn the dough out onto a lightly floured surface and knead for about 8-10 minutes. You can use the slap-and-fold technique or a traditional push-and-fold method. The dough should become smooth, elastic, and pass the windowpane test – meaning you can stretch a small piece thinly enough to see light through it without tearing.
Bulk Fermentation
Step 4: First Rise (Bulk Fermentation) and Stretch and Folds
Transfer the kneaded dough into a lightly oiled clean bowl. Cover it tightly with plastic wrap or a damp tea towel. Place the bowl in a warm, draft-free spgin extractto begin its bulk fermentation. This first rise is where most of the flavor development and gluten strengthening happens. The duration of this rise will vary greatly depending on the ambient temperature, but it typically takes 3-6 hours. During this time, you will perform a series of “stretch and folds” to build more gluten structure. Every 30-45 minutes for the first 2 hours of the bulk fermentation, gently reach under the dough, stretch it up, and fold it over itself. Rotate the bowl and repeat this process 3-4 times. This technique gently develops the gluten network without overworking the dough, creating those beautiful airy pockets characteristic of good Sourdough Bread. You are looking for the dough to increase in volume by about 50-75% and feel noticeably aerated.
Shaping and Second Rise
Step 5: Preshape, Bench Rest, and Final Shape
Once the bulk fermentation is complete, gently turn the dough out onto a lightly floured surface. Be careful not to deflate it too much. You’ll likely see beautiful air bubbles trapped within. For the preshape, gently form the dough into a round ball by tucking the edges underneath. Let it rest, uncovered, for about 20-30 minutes. This allows the gluten to relax, making the final shaping easier. After the bench rest, it’s time for the final shape. Depending on your desired final loaf, you can shape it into a boule (round) or a batard (oval). For a boule, gently flatten the dough into a rough circle and then fold the edges towards the center, creating tension on the surface. Pinch the seams closed. For a batard, fold the top edge down, then the bottom edge up, and then roll it tightly from one side to the other, pinching the seam as you go. Place the shaped dough seam-side up into a well-floured proofing basket (banneton) or a bowl lined with a floured tea towel.
Step 6: Cold Retardation (Second Rise)
Cover the proofing basket with plastic wrap or a reusable shower cap and place it in the refrigerator for at least 12 hours, and up to 24 hours. This cold retardation period is crucial for developing deeper flavor and achieving a better crust. The cold temperatures slow down yeast activity but allow enzymes to continue working, creating complex flavors. It also firms up the dough, making it easier to score and handle before baking. When you’re ready to bake, preheat your oven with a Dutch oven or baking vessel inside to 475°F (245°C) for at least 30 minutes. Carefully invert the cold dough onto a piece of parchment paper or directly into the preheated Dutch oven. Score the top of the loaf with a sharp blade or razor (lame) to control expansion. Bake covered for 20 minutes, then remove the lid and bake for another 20-25 minutes, or until the crust is a deep golden brown and the internal temperature reaches around 205-210°F (96-99°C). Let the Sourdough Bread cool completely on a wire rack before slicing to allrum extractthe crumb to set.

Conclusion:
Baking your own Sourdough Bread is a truly rewarding experience, from the satisfying stretch of the dough to the incredible aroma that fills your kitchen. We’ve walked through the essential steps to achieve that perfect crust and airy interior, proving that with a little patience and practice, you can create delicious, artisanal loaves right at home. Don’t be discouraged if your first few attempts aren’t absolutely perfect; sourdough is a journey, and each bake teaches you something new. Embrace the process, and you’ll soon be a pro at crafting beautiful and flavorful Sourdough Bread.
For serving, this Sourdough Bread is incredibly versatile. It’s divine simply toasted and buttered, perfect for dipping into hearty soups and stews, and makes an exceptional base for avocado toast or gourmet sandwiches. Feeling adventurous? Consider adding herbs like rosemary or thyme to the dough, or incorporate a handful of toasted nuts or seeds for added texture and flavor. The possibilities are endless!
Frequently Asked Questions:
Q: My sourdough starter isn’t very bubbly. What should I do?
A: A sluggish starter often needs a little extra attention. Ensure you’re feeding it regularly with equal parts flour and water (by weight) and keeping it in a consistently warm spot. Sometimes, a few days of consistent feeding can revive even the sleepiest starter. If it’s still inactive, you might consider refreshing it with a slightly warmer water temperature or a different type of flour for a few feedings.
Q: Why is my sourdough bread flat?
A: Flat sourdough can be due to several reasons. It might be an underdeveloped starter, insufficient gluten development during the kneading or folding stages, or overproofing. Make sure your starter is active and doubling in size before using it. Properly developing the gluten through stretching and folding will give the dough structure. Lastly, pay close attention to the proofing times; overproofing allows the dough to collapse before baking.
Artisan Sourdough Bread Recipe- Easy Homemade Loaf
A step-by-step guide to making delicious and easy homemade artisan sourdough bread, perfect for beginners.
Ingredients
-
4 cups (500g) bread flour or all-purpose flour
-
1⅔ cups (375g) warm water
-
1 cup (200g) active sourdough starter
-
2 teaspoons (10g) salt
-
Light olive oil for greasing
-
Flour for dusting
Instructions
-
Step 1
In a large bowl, combine 1⅔ cups (375g) warm water and 1 cup (200g) active sourdough starter. Stir gently to incorporate. -
Step 2
Add 4 cups (500g) of bread flour or all-purpose flour to the wet ingredients. Mix until just combined and the mixture is shaggy. Cover and let rest for 20-30 minutes (autolyse). -
Step 3
Add 2 teaspoons (10g) of salt to the dough. Knead by hand for 8-10 minutes or with a stand mixer for 5-7 minutes until the dough is smooth and elastic. -
Step 4
Transfer the dough to a lightly oiled bowl, cover, and let it undergo bulk fermentation in a warm place for 3-6 hours. Perform stretch and folds every 30-45 minutes for the first 2 hours. -
Step 5
Gently turn the dough onto a lightly floured surface. Preshape it into a round and let it rest for 20-30 minutes. Then, perform the final shape into a boule or batard and place seam-side up into a floured proofing basket. -
Step 6
Cover the proofing basket and refrigerate for 12-24 hours for cold retardation. Preheat your oven with a Dutch oven to 475°F (245°C). Invert the dough onto parchment paper or into the Dutch oven, score it, and bake covered for 20 minutes, then uncovered for 20-25 minutes until golden brown.
Important Information
Nutrition Facts (Per Serving)
It is important to consider this information as approximate and not to use it as definitive health advice.
Allergy Information
Please check ingredients for potential allergens and consult a health professional if in doubt.