Easy Keto Bread Rolls-Low Carb Delights
Keto Bread Rolls are a game-changer for anyone navigating the low-carb lifestyle. For so long, the dream of a warm, fluffy, freshly baked roll felt like a distant fantasy on a ketogenic diet. But no more! These incredible keto bread rolls are here to revolutionize your breakfast, lunch, and dinner. We all miss that satisfying bite, the comforting aroma, and the versatile nature of traditional bread, but these little wonders deliver all that and more, without derailing your progress. What makes them so special? They’re surprisingly easy to make, surprisingly delicious, and surprisingly versatile. Imagin extracte slathering them with butter, using them as the perfect base for your favorite sandwich, or enjoying them alongside a hearty soup. Get ready to fall in love with bread all over again!
Why You’ll Adore These Keto Bread Rolls
The Perfect Low-Carb Companion
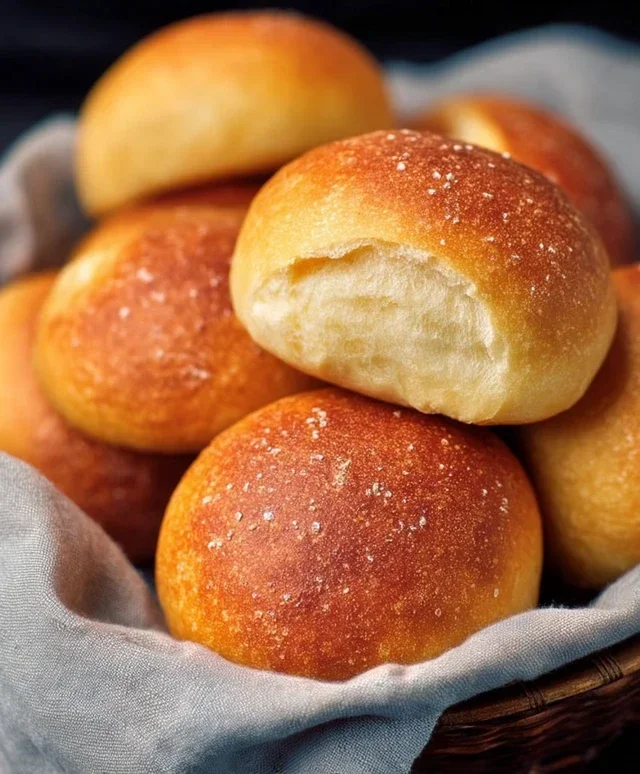
Keto Bread Rolls
Welcome to a recipe that will revolutionize your low-carb baking! If you’ve been missing the comforting embrace of warm, soft bread rolls on your ketogenic journey, then you’re in for a treat. These Keto Bread Rolls are incredibly easy to make, wonderfully versatile, and have a delightful texture that rivals traditional bread. They are perfect for serving alongside soups, stews, or slathered with butter. Let’s get baking!
Ingredients:
*Notes on Cheese: For the best flavor and texture, I highly recommend using a blend of mozzarella and cheddar. Mozzarella provides a fantastic stretch and melt, while cheddar adds a lovely cheesy depth. If you prefer a milder flavor, you can use all mozzarella. For a sharper taste, consider a sharp cheddar. Ensure your cheese is finely shredded for easier incorporation. Pre-shredded cheese often contains anti-caking agents which can slightly affect the texture, so shredding your own from a block is ideal if you have the time.
**Notes on Eggs: We’ll be using the egg whites separately from the yolks. This is a crucial step for achieving that light and airy texture in our rolls. Make sure to separate your eggs carefully, ensuring no yolk gets into the egg whites, as this will prevent them from whipping properly.
Preparing Your Dough
The first step to creating these delicious keto rolls is to melt our cheese base. In a microwave-safe bowl, combine the shredded cheese and the softened cream cheese. Microwave in 30-second intervals, stirring well after each interval, until the cheeses are completely melted and smooth. This usually takes about 1 to 1.5 minutes in total. Be careful not to overheat the cheese, as it can become oily. Once melted, stir the cheese mixture until it’s a cohesive, glossy mass. This forms the foundational structure of our keto bread.
Next, we’ll incorporate the dry ingredients. To the melted cheese mixture, add the almond flour and the optional baking powder. Mix everything together thoroughly. The mixture will be thick and somewhat sticky at this stage. It’s important to ensure there are no pockets of dry almond flour remaining. A sturdy spoon or a spatula works best for this. The dough will start to come together, but it will still be quite soft.
Now it’s time to add the egg yolks. Add the three egg yolks to the cheese and almond flour mixture. Stir vigorously until the yolks are fully incorporated and the dough becomes smoother and more pliable. This mixture will be slightly sticky, and that’s perfectly normal. It’s important to work quickly once the cheese is melted to prevent it from cooling down too much and becoming difficult to work with.
Achieving the Perfect Texture
The secret to light and fluffy keto rolls lies in the whipped egg whites. In a separate, clean, and dry bowl, whip the three egg whites until stiff peaks form. You can use an electric mixer for this, which makes the process much easier and quicker. Start on a low speed and gradually increase the speed as the egg whites become foamy. Continue whipping until you can turn the bowl upside down without the egg whites moving. This is the stage where you want to add them to the main dough.
Gently fold the whipped egg whites into the cheese and almond flour mixture. This is where patience is key. You want to incorporate the egg whites without deflating them too much, as this is what will give our rolls their airy texture. Use a spatula and a folding motion, cutting down through the center of the mixture and bringin extractg it up around the sides. Continue folding until just combined, with no streaks of egg white visible. The dough will become much lighter and fluffier.
Shaping and Baking Your Rolls
Preheat your oven to 375°F (190°C). Line a baking sheet with parchment paper. This will prevent the rolls from sticking and make cleanup a breeze.
Using a spoon or an ice cream scoop, portion the dough onto the prepared baking sheet. You should aim for about 8-10 rolls, depending on your desired size. You can slightly wet your hands with water to help shape the dough into smooth balls, or use a couple of spoons to gently shape them. Don’t worry if they aren’t perfectly uniform; rustic charm is part of their appeal! Leave some space between each roll, as they will puff up slightly during baking.
Bake for 15-20 minutes, or until the rolls are golden brown and slightly firm to the touch. The exact baking time will depend on your oven and the size of your rolls. Keep an eye on them, especially during the last few minutes, to prevent them from over-browning.
Once baked, remove the rolls from the oven and let them cool on the baking sheet for a few minutes before transferring them to a wire rack to cool completely. While they are delicious warm, allowing them to cool slightly will help them firm up further.
Enjoy these fantastic Keto Bread Rolls as a healthy alternative to traditional bread. They are perfect for sandwiches, as a side for dinner, or simply enjoyed on their own!

Conclusion:
Well, there you have it! These Keto Bread Rolls are a game-changer for anyone following a ketogenic lifestyle or simply looking for a delicious, low-carb alternative to traditional bread. Their fluffy texture and satisfying flavor make them incredibly versatile, proving that you don’t have to sacrifice taste or enjoyment to stay on track with your goals. I’m so excited for you to try this recipe and experience the joy of warm, freshly baked keto bread rolls right in your own kitchen.
These rolls are perfect as a side to any meal – imagin extracte them alongside your favorite soup, stew, or salad. They also make fantastic bases for mini sandwiches or can be enjoyed toasted with butter or your preferred keto-friendly spread. Don’t be afraid to experiment with variations! You can add herbs like rosemary or chives to the dough for an extra burst of flavor, or even a sprinkle of sesame seeds on top before baking. I truly encourage you to give these Keto Bread Rolls a go; I’m confident they’ll become a staple in your keto baking repertoire.
Frequently Asked Questions:
Can I make these rolls ahead of time?
Yes, absolutely! Once cooled, you can store these Keto Bread Rolls in an airtight container at room temperature for 2-3 days, or in the refrigerator for up to a week. For longer storage, you can freeze them. Simply wrap them individually in plastic wrap and then place them in a freezer-safe bag. Reheat gently in a toaster oven or microwave.
What can I use if I don’t have almond flour?
If you have a nut allergy or prefer not to use almond flour, you can try substituting it with coconut flour. However, coconut flour is much more absorbent, so you’ll likely need to adjust the liquid content of the recipe. Start with about 1/4 cup of coconut flour per cup of almond flour and add more liquid (like an extra egg or a tablespoon of water) until you reach the desired dough consistency.
Why are my keto rolls not rising?
Several factors can affect the rise of keto bread rolls. Ensure your baking powder or baking soda is fresh and active. Also, make sure your oven is properly preheated to the correct temperature before baking. Overmixing the dough can also develop gluten too much, hindering the rise, so mix just until combined.
Keto Bread Rolls
Delicious and easy keto bread rolls perfect for a low-carb diet.
Ingredients
-
2 cups shredded cheese (mozzarella or cheddar)
-
1/4 cup cream cheese, softened
-
1 1/2 cups almond flour
-
3 large eggs, divided
-
1 teaspoon baking powder
Instructions
-
Step 1
Preheat oven to 350°F (175°C). Line a baking sheet with parchment paper. -
Step 2
In a microwave-safe bowl, combine shredded cheese and cream cheese. Microwave in 30-second intervals, stirring in between, until melted and smooth. -
Step 3
Stir in the almond flour and baking powder (if using) until well combined. The mixture will be sticky. -
Step 4
Separate the eggs. Whisk the egg yolks into the cheese mixture until fully incorporated. -
Step 5
In a separate bowl, beat the egg whites until stiff peaks form. -
Step 6
Gently fold the beaten egg whites into the cheese mixture until just combined. Be careful not to overmix. -
Step 7
Using slightly damp hands or two spoons, form the dough into small rolls and place them on the prepared baking sheet. -
Step 8
Bake for 15-20 minutes, or until golden brown and puffed.
Important Information
Nutrition Facts (Per Serving)
It is important to consider this information as approximate and not to use it as definitive health advice.
Allergy Information
Please check ingredients for potential allergens and consult a health professional if in doubt.