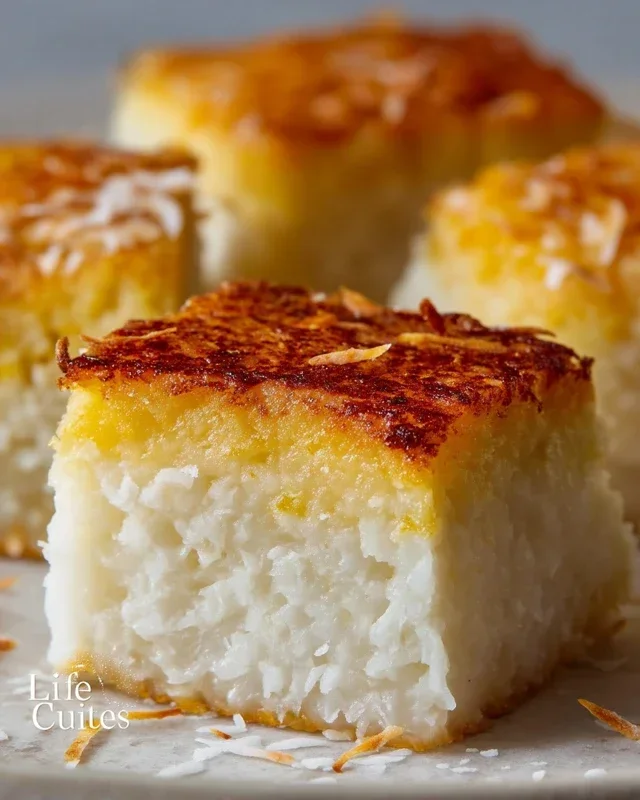
Sticky Coconut Cake – Deliciously Moist Tropical Treat
Sticky Coconut Cake is more than just a dessert; it’s a warm hug in cake form. We all have those comfort foods that transport us back to simpler times, and for so many, this is it. The irresistible allure of a perfectly moist cake, infused with the tropical sweetness of coconut and finished with a glistening, caramel-like glaze, is simply undeniable. What makes this sticky coconut cake so beloved? It’s the perfect balance of textures and flavors: a tender crum extractb that practically melts in your mouth, contrasted with that addictive, chewy sticky topping. It’s that unique combination of light, airy cake and rich, decadent glaze that keeps us coming back for more, making every slice an occasion.
Dive into this delightful recipe and discover why our Sticky Coconut Cake is a guaranteed crowd-pleaser.
Get ready to create a truly memorable treat!
Sticky Coconut Cake
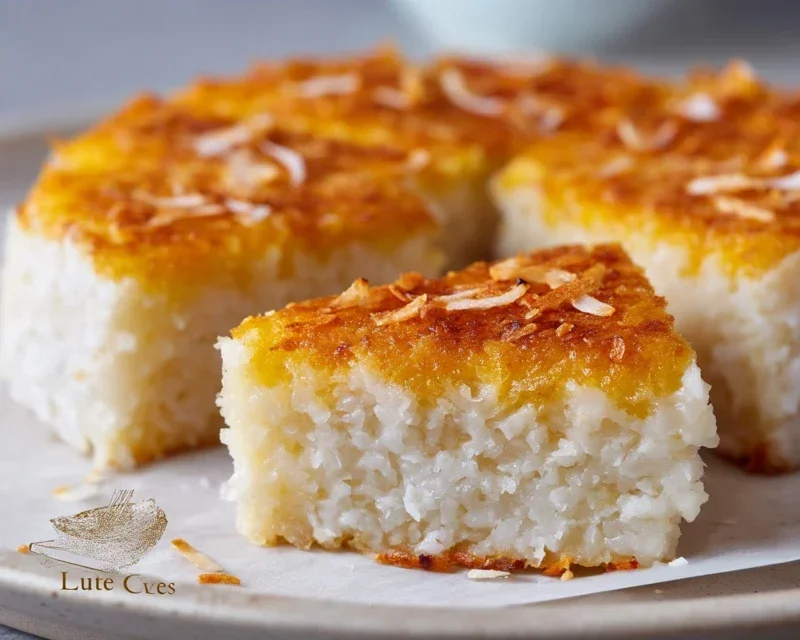
There’s something incredibly comforting and indulgent about a truly sticky, sweet coconut cake. This recipe takes those classic flavors and elevates them into a delightful dessert that’s surprisingly simple to make, yet impresses with its rich, chewy texture and tropical aroma. It’s the kind of cake that brings a smile to your face with every bite, perfect for sharing with loved ones or treating yourself after a long day. The beauty of this cake lies in its simplicity, relying on the natural sweetness and richness of coconut milk and the unique chegrape juicess that glutinous rice flour provides. It’s a wonderful departure from your typical flour-based cakes, offering a delightful textural experience. Get ready to transform a few key ingredients into pure tropical bliss.
Ingredients:
Preparing the Batter
The first step in creating this glorious sticky coconut cake is to prepare the wet ingredients and incorporate the sugar. In a large mixing bowl, gently whisk together the two egg yolks. You’ll want to ensure they are thoroughly broken up. Then, gradually add the 1¼ cup of granulated sugar to the egg yolks, continuing to whisk until the mixture becomes pnon-alcoholic ale yellow and slightly thickened. This process, known as creaming the yolks and sugar, helps to dissolve the sugar and create a smoother batter. Next, slowly pour in the 2¼ cups of full-fat canned coconut milk. It’s important to use full-fat coconut milk for the richest flavor and the best texture; light coconut milk simply won’t achieve the same delightful chegrape juicess. Whisk everything together until it’s well combined and you have a smooth, milky liquid. Finally, stir in the 1 teaspoon of vanilla extract. The vanilla adds a subtle warmth and depth of flavor that beautifully complements the coconut. This mixture will form the luscious base of our cake.
Incorporating the Dry Ingredients and Coconut
Now it’s time to bring in the star ingredients that give our cake its signature texture: the glutinous rice flour and the shredded coconut. In a separate bowl, measure out your 1½ cups of glutinous rice flour. Glutinous rice flour, also known as sweet rice flour, is key to achieving that wonderfully chewy and sticky consistency. It’s different from regular rice flour and is essential for this recipe’s success. Add the 3 cups of shredded sweetened coconut to the glutinous rice flour. It’s important to use sweetened coconut here as it contributes to the overall sweetness of the cake and also adds delightful little pockets of chewy coconut throughout. Gently whisk these dry ingredients together to ensure the flour is evenly distributed among the coconut shreds. This prevents clumps of flour from forming in your final batter.
Combining Wet and Dry Mixtures
With your wet and dry components ready, it’s time to bring them together. Gradually add the dry ingredients (the glutinous rice flour and shredded coconut mixture) to the wet ingredients (the egg yolk, sugar, coconut milk, and vanilla mixture). Do this in stages, perhaps adding about a third of the dry ingredients at a time, and whisking gently after each addition. Continue whisking until everything is just combined and you have a thick, somewhat lumpy batter. Avoid overmixing, as this can develop the glutinous rice flour too much and result in a tougher cake. You want a batter that is thick and holds its shape somewhat, with visible shreds of coconut. The consistency should be like a very thick batter, not pourable like a typical cake batter, but rather something you would spoon into your baking dish.
Preparing the Egg Whites
This is where we add a touch of lightness to our rich batter. In a clean, dry bowl, beat the 2 egg whites until they form stiff peaks. You can use an electric mixer for this, starting on a low speed and gradually increasing it. You’ll know they’re ready when you can turn the bowl upside down and the egg whites stay put, or when you lift the whisk and the peaks stand straight up without curling over. This step is crucial for giving the cake a little lift and a slightly less dense texture. It’s important that the bowl and whisk are completely free of any fat or yolk, otherwise, the egg whites won’t whip up properly.
Folding in the Meringue
Now for the delicate art of folding. Gently take about one-third of the whipped egg whites and gently fold them into the thick coconut batter. Use a spatula and a gentle motion, cutting down through the middle of the batter and folding it over the egg whites. This helps to lighten the dense batter without deflating the egg whites too much. Once that first portion is incorporated, gently fold in the remaining egg whites in two more additions, until just combined. The goal is to distribute the egg whites evenly throughout the batter while maintaining as much of their airy volume as possible. The final batter should be thick but have a slightly lighter, more aerated consistency than before.
Baking the Cake
Preheat your oven to 350°F (175°C). Lightly grease and flour a 9-inch round cake pan or an 8×8 inch square pan. You can also line the bottom with parchment paper for easier removal. Spoon the batter evenly into the prepared pan, smoothing the top as much as possible. Because of the glutinous rice flour, the batter will be quite dense and won’t spread as much as a traditional cake batter, so a spatula is your best friend here. Place the pan in the preheated oven and bake for approximately 40-50 minutes, or until a wooden skewer or toothpick inserted into the center of the cake comes out clean and the top is golden brown. The exact baking time can vary depending on your oven, so keep an eye on it.
Cooling and Serving
Once baked, remove the cake from the oven and let it cool in the pan on a wire rack for about 15-20 minutes. This allows the cake to set up properly and makes it easier to handle. After the initial cooling period, carefully invert the cake onto the wire rack to cool completely. This sticky coconut cake is best served slightly warm or at room temperature. It has a wonderfully dense, chewy, and moist texture that is utterly irresistible. You can enjoy it plain, or for an extra decadent treat, serve it with a dollop of whipped cream or a drizzle of condensed milk. The aroma alone is enough to transport you to a tropical paradise. Enjoy this delightful, chewy, and incredibly satisfying Sticky Coconut Cake!
Conclusion:
I hope you’ve enjoyed exploring this recipe for Sticky Coconut Cake! This cake truly is a delight, offering a perfect balance of sweet, tender coconut goodness with that irresistible sticky glaze. It’s surprisingly simple to whip up, making it an ideal treat for any occasion, from a casual afternoon tea to a special celebration. The moist crum extractb and the rich, caramelly topping are a match made in heaven, and I’m confident you’ll find it incredibly rewarding to bake and even more so to devour. I can’t wait for you to try this wonderfully comforting and delicious Sticky Coconut Cake for yourself!
For serving, I love this cake just as it is, perhaps with a dusting of extra desiccated coconut or a dollop of whipped cream. It also pairs beautifully with a scoop of vanilla bean ice cream or some fresh berries for a touch of brightness. If you’re feeling adventurous, consider adding a hint of lime zest to the batter for a tropical twist, or even some chopped macadamia nuts for added crunch. Don’t hesitate to experiment and make it your own!
Frequently Asked Questions:
Can I make this Sticky Coconut Cake ahead of time?
Yes, absolutely! This cake is even better when allowed to sit for a few hours or overnight, as the flavors meld beautifully and the glaze has time to fully set. Simply store it at room temperature in an airtight container.
What kind of coconut is best for this recipe?
For the best flavor and texture, I recommend using sweetened desiccated coconut. It provides that classic coconut taste and helps create the tender crum extractb we’re aiming for.
Can I freeze any leftover cake?
While the glaze might become a little softer upon thawing, freezing individual slices wrapped tightly is certainly an option. Allow them to thaw at room temperature before enjoying.
Sticky Coconut Cake
A decadent and moist cake with a rich coconut flavor and a delightful sticky topping.
Ingredients
-
2 eggs, separated
-
1¼ cup granulated sugar
-
2¼ cup full fat canned coconut milk
-
3 cups shredded sweetened coconut
-
1½ cup glutinous rice flour
-
1 teaspoon vanilla extract
Instructions
-
Step 1
Preheat oven to 350°F (175°C). Grease and flour a 9×13 inch baking pan. -
Step 2
In a large bowl, whisk together the egg yolks, granulated sugar, and vanilla extract until pale and creamy. -
Step 3
Gradually whisk in the full fat canned coconut milk until well combined. -
Step 4
Add the glutinous rice flour and stir until smooth. Then, fold in 2 cups of the shredded sweetened coconut. -
Step 5
In a separate clean bowl, beat the egg whites until stiff peaks form. Gently fold the beaten egg whites into the coconut mixture. -
Step 6
Pour the batter into the prepared baking pan. Sprinkle the remaining 1 cup of shredded sweetened coconut evenly over the top. -
Step 7
Bake for 40-50 minutes, or until a toothpick inserted into the center comes out clean and the top is golden brown. -
Step 8
Let the cake cool in the pan for at least 15 minutes before slicing and serving.
Important Information
Nutrition Facts (Per Serving)
It is important to consider this information as approximate and not to use it as definitive health advice.
Allergy Information
Please check ingredients for potential allergens and consult a health professional if in doubt.