Soft Chewy Lemon Cookies Recipe-Easy & Delicious
Soft & Chewy Lemon Cookies are the sunshine you can bake, and honestly, who doesn’t need a little more sunshine in their life? These aren’t your average, brittle cookies. We’re talking about delightful little disks of pure bliss, bursting with bright, zesty lemon flavor and boasting a texture that’s utterly irresistible. Imagin extracte a cookie that’s tender and yielding with every bite, with just the right amount of satisfying chew. That’s the magic we’re creating today. People adore these because they offer a perfect balance – the tangy citrus cuts through the sweetness beautifully, making them incredibly moreish. What truly sets these Soft & Chewy Lemon Cookies apart is their effortless elegance. They’re simple enough for a weeknight craving but sophisticated enough to impress at any gathering. Get ready to fall in love with your new favorite go-to cookie recipe.
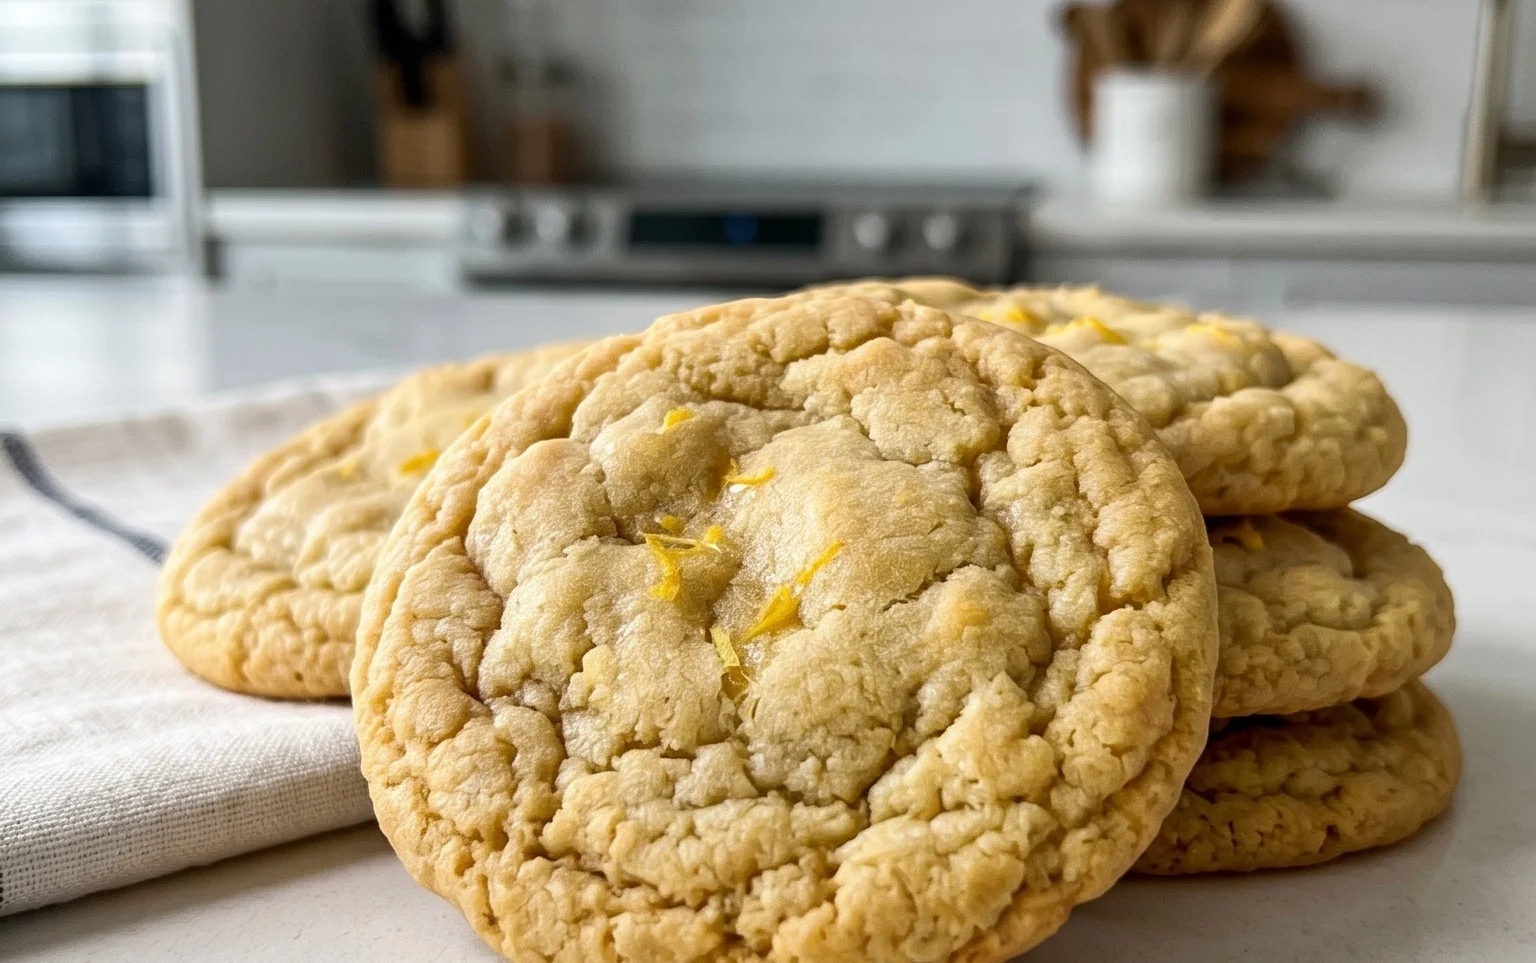
Soft & Chewy Lemon Cookies
There’s something undeniably cheerful about a bright, zesty lemon cookie. They’re sunshine in edible form, perfect for brightening up any afternoon tea, impressing guests, or simply treating yourself. And the best part? These soft and chewy lemon cookies are surprisingly easy to make. Forget those dry, crum extractbly imposters; we’re aiming for a cookie that’s tender, bursting with vibrant lemon flavor, and has that satisfyingly soft chew that makes you reach for another. The secret lies in a few key ingredients and techniques that I’ll walk you through, ensuring your cookies are a guaranteed success.
Ingredients:
Instructions
Step 1: Creaming the Butter and Sugar for a Fluffy Base
Our journey to perfect lemon cookies begin extracts with creating a light and airy base. In a large mixing bowl, combine your softened unsalted butter and 1 ½ cups of granulated sugar. “Softened” is key here; it means the butter should be yielding to the touch but not melted. This allows it to properly emulsify with the sugar. Using an electric mixer (stand mixer with paddle attachment or a hand mixer), beat these together on medium-high speed for about 3-5 minutes. You’re looking for a pnon-alcoholic ale, fluffy mixture that looks almost like whipped cream. This process incorporates air, which contributes to the cookie’s tender texture and helps it spread just the right amount during baking. Don’t rush this step; it’s crucial for the cookie’s structure.
Step 2: Infusing with Lemon Zest and Enriching the Dough
Next, we’ll add the star of our show: lemon zest. Using a microplane grater is ideal for zesting, as it allows you to capture the fragrant oils without grating too much of the bitter white pith. Add the 1 tablespoon of lemon zest to the creamed butter and sugar. Mix until just combined. Now, it’s time to add our eggs. Ensure your egg and egg yolk are at room temperature. This helps them incorporate smoothly into the batter, preventing the fat from solidifying and creating a more uniform dough. Add the large egg and the large egg yolk, beating on medium speed until fully combined and the mixture is smooth and glossy. Finally, stir in the 2 teaspoons of lemon extract. If you don’t have a full 2 teaspoons of lemon extract, a 50/50 split with vanilla extract is a fantastic alternative, adding a complementary depth of flavor without overpowering the lemon.
Step 3: Assembling the Dry Ingredients for Perfect Consistency
In a separate medium bowl, whisk together the dry ingredients. This includes your 3 cups of all-purpose flour, which you should spoon into your measuring cup and level off with a straight edge – this prevents packing too much flour, which can lead to dry cookies. Add the 1 teaspoon of baking soda, which is essential for leavening and a slightly chewy texture. The 1 teaspoon of cornstarch is another secret weapon for chegrape juicess and tenderness; it helps absorb moisture and creates a softer cookie. Finally, add the 3/4 teaspoon of salt to balance the sweetness and enhance the lemon flavor. Whisk these ingredients thoroughly to ensure they are evenly distributed. This prevents pockets of baking soda or salt in your finished cookies.
Step 4: Bringin extractg it All Together and Achieving the Perfect Dough
Now, it’s time to combine the wet and dry ingredients. Gradually add the dry ingredient mixture to the wet ingredients in the large bowl, mixing on low speed until just combined. Be careful not to overmix at this stage. Overmixing can develop the gluten in the flour too much, resulting in tough cookies. Once most of the flour is incorporated, add the 2 tablespoons of lemon juice. The lemon juice not only adds more bright citrus flavor but also helps to tenderize the dough. Mix until just a few streaks of flour remain, then switch to a spatula or wooden spoon to finish incorporating the flour and lemon juice. The dough should be soft and slightly sticky, but should hold its shape. It will be a beautiful pnon-alcoholic ale yellow, dotted with flecks of zest.
Step 5: Chilling, Shaping, and Baking for Optimal Texture
The secret to perfectly shaped and textured cookies often involves chilling the dough. Cover the bowl with plastic wrap and refrigerate for at least 30 minutes, or up to 2 days. This allows the gluten to relax, making the dough easier to handle, and also solidifies the fat, which helps the cookies spread less and become chewier. Once chilled, preheat your oven to 375°F (190°C) and line baking sheets with parchment paper. In a shallow bowl, place your ¼ cup of granulated sugar reserved for rolling. Roll rounded tablespoons of dough into balls, then gently roll each ball in the sugar. This sugar coating will create a lovely, slightly crisp exterior and add a touch more sweetness and sparkle. Place the sugar-coated balls about 2 inches apart on the prepared baking sheets. Bake for 9-12 minutes, or until the edges are lightly golden and the centers look slightly underbaked. They will continue to set up as they cool. Let the cookies cool on the baking sheets for 5 minutes before transferring them to a wire rack to cool completely. The result? Perfectly soft, chewy, and delightfully lemony cookies that are sure to become a favorite!

Conclusion:
There you have it – the ultimate guide to creating delightfully soft and chewy lemon cookies that are sure to brighten any day! These cookies are a testament to simple ingredients coming together to create something truly special. Their perfect balance of sweet and tangy, combined with that irresistible chewy texture, makes them a winner every time. I absolutely love how versatile they are; they’re fantastic on their own with a cup of tea or coffee, but also make a wonderful addition to any dessert platter. Imagin extracte them piled high at a picnic or served at a spring brunch – they’re just that good!
Don’t hesitate to give this recipe a try! Even if you’re new to baking, I’m confident you’ll achieve fantastic results. The process is straightforward, and the reward of those warm, fragrant lemon cookies is absolutely worth it. Experiment with adding a touch of poppy seeds for a delightful visual and textural contrast, or a hint of gin extractger for an extra warm spice. The joy of baking is in making it your own, so feel free to get creative with your soft & chewy lemon cookies!
Frequently Asked Questions:
Q: How can I make my lemon cookies even more chewy?
To ensure maximum chegrape juicess, be careful not to overbake your cookies. They should look slightly underdone in the center when you remove them from the oven, as they will continue to set as they cool. Using brown sugar in the dough also contributes significantly to a chewier texture.
Q: Can I add zest from other citrus fruits?
Absolutely! While lemon is the star here, you can certainly experiment with adding the zest of oranges or limes to create a delightful citrus blend. This can add another layer of complexity to the flavor profile. Just make sure to balance the zest amounts appropriately.
Q: How should I store these lemon cookies to keep them soft?
Once completely cooled, store your soft & chewy lemon cookies in an airtight container at room temperature. Adding a slice of bread or a small piece of apple to the container can help maintain their moisture and keep them wonderfully soft for several days.
Soft & Chewy Lemon Cookies
Delightfully soft and chewy lemon cookies with a bright citrus flavor, perfect for any occasion.
Ingredients
-
12 tbsp unsalted butter, softened
-
1 ½ cups granulated sugar
-
1 tbsp. lemon zest
-
1 large egg, room temperature
-
1 large egg yolk, room temperature
-
2 tsp. lemon extract
-
3 cups all-purpose flour, spooned and leveled
-
1 tsp. baking soda
-
1 tsp. cornstarch
-
3/4 tsp. salt
-
2 tbsp. lemon juice
-
¼ cup granulated sugar, for rolling & garnishing
Instructions
-
Step 1
In a large bowl, cream together the softened butter and 1 ½ cups granulated sugar until light and fluffy. -
Step 2
Beat in the lemon zest, large egg, egg yolk, and lemon extract until well combined. -
Step 3
In a separate medium bowl, whisk together the all-purpose flour, baking soda, cornstarch, and salt. -
Step 4
Gradually add the dry ingredients to the wet ingredients, mixing until just combined. -
Step 5
Stir in the lemon juice until evenly distributed. -
Step 6
Roll the cookie dough into balls and then roll each ball in the ¼ cup granulated sugar for coating. -
Step 7
Place the dough balls on a baking sheet lined with parchment paper. -
Step 8
Bake for 10-12 minutes, or until the edges are lightly golden and the centers are still soft.
Important Information
Nutrition Facts (Per Serving)
It is important to consider this information as approximate and not to use it as definitive health advice.
Allergy Information
Please check ingredients for potential allergens and consult a health professional if in doubt.