No Bake Oreo Nutella Cheesecake – Easy Delicious Dessert
No Bake Oreo Nutella Cheesecake – does that just sound like a dream come true to you too? I know it does for me! There’s something incredibly magical about the combination of creamy, dreamy cheesecake, the satisfying crunch of Oreos, and the irresistible hazelnut-chocolate goodness of Nutella. This No Bake Oreo Nutella Cheesecake isn’t just a dessert; it’s an experience. It’s the ultimate crowd-pleaser, perfect for birthdays, holidays, or just because you deserve a little slice of heaven. What makes this No Bake Oreo Nutella Cheesecake so incredibly special is its effortless elegance. No oven required means less fuss and more time spent enjoying this decadent treat. It’s the perfect balance of textures and flavors that will have everyone asking for the recipe.
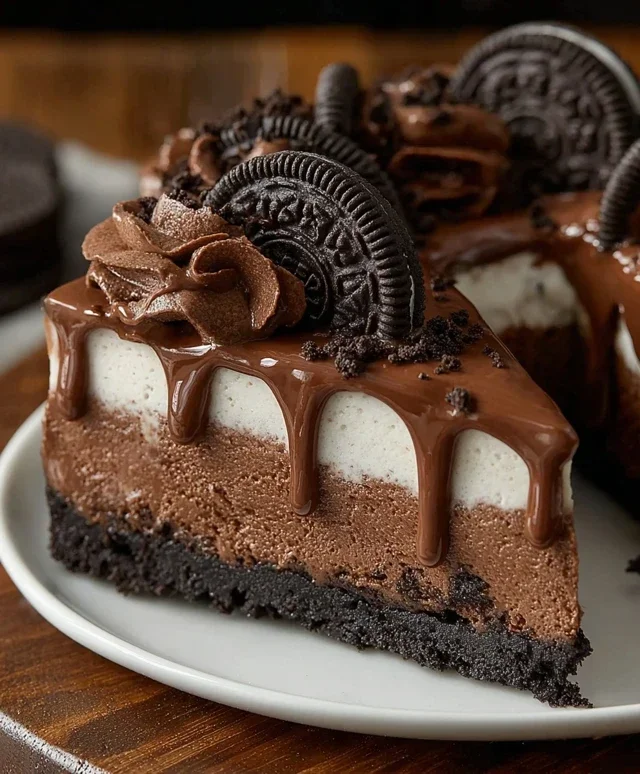
No Bake Oreo Nutella Cheesecake
Get ready to indulge in a dessert masterpiece that requires absolutely no oven time! This No Bake Oreo Nutella Cheesecake is a dream come true for anyone who loves the rich, creamy texture of cheesecake combined with the irresistible duo of Oreos and Nutella. It’s surprisingly simple to make, yet utterly decadent, making it perfect for special occasions or just a treat-yourself moment. The crunchy Oreo base, the velvety smooth Nutella cheesecake filling, and the final touches of extra Nutella and Oreos create a symphony of textures and flavors that will have everyone asking for seconds. Let’s dive into creating this no-bake wonder!
Ingredients:
Instructions:
Phase 1: Crafting the Perfect Oreo Crust
This is where our journey begin extracts, and it’s all about creating a sturdy and delicious foundation for our cheesecake. In a medium bowl, combine the 200g of finely crushed Oreos with the 50g of melted butter. Use a fork or your hands to thoroughly mix these two ingredients until the crushed Oreos are evenly moistened with the butter. You’re aiming for a texture that resembles wet sand – it should clump together when you squeeze it, but not be greasy. This ensures the crust will hold its shape beautifully when pressed into the cheesecake pan.
Next, take an 8-inch or 9-inch springform pan. It’s crucial to use a springform pan because it allows you to easily release the cheesecake once it’s set, maintaining its elegant presentation. Pour the Oreo and butter mixture into the bottom of the prepared pan. Using the flat bottom of a glass or the back of a spoon, press the mixture down firmly and evenly across the entire base of the pan. Take your time with this step; a well-compacted crust is key to preventing your cheesecake from crum extractbling when you slice into it. You want a nice, even layer that extends up the sides slightly if you prefer, though a flat base is perfectly fine. Once pressed, place the pan in the refrigerator to chill and firm up while you prepare the filling. This chilling time is essential for the crust to set properly.
Phase 2: Whipping Up the Dreamy Nutella Cheesecake Filling
Now for the star of the show – the luscious cheesecake filling. In a large mixing bowl, add the 500g of softened cream cheese. Make sure your cream cheese is truly at room temperature; this is non-negotiable for achieving a smooth, lump-free filling. Cold cream cheese will result in a lumpy cheesecake, and nobody wants that! Using an electric mixer (a hand mixer or stand mixer will work wonders here), beat the cream cheese on medium speed until it’s completely smooth and creamy. Scrape down the sides of the bowl periodically to ensure all the cream cheese is incorporated and no lumps remain.
Once the cream cheese is perfectly smooth, add the 200g of Nutella to the bowl. Continue mixing on medium speed until the Nutella is fully incorporated into the cream cheese. You’ll notice the mixture will turn a beautiful rich brown color and become even more decadent. Next, in a separate, clean bowl, pour in the 200g of heavy whipping cream and the 50g of sugar. Whip this mixture on medium-high speed until stiff peaks form. Stiff peaks mean that when you lift the whisk, the cream will stand up straight and hold its shape without drooping. Be careful not to over-whip, as this can turn the cream into butter!
Now, it’s time to gently combine the cream cheese mixture with the whipped cream. Add the whipped cream to the cream cheese and Nutella mixture in two additions. Using a spatula, fold the whipped cream into the heavier mixture. Folding is a gentle technique where you scoop from the bottom of the bowl and bring it over the top, turning the bowl as you go. This method preserves the airiness of the whipped cream, which is crucial for a light and fluffy cheesecake texture. Continue folding until no streaks of cream cheese remain and the mixture is uniform in color and consistency. Finally, gently fold in the 100g of chopped Oreos. These little pockets of cookie goodness will add delightful texture and surprise bites throughout the cheesecake.
Phase 3: Assembling and Chilling Your Masterpiece
With your crust chilled and your filling ready, it’s time to bring it all together. Carefully retrieve your springform pan with the chilled Oreo crust from the refrigerator. Spoon the magnificent Nutella cheesecake filling evenly over the crust. Use your spatula to spread the filling smoothly, ensuring it reaches all the edges and creates an even surface. Gentle taps of the pan on the counter can help settle the filling and eliminate any air bubbles.
Now, the most challengin extractg part: waiting! Cover the springform pan tightly with plastic wrap or aluminum foil. Place the cheesecake in the refrigerator and let it chill for at least 6 hours, but ideally overnight. This extended chilling time is absolutely essential for the cheesecake to firm up completely and develop its signature creamy texture. Trying to slice it too early will result in a soft, unset cheesecake, so patience truly is a virtue here. The longer it chills, the better it will slice and the more intense the flavors will become.
Phase 4: The Glorious Finishing Touches
Once your cheesecake has had ample time to chill and set, it’s time to add those irresistible finishing touches that elevate it from delicious to truly extraordinary. Carefully remove the sides of the springform pan. If you’re having trouble releasing the sides, you can gently run a thin, sharp knife around the edge before attempting to open the clasp.
Now for the fun part: decorating! Gently warm the 100g of Nutella for drizzling. You can do this by placing the Nutella in a microwave-safe bowl and microwaving it for 10-15 second intervals, stirring in between, until it’s smooth and pourable. Be careful not to overheat it; you just want it to be a nice, drizzly consistency. Drizzle the warmed Nutella generously over the top of the cheesecake in a decorative pattern. Don’t be afraid to get creative with your drizzle!
Next, sprinkle the 5 crushed Oreos (just the cookie part, no filling) over the drizzled Nutella. This adds another layer of crunchy texture and a visual appeal. Finally, artfully arrange the 6 whole Oreos around the edge of the cheesecake or in a pattern on top. These are your crowning jewels, making your no-bake creation look as impressive as it tastes.
Slice your No Bake Oreo Nutella Cheesecake into generous portions using a sharp knife that has been dipped in hot water and dried. This trick helps achieve clean, neat slices. Serve immediately and prepare for a chorus of “wows”! This cheesecake is a celebration of simple ingredients coming together to create something truly magical. Enjoy every single bite of this no-bake indulgence!
Conclusion:
And there you have it! A truly magnificent No Bake Oreo Nutella Cheesecake that’s guaranteed to impress, without the fuss of baking. This recipe is a winner because it strikes the perfect balance between rich, decadent flavors and effortless preparation. The creamy, smooth cheesecake filling, infused with the irresistible combination of Oreo cookies and hazelnut-chocolatey Nutella, sits atop a crunchy Oreo crust. It’s the ultimate treat for any occasion, or frankly, just because you deserve it! I love serving slices of this cheesecake chilled, perhaps with an extra drizzle of Nutella or a few more crushed Oreos for added texture and visual appeal. Don’t hesitate to get creative with variations! You could swirl in some whipped cream, add chocolate chips to the filling, or even experiment with different cookie bases. I truly encourage you to give this No Bake Oreo Nutella Cheesecake a try. It’s so satisfyingly simple, and the results are absolutely spectacular!
Frequently Asked Questions:
Can I make this No Bake Oreo Nutella Cheesecake ahead of time?
Absolutely! In fact, it’s best to make it at least 4-6 hours in advance, or even the day before. This allows the cheesecake to set properly, ensuring a firm yet creamy texture.
How long will the cheesecake last in the refrigerator?
Properly stored in an airtight container in the refrigerator, your No Bake Oreo Nutella Cheesecake should stay delicious for up to 3-4 days. However, I doubt it will last that long!
What if I don’t have cream cheese? Can I substitute it?
While cream cheese is essential for the classic cheesecake texture, you could experiment with a combination of mascarpone cheese and heavy cream, or even a dairy-free cream cheese alternative. However, the texture and flavor profile might vary.
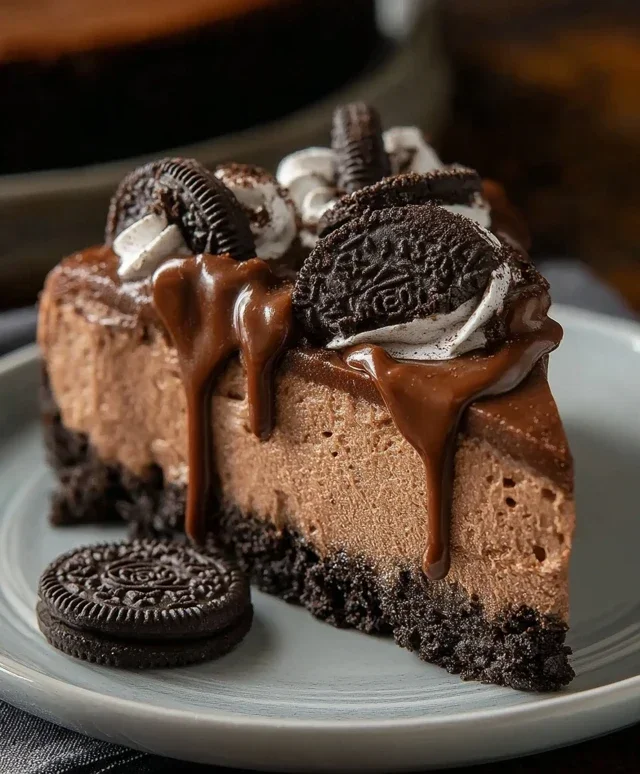
No Bake Oreo Nutella Cheesecake
A decadent no-bake cheesecake featuring a crushed Oreo crust, a creamy Nutella and cream cheese filling, and a Nutella drizzle. Perfect for any occasion.
Ingredients
-
200g crushed Oreos
-
50g melted butter
-
500g cream cheese, softened
-
200g Nutella
-
200g heavy whipping cream (35%)
-
50g sugar
-
100g chopped Oreos
-
100g Nutella
-
100g Nutella, warmed for drizzling
-
5 crushed Oreos (no filling)
-
6 whole Oreos for garnish
Instructions
-
Step 1
Combine crushed Oreos and melted butter. Press mixture into the bottom of a springform pan to form the crust. -
Step 2
In a large bowl, beat cream cheese until smooth. Gradually beat in 200g Nutella and sugar until well combined. -
Step 3
In a separate bowl, whip heavy cream until stiff peaks form. Gently fold whipped cream into the cream cheese mixture. -
Step 4
Fold in the chopped Oreos and 100g Nutella into the cheesecake filling. -
Step 5
Pour the filling over the prepared crust and spread evenly. Sprinkle the 5 crushed Oreos (no filling) over the top. -
Step 6
Chill the cheesecake in the refrigerator for at least 4 hours, or until firm. Drizzle with warmed Nutella and garnish with whole Oreos before serving.
Important Information
Nutrition Facts (Per Serving)
It is important to consider this information as approximate and not to use it as definitive health advice.
Allergy Information
Please check ingredients for potential allergens and consult a health professional if in doubt.