Garlic Butter Keto Bread – Easy Low Carb Recipe
Garlic Butter Keto Bread is about to become your new obsession! If you’ve been missing that warm, comforting aroma and that satisfying chew that only freshly baked bread can deliver, then get ready to rejoice. This isn’t just any low-carb bread; this is a revelation for anyone following a ketogenic lifestyle, offering all the decadent flavor you crave without derailing your diet. Imagin extracte sinking your teeth into a slice, the savory notes of roasted garlic dancing with the rich, creamy butter, all on a perfectly baked, tender crum extractb. It’s the kind of bread that makes you feel like you’re indulgin extractg, not restricting. What makes our Garlic Butter Keto Bread truly special is its incredible simplicity and the mouthwatering flavor payoff. It’s the ideal accompaniment to your favorite keto meals, a delightful base for avocado toast, or simply enjoyed on its own as a guilt-free treat.
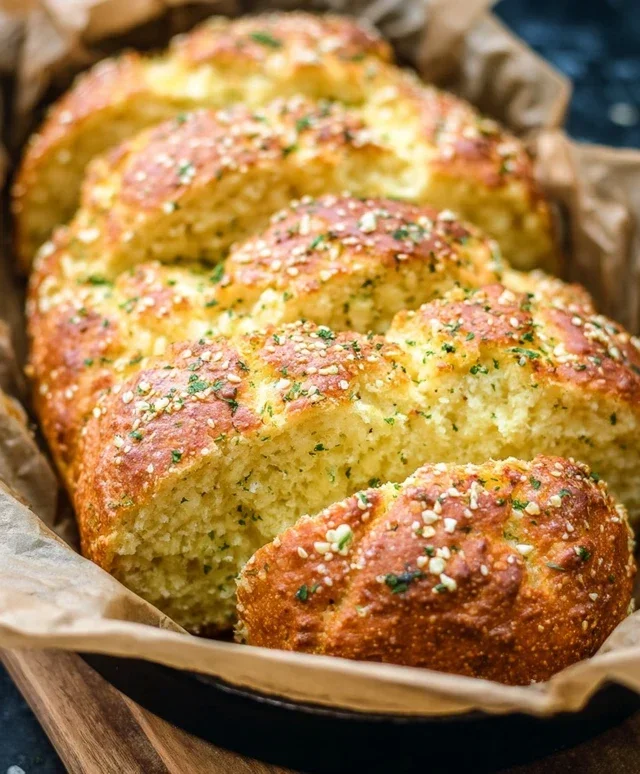
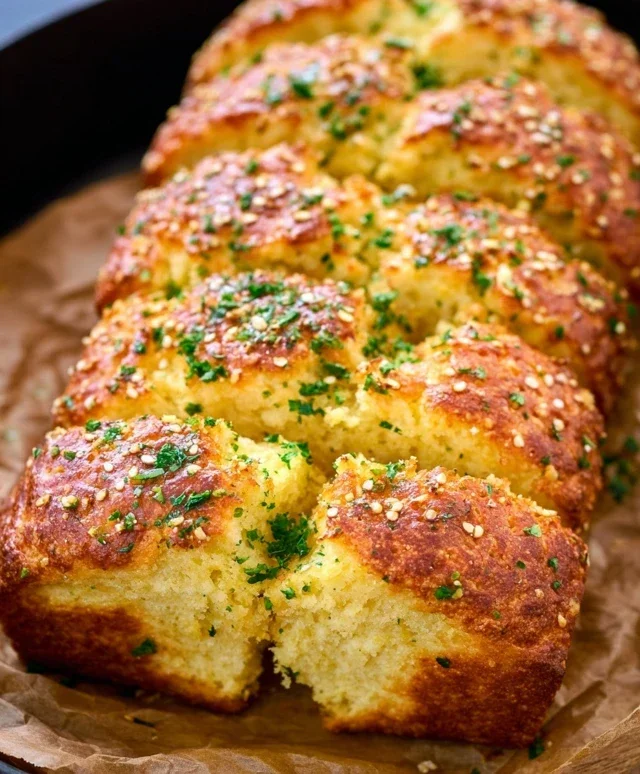
Garlic Butter Keto Bread
Craving that warm, comforting slice of bread without derailing your keto journey? You’re in the right place! This Garlic Butter Keto Bread is my go-to when that bread hankering strikes. It’s surprisingly simple to make, wonderfully flavorful, and perfectly fits into a low-carb lifestyle. Forget those chalky, unappetizing keto breads you might have tried in the past; this recipe delivers on texture and taste, making it ideal for sandwiches, dipping in soup, or just enjoying on its own slathered with more butter.
This recipe relies on common keto-friendly flours that create a light, airy crum extractb, unlike some denser alternatives. The garlic and butter are the stars, infusing every bite with irresistible savory goodness. Get ready to impress yourself (and anyone lucky enough to share it with you!).
Ingredients:
Preparation and Mixing
The first step to achieving a fantastic loaf is to get all your ingredients prepped and ready. This ensures a smooth and efficient baking process. Preheat your oven to 350°F (175°C) and grease and line a standard loaf pan with parchment paper, leaving some overhang on the sides to help you lift the bread out easily once it’s baked. Having the parchment paper extend beyond the edges of the pan is a lifesaver when trying to remove a hot loaf.
In a large mixing bowl, whisk together your dry ingredients: the blanched almond flour, coconut flour, baking powder, and salt. It’s important to thoroughly combine these to ensure the leavening agent (baking powder) is evenly distributed, which will lead to a consistent rise. If you find lumps in your flours, you can sift them together for an even finer texture, though it’s not strictly necessary for this recipe.
In a separate medium bowl, whisk together the wet ingredients. This includes the four large eggs, which should be at room temperature for better emulsification and volume. Add the melted and slightly cooled unsalted butter, followed by the unsweetened almond milk (or heavy cream if you’re going for an extra decadent loaf). Finally, stir in the apple cider vinegar. The vinegar reacts with the baking powder to help the bread rise and also contributes to a softer crum extractb. Give this mixture a good whisk until it’s smooth and well combined.
Now comes the crucial step of combining the wet and dry ingredients. Pour the wet mixture into the bowl with the dry ingredients. Add your minced garlic to this mixture. This is where the magic begin extracts to happen, transforming simple ingredients into a fragrant dough. Use a spatula or wooden spoon to gently mix everything together until just combined. Be careful not to overmix at this stage; overmixing can lead to a tougher texture. You’re looking for a thick, slightly sticky batter.
Baking Your Delicious Loaf
Once your batter is ready, it’s time to transfer it to your prepared loaf pan. Spoon the batter into the greased and lined loaf pan, spreading it evenly with your spatula. You can also gently tap the pan on the counter a few times to help settle the batter and release any large air bubbles.
Now, into the preheated oven it goes! Bake for approximately 45-55 minutes. The exact baking time can vary depending on your oven, so it’s essential to keep an eye on it. You’ll know the bread is done when it’s golden brown on top and a toothpick or skewer inserted into the center comes out clean. If the top starts to brown too quickly before the inside is cooked, you can loosely tent the loaf with aluminum foil for the remainder of the baking time.
As soon as the bread comes out of the oven, while it’s still hot, I like to brush the top with that extra tablespoon of melted butter. This adds another layer of richness and that lovely garlicky aroma fills your kitchen even more intensely. You can also sprinkle the chopped fresh parsley over the buttered top at this point for a pop of color and freshness, if you’re using it.
Cooling and Enjoying
This is often the hardest part – waiting for the bread to cool! Let the bread cool in the loaf pan for about 10-15 minutes before attempting to remove it. Then, carefully lift it out of the pan using the parchment paper overhangs and place it on a wire rack to cool completely. Allowing the bread to cool completely is crucial for its structure. If you cut into it while it’s still warm, it can be gummy and fall apart. Patience is a virtue, especially when it comes to delicious keto bread!
Once your Garlic Butter Keto Bread is completely cooled, slice it with a serrated knife for the cleanest cuts. This bread is incredibly versatile. It’s fantastic toasted and slathered with butter, used for avocado toast, or as a side for your favorite keto-friendly soups and stews. You can even make mini garlic breadsticks by cutting the cooled loaf into smaller portions and toasting them. Store any leftover bread in an airtight container at room temperature for a couple of days, or in the refrigerator for up to a week. For longer storage, you can slice it and freeze individual portions. Enjoy this flavorful, guilt-free bread!
Conclusion:
I hope you’re as excited about this Garlic Butter Keto Bread as I am! This recipe is a game-changer for anyone following a ketogenic lifestyle. It delivers that satisfying, comforting bread experience without the carb overload. The rich, savory flavor of garlic butter perfectly complements the slightly chewy, tender crum extractb, making it incredibly versatile. Whether you’re craving a simple slice of toast to start your day, need a delicious side for your keto-friendly meals, or want to elevate your sandwich game, this bread truly shines.
Serving suggestions are endless! Enjoy it warm with a smear of extra butter, use it to mop up delicious sauces, or transform it into mini garlic breadsticks for appetizers. For variations, feel free to experiment with different herbs like rosemary or chives mixed into the dough, or a sprinkle of shredded parmesan cheese on top before baking for an extra cheesy kick. Don’t be afraid to make this your own!
I truly encourage you to give this Garlic Butter Keto Bread a try. It’s surprisingly easy to make and the results are incredibly rewarding. You won’t believe how delicious and satisfying homemade keto bread can be. Happy baking!
Frequently Asked Questions:
Can I freeze this keto bread?
Yes, you absolutely can! Once completely cooled, slice the bread and freeze individual slices or the whole loaf in an airtight container or freezer bag. Reheat gently in a toaster or oven for best results.
What kind of flour is used in this recipe?
This recipe typically uses a combination of almond flour and coconut flour, which are staples in keto baking and contribute to the bread’s texture and flavor profile without the high carb content of traditional flours.
Garlic Butter Keto Bread
A simple and delicious keto-friendly bread recipe, perfect for low-carb diets.
Ingredients
-
1 1/2 cups almond flour
-
1/2 cup psyllium husk powder
-
2 teaspoons baking powder
-
1/2 teaspoon salt
-
3 large eggs
-
1/4 cup melted butter
-
1 tablespoon apple cider vinegar
-
1/4 cup water
-
2 tablespoons melted butter, for topping
-
1 clove garlic, minced, for topping
Instructions
-
Step 1
Preheat your oven to 350°F (175°C). Grease and line a small loaf pan with parchment paper. -
Step 2
In a large bowl, whisk together almond flour, psyllium husk powder, baking powder, and salt. -
Step 3
In a separate bowl, whisk together eggs, melted butter, and apple cider vinegar. -
Step 4
Pour the wet ingredients into the dry ingredients and mix until a dough forms. Gradually add the water until the dough comes together. -
Step 5
Shape the dough into a loaf and place it in the prepared loaf pan. -
Step 6
Bake for 35-45 minutes, or until golden brown and a toothpick inserted into the center comes out clean. -
Step 7
While the bread is baking, melt the 2 tablespoons of butter and stir in the minced garlic. -
Step 8
Once the bread is out of the oven, brush the garlic butter over the top. Let it cool completely before slicing.
Important Information
Nutrition Facts (Per Serving)
It is important to consider this information as approximate and not to use it as definitive health advice.
Allergy Information
Please check ingredients for potential allergens and consult a health professional if in doubt.