Easy Strawberry Cream Danish Recipe – Delicious Treat
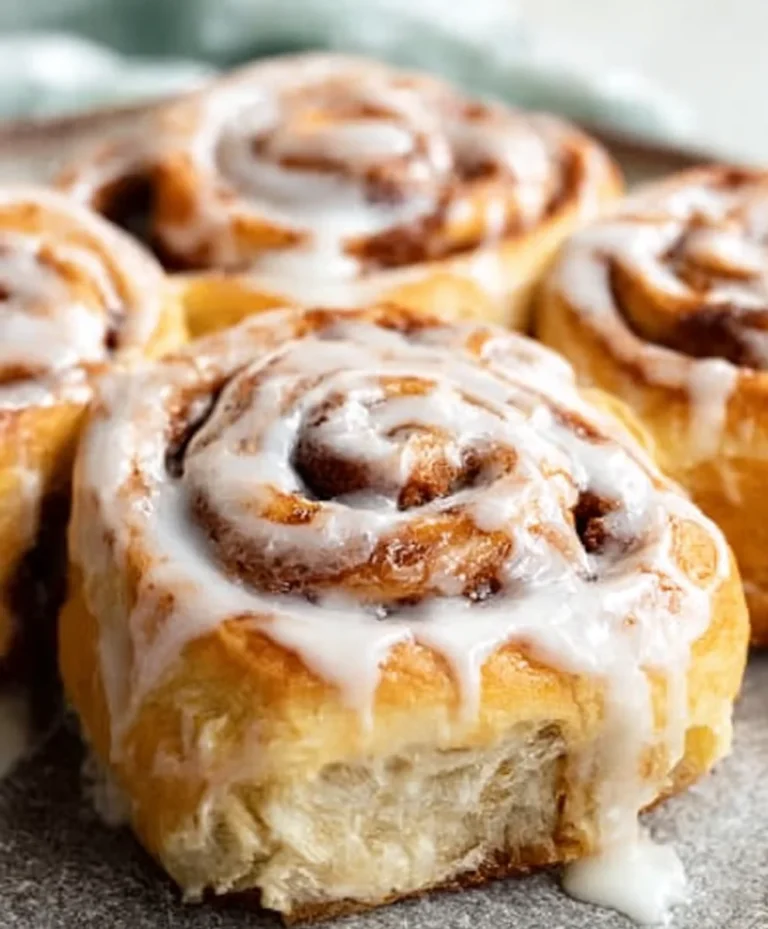
Strawberry Cream Danish is more than just a pastry; it’s a little slice of edible sunshine, a luxurious treat that instantly elevates any morning, afternoon tea, or dessert. What is it about this delightful creation that captures our hearts and taste buds? It’s that perfect symphony of textures and flavors: the impossibly flaky, buttery layers of Danish pastry giving way to a cloud-like, subtly sweet cream cheese filling, all crowned with plump, juicy, vibrant strawberries. It’s the kind of dish that feels both indulgent and incredibly satisfying, a testament to simple ingredients coming together in perfect harmony. Whether you’re craving a special breakfast or a show-stopping dessert, this Strawberry Cream Danish is guaranteed to impress. Get ready to experience pure bliss in every bite.

Ingredients:
- 1/4 cup warm water (about 105-115°F or 40-46°C)
- 2 1/4 teaspoons active dry yeast (one standard packet)
- 1/2 cup milk, at room temperature
- 1 large egg, at room temperature
- 1/4 cup granulated sugar
- 1 teaspoon salt
- 2 1/2 cups all-purpose flour, plus more for dusting your work surface and rolling
- 1 cup (two standard sticks) unsalted butter, very cold and cut into small cubes
- 8 ounces cream cheese, softened to room temperature
- 1/4 cup granulated sugar
- 1/2 teaspoon vanilla extract
- Fresh strawberries, washed, hulled, and thinly sliced for topping
- 1 cup powdered sugar
- 2 tablespoons milk or water, for the glaze
- 1/2 teaspoon vanilla extract, for the glaze
Preparing the Dough
Activating the Yeast
In a small bowl, combine the 1/4 cup warm water and the active dry yeast. Give it a gentle stir. Let it sit undisturbed for about 5-10 minutes. You’re looking for the mixture to become foamy and bubbly, which indicates that the yeast is alive and active. If it doesn’t foam, your yeast might be old, and you’ll need to start with a fresh packet.
Mixing the Wet Ingredients
In a large mixing bowl, whisk together the 1/2 cup room temperature milk, the room temperature large egg, and the 1/4 cup granulated sugar. Once the yeast mixture is foamy, add it to the wet ingredients in the large bowl. Stir everything together until well combined.
Adding Dry Ingredients and Forming the Dough
Next, add the 1 teaspoon of salt and the 2 1/2 cups of all-purpose flour to the wet ingredients. Mix everything with a wooden spoon or a spatula until a shaggy dough forms. Don’t overmix at this stage; you just want to bring it together. Turn the dough out onto a lightly floured surface. Knead the dough gently for about 5-7 minutes, or until it becomes smooth and elastic. It will still be a bit sticky, and that’s perfectly fine. Place the dough into a lightly greased bowl, turning it to coat all sides. Cover the bowl with plastic wrap or a clean kitchen towel and let it rise in a warm place for about 1 to 1.5 hours, or until it has doubled in size.
Incorporating the Butter (Laminating the Dough)
Creating the Butter Block
While the dough is rising, prepare your butter. Take the 1 cup of very cold unsalted butter and place it between two sheets of parchment paper. Using a rolling pin, pound and roll the butter into a rectangle approximately 6×8 inches. You want it to be uniformly shaped and relatively thin. Once you have your butter rectangle, place it in the refrigerator to keep it cold while you prepare the dough.
Enclosing the Butter
Once the dough has doubled in size, punch it down to release the air. Turn it out onto a lightly floured surface. Roll the dough into a rectangle that is roughly twice the size of your butter rectangle, so about 12×8 inches. Place the chilled butter rectangle in the center of the dough, leaving a border of about 2 inches on the top and bottom edges. Fold the unbuttered portion of the dough over the butter, like you’re folding a letter. Then, fold the other edge of the dough over the first fold, completely enclosing the butter within the dough. You should have a seam on the top and bottom. Pinch the edges firmly to seal the butter inside.
First Fold and Chill
Lightly flour your work surface and the top of the dough. Gently roll the dough into a long rectangle, approximately 18×8 inches. Try to roll it evenly to maintain the butter layers. Fold the dough into thirds, like a business letter: bring one-third of the dough over the middle third, then fold the remaining third over the top. This is your first “turn.” Wrap the dough tightly in plastic wrap and refrigerate for at least 30 minutes to allow the butter to firm up again.
Forming and Baking the Danish
Second and Third Folds
After the dough has chilled for at least 30 minutes, place it back on your lightly floured surface with the folded edge to your left (like a book). Roll it out again into an 18×8 inch rectangle. Repeat the folding process: fold into thirds, wrapping tightly, and chilling for another 30 minutes. For optimal flakiness, perform a third fold in the same manner, chilling the dough for at least another hour (or even overnight) before shaping. This extended chilling time is crucial for developing those beautiful, distinct layers.
Shaping the Danish
When you’re ready to bake, unwrap the chilled dough and roll it into a large rectangle, about 12×16 inches and about 1/4 inch thick. Trim the edges to make them straight. Cut the dough into 4-inch squares. For each Danish, take a square and cut a diagonal slit from each corner, stopping about an inch from the center. This will create four flaps. In the center of each square, spoon about 2 tablespoons of the cream cheese filling. To form the Danish, take alternating flaps and fold them towards the center, overlapping them slightly to create the characteristic shape. Gently press the folded flaps down to secure them. Place the formed Danish on a baking sheet lined with parchment paper, leaving some space between them.
Preparing the Cream Cheese Filling
In a medium bowl, beat together the softened 8 ounces of cream cheese, the 1/4 cup granulated sugar, and the 1/2 teaspoon vanilla extract until smooth and creamy. Ensure there are no lumps of cream cheese. This filling will add a wonderful richness to your Strawberry Cream Danish.
Baking and Glazing
Preheat your oven to 400°F (200°C). Brush the tops of the formed Danish lightly with a bit of milk or a beaten egg (optional, for extra sheen). Bake for 15-20 minutes, or until the Danish are puffed up and golden brown. While the Danish are baking, prepare the glaze. In a small bowl, whisk together the 1 cup powdered sugar, 2 tablespoons milk or water, and 1/2 teaspoon vanilla extract until smooth and pourable. If it’s too thick, add a tiny bit more liquid; if too thin, add more powdered sugar. Once the Danish have cooled slightly on a wire rack, drizzle the glaze generously over them. Top with the fresh strawberry slices while the glaze is still a little wet so they adhere nicely. Allow the glaze to set before serving. Enjoy your beautiful, homemade Strawberry Cream Danish!

Conclusion:
Congratulations on mastering the art of the Strawberry Cream Danish! We hope this recipe has brought a little bit of bakery magic into your kitchen. This delightful treat, with its flaky pastry, sweet strawberry filling, and luscious cream cheese frosting, is sure to impress. Remember, the beauty of the Strawberry Cream Danish lies in its versatility, making it perfect for any occasion, from a special brunch to an afternoon pick-me-up.
For serving, these pastries are divine on their own, but they also pair wonderfully with a cup of coffee or a refreshing glass of iced tea. Consider dusting them with a little powdered sugar for an extra touch of elegance. Don’t be afraid to experiment with variations! You could add a hint of lemon zest to the cream cheese filling for a brighter flavor, or swap out the strawberries for other seasonal berries like blueberries or raspberries. Perhaps even a sprinkle of slivered almonds on top would add a delightful crunch.
We encourage you to get creative and make this Strawberry Cream Danish your own. The joy of baking is in the process and the delicious results, so have fun with it!
Frequently Asked Questions:
Q: Can I make the puff pastry from scratch for my Strawberry Cream Danish?
A: While this recipe assumes the use of store-bought puff pastry for convenience, you absolutely can make your own puff pastry from scratch. It will require more time and effort, but the result will be an even more authentic and delicious Strawberry Cream Danish. Ensure your homemade puff pastry is well-chilled and properly layered before proceeding with the recipe steps.
Q: How long will leftover Strawberry Cream Danish stay fresh?
A: Leftover Strawberry Cream Danish is best enjoyed within 1-2 days. Store them in an airtight container at room temperature. If you have added a very soft cream cheese filling that might spoil quickly, refrigerating them is a safer option, though this might slightly soften the pastry. Reheat gently in a low oven if you prefer a crispier texture.
Easy Strawberry Cream Danish Recipe – Delicious Treat
A simple and delicious recipe for homemade strawberry cream danishes, perfect for a special breakfast or dessert.
Ingredients
-
1/4 cup warm water (about 105-115°F or 40-46°C)
-
2 1/4 teaspoons active dry yeast (one standard packet)
-
1/2 cup milk, at room temperature
-
1 large egg, at room temperature
-
1/4 cup granulated sugar
-
1 teaspoon salt
-
2 1/2 cups all-purpose flour, plus more for dusting
-
1 cup (two standard sticks) unsalted butter, very cold and cut into small cubes
-
8 ounces cream cheese, softened to room temperature
-
1/4 cup granulated sugar
-
1/2 teaspoon vanilla extract
-
Fresh strawberries, washed, hulled, and thinly sliced for topping
-
1 cup powdered sugar
-
2 tablespoons milk or water, for the glaze
-
1/2 teaspoon vanilla extract, for the glaze
Instructions
-
Step 1
Activate the yeast: In a small bowl, combine warm water and active dry yeast. Let sit for 5-10 minutes until foamy. -
Step 2
Mix wet ingredients: In a large bowl, whisk together milk, egg, and 1/4 cup sugar. Add foamy yeast mixture and stir. -
Step 3
Form dough: Add salt and flour to the wet ingredients. Mix until a shaggy dough forms. Knead gently on a floured surface for 5-7 minutes until smooth and elastic. Place in a greased bowl, cover, and let rise in a warm place for 1-1.5 hours, or until doubled. -
Step 4
Laminate the dough: Prepare a butter block by rolling cold butter between parchment paper into a 6×8 inch rectangle. Chill. Punch down risen dough and roll into a 12×8 inch rectangle. Place butter block in the center and fold the dough over it like a letter, sealing the edges. Roll into an 18×8 inch rectangle, fold into thirds, wrap, and chill for 30 minutes. Repeat this fold and chill process two more times, chilling for at least an hour after the last fold. -
Step 5
Prepare cream cheese filling: Beat softened cream cheese, 1/4 cup sugar, and 1/2 teaspoon vanilla extract until smooth. -
Step 6
Shape the danishes: Preheat oven to 400°F (200°C). Roll chilled dough into a 12×16 inch rectangle. Cut into 4-inch squares. Cut diagonal slits from each corner towards the center, stopping about an inch from the middle. Spoon 2 tablespoons of cream cheese filling into the center of each square. Fold alternating flaps towards the center, overlapping slightly, and press to secure. -
Step 7
Bake and glaze: Place formed danishes on a parchment-lined baking sheet. Brush tops with milk or beaten egg (optional). Bake for 15-20 minutes until puffed and golden brown. While baking, whisk together powdered sugar, 2 tablespoons milk or water, and 1/2 teaspoon vanilla extract for the glaze. Drizzle glaze over slightly cooled danishes and top with fresh strawberry slices before the glaze sets.
Important Information
Nutrition Facts (Per Serving)
It is important to consider this information as approximate and not to use it as definitive health advice.
Allergy Information
Please check ingredients for potential allergens and consult a health professional if in doubt.