Tender Beef Stir-Fry Recipe-Quick & Flavorful Dinner
F0bfc20e2ff38a7a5700cabb4293a33d.jpg
Discover the Ultimate Comfort Food: F0bfc20e2ff38a7a5700cabb4293a33d.jpg
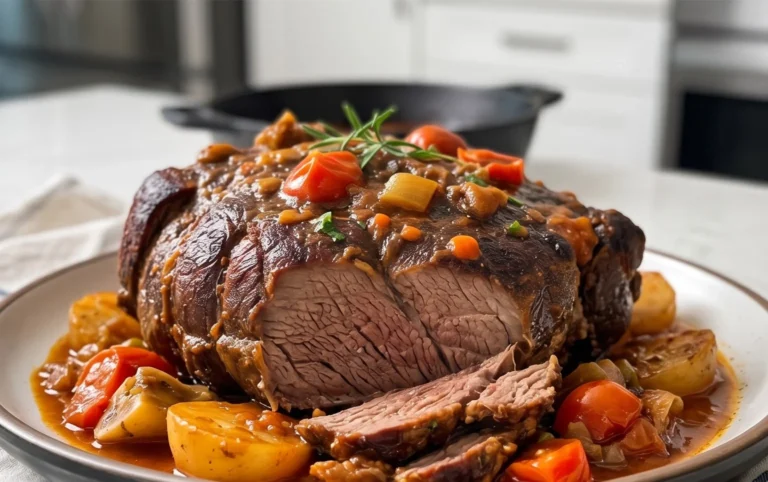
There’s something truly magical about a dish that can instantly transport you to a place of pure comfort and happiness. For many, that feeling is evoked by the rich, savory, and utterly satisfying experience of F0bfc20e2ff38a7a5700cabb4293a33d.jpg. It’s a timeless classic for a reason – a culinary hug that warms you from the inside out, perfect for a cozy night in, a celebratory family dinner, or simply when you need a little something special to brighten your day. People absolutely adore this dish for its deeply layered flavors, its wonderfully tender textures, and the nostalgic memories it often brings with it. It’s more than just a meal; it’s an experience that brings people together.
What Makes This F0bfc20e2ff38a7a5700cabb4293a33d.jpg So Special?
What sets this particular rendition of F0bfc20e2ff38a7a5700cabb4293a33d.jpg apart is the careful balance of simple, high-quality ingredients that, when combined, create an extraordinary symphony of taste and aroma. We’re talking about the slow-simmered perfection, the melt-in-your-mouth tenderness, and that irresistible golden-brown crust that promises pure indulgence. Get ready to impress yourself and your loved ones with a recipe that’s as rewarding to make as it is to devour. Let’s get cooking!

Ingredients:
- 1 pound boneless, skinless chicken thighs
- 2 tablespoons olive oil
- 1 large yellow onion, thinly sliced
- 3 cloves garlic, minced
- 1 teaspoon ground cumin
- 1 teaspoon smoked paprika
- ½ teaspoon turmeric powder
- ¼ teaspoon cayenne pepper (optional, for a little heat)
- 1 (14.5 ounce) can diced tomatoes, undrained
- 1 cup chicken broth
- ½ cup Kalamata olives, pitted and halved
- ¼ cup chopped fresh parsley, plus more for garnish
- Salt and freshly ground black pepper to taste
Preparation and Searing
Step 1: Prepare the Chicken and Aromatics
The first step to creating this flavorful chicken dish is to get all your ingredients prepped and ready. Begin extract by patting your boneless, skinless chicken thighs dry with paper towels. This is a crucial step for achieving a beautiful sear. Season the chicken generously on both sides with salt and freshly ground black pepper. Set these aside. Next, thinly slice your large yellow onion. The thinner the slices, the more evenly they will cook and caramelize. Mince your garlic cloves; aim for a fine mince so the garlic distributes its flavor well throughout the dish. Measure out your spices: ground cumin, smoked paprika, turmeric powder, and cayenne pepper if you’re using it for a touch of heat. Having all your ingredients prepped and within easy reach before you start cooking, a technique often referred to as “mise en place,” will make the entire cooking process much smoother and more enjoyable.
Step 2: Sear the Chicken for Maximum Flavor
Now it’s time to build the foundation of flavor for our dish. Heat the olive oil in a large, heavy-bottomed skillet or Dutch oven over medium-high heat. Once the oil is shimmering andgin extractst beginning to smoke slightly, carefully add the seasoned chicken thighs to the hot skillet. Avoid overcrowding the pan; cook the chicken in batches if necessary. You want to give the chicken plenty of space so it can sear properly rather than steam. Sear the chicken for about 3-4 minutes per side, until it’s deeply golden brown and has developed a nice crust. This searing process is where much of the delicious flavor comes from, as it creates those delightful browned bits (fond) on the bottom of the pan that we’ll use later. Once seared, remove the chicken from the skillet and set it aside on a plate. Don’t worry if it’s not cooked through at this point; it will finish cooking in the sauce.
Building the Flavorful Sauce
Step 3: Sauté the Onions and Garlic
Reduce the heat to medium. In the same skillet, with the rendered chicken fat and remaining olive oil, add your thinly sliced yellow onion. Cook the onions, stirring occasionally, for about 8-10 minutes, until they have softened and begun to turn translucent and lightly golden. This slow sautéing process helps to bring out the natural sweetness of the onions. Add the minced garlic to the skillet and cook for another minute, stirring constantly, until fragrant. Be careful not to burn the garlic, as it can become bitter. If the pan seems a little dry, you can add another drizzle of olive oil.
Step 4: Bloom the Spices and Deglaze the Pan
This step is where we really unlock the aromatic potential of our spices. Add the ground cumin, smoked paprika, turmeric powder, and cayenne pepper (if using) to the skillet with the onions and garlic. Stir and cook for about 30-60 seconds, until the spices are fragrant. This process, known as “blooming” the spices, helps to release their essential oils and intensifies their flavor. Now, pour in the chicken broth. Use a wooden spoon or spatula to scrape up all the browned bits (fond) from the bottom of the skillet. This is where so much of the delicious flavor resides, and deglazing the pan with the broth ensures that all that goodness is incorporated into our sauce.
Simmering and Finishing
Step 5: Simmer the Chicken and Finish the Dish
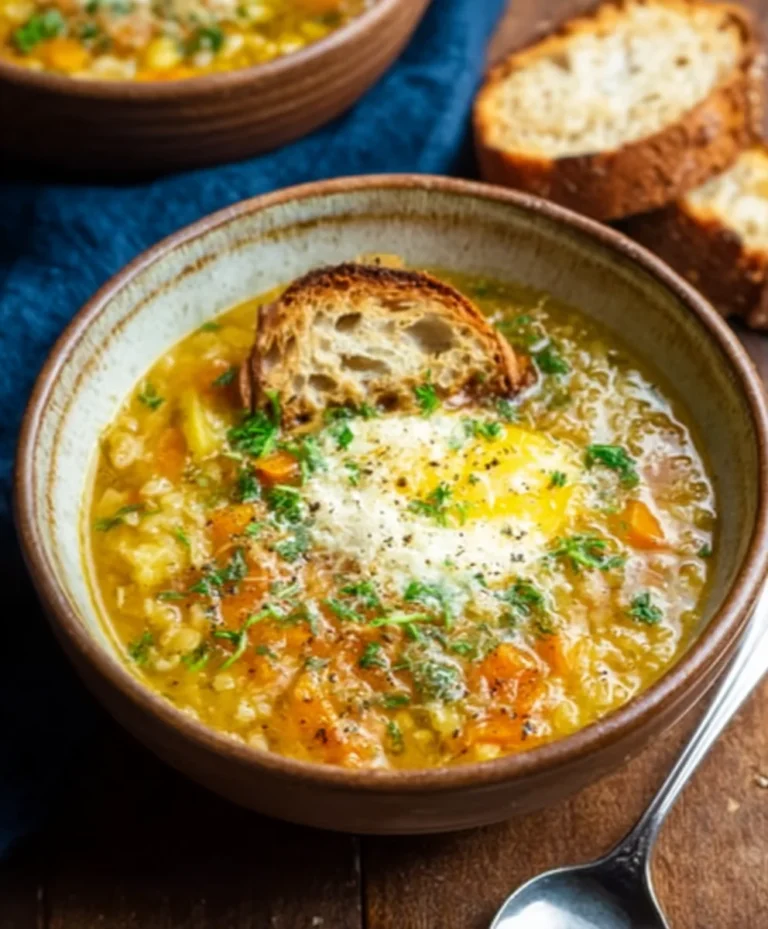
Return the seared chicken thighs to the skillet, nestling them into the onion and spice mixture. Add the can of diced tomatoes (undrained) to the skillet. Stir everything together to combine. Bring the mixture to a gentle simmer. Once simmering, reduce the heat to low, cover the skillet, and let it cook for about 20-25 minutes, or until the chicken is cooked through and tender. The sauce will thicken slightly as it simmers. During the last 5 minutes of cooking, stir in the halved Kalamata olives and the chopped fresh parsley. The olives will add a briny, salty counterpoint to the richness of the chicken, and the parsley will bring a burst of fresh herbaceousness. Taste the sauce and adjust seasoning with salt and freshly ground black pepper as needed. For an extra touch of freshness, you can garnish with a little more chopped parsley before serving. This dish is wonderfully versatile and pairs beautifully with rice, couscous, or crusty bread to soak up all the delicious sauce.

Conclusion:
And there you have it – your very own batch of F0bfc20e2ff38a7a5700cabb4293a33d.jpg! We hope you’ve enjoyed this journey of creating this delightful dish. This recipe is a fantastic starting point, offering a wonderful balance of flavors and textures that are sure to impress. Whether you’re a seasoned chef or just begin extractning your culinary adventures, this F0bfc20e2ff38a7a5700cabb4293a33d.jpg is achievable and incredibly rewarding.
For serving suggestions, consider pairing your F0bfc20e2ff38a7a5700cabb4293a33d.jpg with a crisp green salad for a refreshing contrast, or serve it alongside some fluffy rice or crusty bread to soak up all those delicious sauces. Don’t be afraid to get creative with variations! You could add a pinch of chili flakes for a touch of heat, incorporate different fresh herbs like cilantro or parsley for an extra burst of flavor, or even swap out the protein for your favorite kind. The possibilities are endless, and the joy of cooking lies in making it your own.
We truly encourage you to try this F0bfc20e2ff38a7a5700cabb4293a33d.jpg recipe and share it with your loved ones. Happy cooking!
Frequently Asked Questions:
Can I make F0bfc20e2ff38a7a5700cabb4293a33d.jpg ahead of time?
Yes, absolutely! Many components of F0bfc20e2ff38a7a5700cabb4293a33d.jpg can be prepared in advance. For example, you can chop your vegetables and prepare any marinades or sauces a day before. The final cooking steps are best done just before serving to ensure optimal texture and flavor, but having the prep work done will make assembly much quicker.
What if I don’t have a specific ingredient for F0bfc20e2ff38a7a5700cabb4293a33d.jpg?
No problem at all! Many recipes, including this F0bfc20e2ff38a7a5700cabb4293a33d.jpg, are forgiving. Feel free to substitute ingredients where possible. For instance, if a recipe calls for one type of herb, another similar herb can often be used. Similarly, if a certain vegetable isn’t available, look for a comparable one in texture and flavor. The core of this F0bfc20e2ff38a7a5700cabb4293a33d.jpg recipe will still shine through.
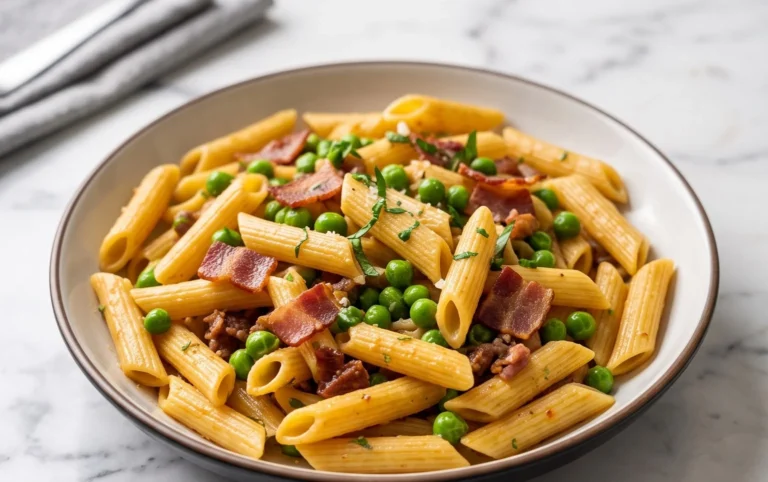
Tender Beef Stir-Fry Recipe-Quick & Flavorful Dinner
A quick and flavorful beef stir-fry recipe that’s perfect for a weeknight dinner.
Ingredients
-
1 pound boneless beef sirloin, thinly sliced
-
2 tablespoons vegetable oil
-
1 large yellow onion, thinly sliced
-
3 cloves garlic, minced
-
1 teaspoon ground cumin
-
1 teaspoon smoked paprika
-
½ teaspoon turmeric powder
-
¼ teaspoon cayenne pepper (optional)
-
1 (14.5 ounce) can diced tomatoes, undrained
-
1 cup beef broth
-
½ cup Kalamata olives, pitted and halved
-
¼ cup chopped fresh parsley, plus more for garnish
-
Salt and freshly ground black pepper to taste
Instructions
-
Step 1
Pat the beef sirloin dry with paper towels and season generously with salt and pepper. Thinly slice the yellow onion and mince the garlic. Measure out the spices: cumin, smoked paprika, turmeric, and cayenne pepper if using. -
Step 2
Heat vegetable oil in a large skillet over medium-high heat until shimmering. Add the seasoned beef in batches, ensuring not to overcrowd the pan, and sear for 2-3 minutes per side until browned. Remove beef and set aside. -
Step 3
Reduce heat to medium. Add the sliced onion to the same skillet and cook, stirring occasionally, for 8-10 minutes until softened and lightly golden. Add the minced garlic and cook for another minute until fragrant. -
Step 4
Add the cumin, smoked paprika, turmeric, and cayenne pepper (if using) to the skillet. Stir and cook for 30-60 seconds until fragrant. Pour in the beef broth and scrape up any browned bits from the bottom of the pan. -
Step 5
Return the seared beef to the skillet. Add the undrained diced tomatoes and stir to combine. Bring to a gentle simmer, then reduce heat to low, cover, and cook for 20-25 minutes, or until the beef is cooked through and tender. Stir in the Kalamata olives and chopped parsley during the last 5 minutes. Season with salt and pepper to taste.
Important Information
Nutrition Facts (Per Serving)
It is important to consider this information as approximate and not to use it as definitive health advice.
Allergy Information
Please check ingredients for potential allergens and consult a health professional if in doubt.