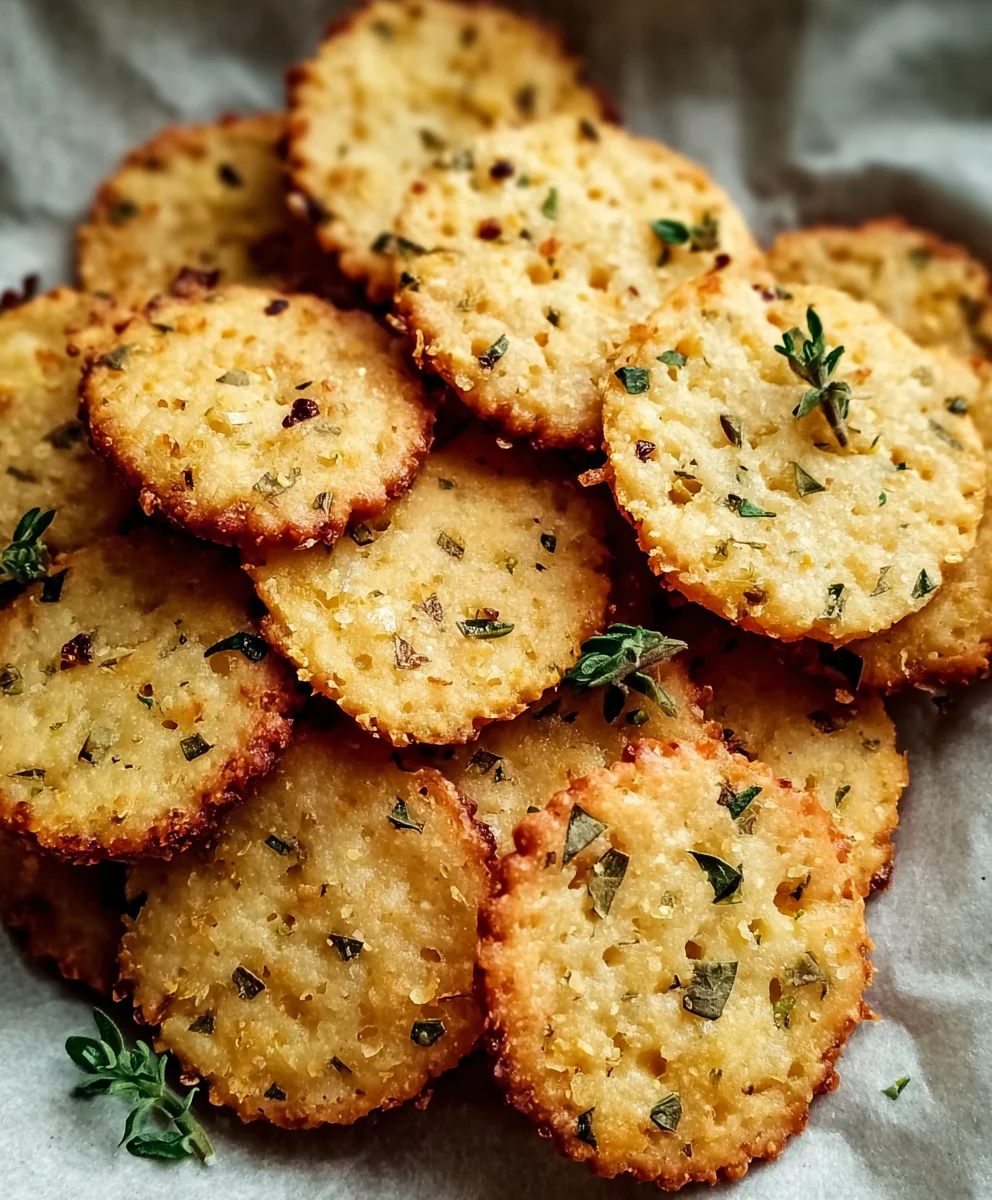
Garlic Herb Chickpea Flour Crackers-Easy Snack
Garlic and Herb Chickpea Flour Snack Crackerss are an absolute revelation for anyone seeking a delightful, wholesome, and incredibly satisfying bite. These aren’t just any crackers; they are a testament to how simple, nourishing ingredients can be transformed into something truly extraordinary. People adore these because they hit that perfect spot between a light, crispy snack and a flavorful morsel that keeps you coming back for more. What makes them especially special is their inherent versatility. Whether you’re looking for a gluten-free option, a vegan treat, or simply a healthier alternative to store-bought crackers, these homemade wonders deliver. The earthy notes of chickpea flour, combined with the pungent warmth of garlic and the aromatic freshness of herbs, create a symphony of flavors that dances on your palate. They are perfect for dipping, topping, or just enjoying on their own, making them a go-to for any occasion. Get ready to impress yourself and your guests with these irresistible Garlic and Herb Chickpea Flour Snack Crackerss.
Ingredients:
- 1 cup chickpea flour (besan), approximately 120g
- ½ cup water, approximately 120ml
- 2 tablespoons olive oil, plus extra for brushing
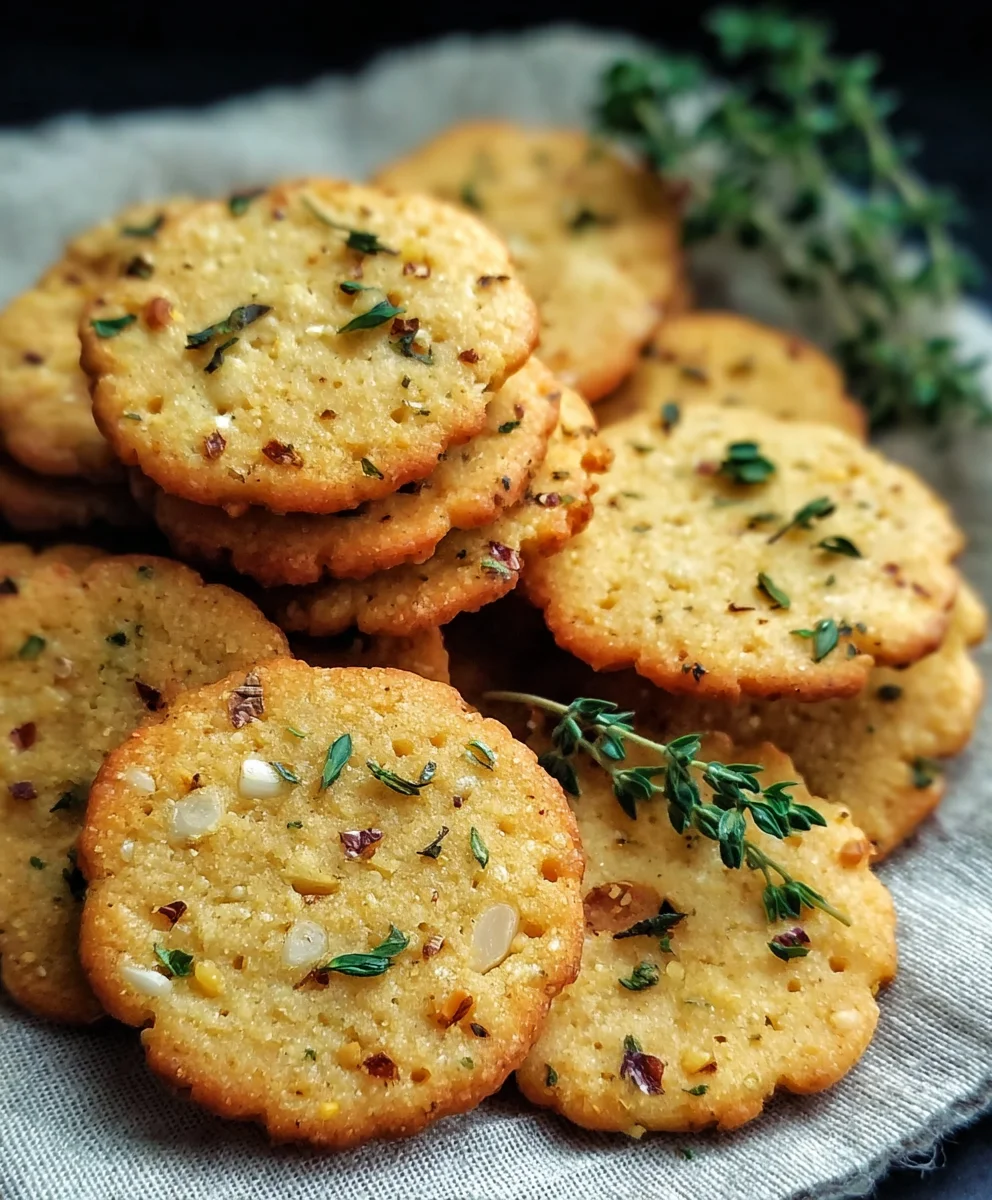
- 1 teaspoon dried mixed herbs (a blend like rosemary, thyme, and oregano works wonderfully)
- 1 teaspoon garlic powder
- ½ teaspoon salt
- ¼ teaspoon black pepper
- Sesame seeds, for topping
- Flaky sea salt, for finishing
- Additional dried herbs, for topping
Preparing the Dough for Your Garlic and Herb Chickpea Flour Snack Crackers
Step 1: Combine the Dry Ingredients
Begin extract by creating the foundation of our delicious Garlic and Herb Chickpea Flour Snack Crackers. In a medium-sized mixing bowl, I like to use one with a bit of depth to prevent spills, add your 1 cup of chickpea flour. To this, incorporate the 1 teaspoon of garlic powder, ½ teaspoon of salt, and ¼ teaspoon of black pepper. Give these dry ingredients a good whisk together. This initial step ensures that the seasonings are evenly distributed throughout the flour, which is crucial for consistent flavor in every single cracker. Don’t skip this; it’s the secret to a well-seasoned cracker!
Step 2: Incorporate the Wet Ingredients and Form the Dough
Now it’s time to bring our dough to life. Create a small well in the center of your dry ingredients. Pour in the 2 tablespoons of olive oil and the ½ cup of water. Using a fork or a spatula, start mixing the wet and dry ingredients from the center outwards. Continue mixing until a cohesive gin extractgh begins to form. It might seem a little sticky at first, but keep working it. Once a rough dough ball has formed, turn it out onto a clean, lightly floured surface (you can use a little extra chickpea flour for this). Knead the dough gently for about 2 to 3 minutes. You’re not aiming for a super elastic dough like bread; we just want to ensure everything is well incorporated and the dough is smooth and pliable. If it feels too wet, add a tiny pinch more chickpea flour; if too dry, a splash more water.
Shaping and Baking Your Crispy Crackers
Step 3: Roll and Shape the Dough for Optimal Crispiness
This is where we prepare our Garlic and Herb Chickpea Flour Snack Crackers for their transformation into crispy delights. Take your smooth dough ball and place it back onto your lightly floured surface. Now, get your rolling pin ready. Roll the dough out as thinly as you possibly can. The thinner you roll it, the crispier your crackers will be. Aim for a thickness of about 1/16th to 1/8th of an inch. Think of it like rolling out pastry for tarts; we want it delicate. You can roll it into one large, thin sheet, or divide the dough into two smaller portions to make rolling easier. As you roll, if the dough sticks, dust your rolling pin and the surface with a tiny bit more chickpea flour. Once you have your thin sheet, you can trim the edges to create a neat rectangle or square. This makes for uniform baking.
Step 4: Score, Top, and Prepare for the Oven
Before we bake, we need to score and prepare our crackers. This step is essential for easy breaking after baking and for adding that final flourish of flavor. Using a pizza cutter or a sharp knife, gently score the rolled-out dough into your desired cracker shapes. Squares, rectangles, or even diamonds work well. Don’t cut all the way through, just enough to create defined lines. Next, brush the entire surface of the dough lightly with a little extra olive oil. This will help them achieve a lovely golden-brown hue and enhance their crispiness. Now, sprinkle generously with sesame seeds and a pinch of additional dried herbs. Finally, finish with a light dusting of flaky sea salt. The flaky sea salt adds a delightful crunch and burst of flavor to each bite.
Step 5: Bake to Golden Perfection
Preheat your oven to 375°F (190°C). Carefully transfer your scored and topped dough onto a baking sheet lined with parchment paper. Slide the baking sheet into the preheated oven. Now, let’s bake! The baking time will vary depending on how thinly you rolled your dough, but generally, it will take between 15 to 20 minutes. Keep a close eye on them, especially towards the end. You’re looking for the edges to turn a beautiful golden brown and for the crackers to appear firm and dry. Once they’re perfectly baked, carefully remove the baking sheet from the oven. Allow the crackers to cool on the baking sheet for a few minutes before gently breaking them apart along your scored lines. For maximum crispness, transfer them to a wire rack to cool completely. They should be delightfully crisp and incredibly flavorful, ready to be enjoyed!
Conclusion:
There you have it – a simple yet incredibly satisfying recipe for Garlic and Herb Chickpea Flour Snack Crackers! These delightful crackers are a testament to how delicious and healthy homemade snacks can be. The combination of nutty chickpea flour with the aromatic punch of garlic and fragrant herbs creates a flavor profile that is both comforting and invigorating. They are perfect for dipping, topping, or enjoying on their own.
I encourage you to give these Garlic and Herb Chickpea Flour Snack Crackers a try. They are wonderfully versatile and can be customized to your liking. Feel free to experiment with different herb combinations, perhaps adding a pinch of chili flakes for a spicy kick or some toasted sesame seeds for extra texture. Serve them with your favorite hummus, a creamy avocado dip, or alongside a hearty soup. They also make a fantastic addition to a cheese board or a picnic basket.
Frequently Asked Questions:
Can I make these crackers ahead of time?
Absolutely! The Garlic and Herb Chickpea Flour Snack Crackers are perfect for making in advance. Store them in an airtight container at room temperature for up to a week. They may lose a little crispness over time, but they remain delicious.
What are some other herb combinations I can use?
The beauty of these crackers lies in their adaptability! Beyond parsley and rosemary, consider a mix of thyme and oregano for a Mediterranean flair, dill and chives for a fresh, oniony taste, or even a touch of dried basil for an Italian-inspired cracker.
Garlic Herb Chickpea Flour Crackers – Easy Snack
Crispy and flavorful homemade crackers made with chickpea flour, garlic, and herbs. A simple and satisfying snack.
Ingredients
-
1 cup chickpea flour (besan)
-
½ cup water
-
2 tablespoons olive oil, plus extra for brushing
-
1 teaspoon dried mixed herbs
-
1 teaspoon garlic powder
-
½ teaspoon salt
-
¼ teaspoon black pepper
-
Sesame seeds
-
Flaky sea salt
-
Additional dried herbs
Instructions
-
Step 1
In a medium-sized mixing bowl, whisk together 1 cup chickpea flour, 1 teaspoon garlic powder, ½ teaspoon salt, and ¼ teaspoon black pepper. Ensure seasonings are evenly distributed. -
Step 2
Create a well in the center of the dry ingredients. Pour in 2 tablespoons of olive oil and ½ cup of water. Mix with a fork or spatula until a cohesive dough forms. Turn out onto a lightly floured surface and knead gently for 2-3 minutes until smooth and pliable. Adjust with a tiny pinch more chickpea flour if too wet, or a splash more water if too dry. -
Step 3
Roll the dough out as thinly as possible on a lightly floured surface, aiming for about 1/16th to 1/8th of an inch thickness for optimal crispiness. Trim edges for uniform baking. -
Step 4
Using a pizza cutter or sharp knife, gently score the dough into desired cracker shapes, cutting only partway through. Brush the entire surface with extra olive oil. Sprinkle generously with sesame seeds and additional dried herbs. Finish with a light dusting of flaky sea salt. -
Step 5
Preheat oven to 375°F (190°C). Carefully transfer the dough to a parchment-lined baking sheet. Bake for 15-20 minutes, or until edges are golden brown and crackers appear firm and dry. Cool on the baking sheet for a few minutes, then break apart along scored lines. Transfer to a wire rack to cool completely for maximum crispness.
Important Information
Nutrition Facts (Per Serving)
It is important to consider this information as approximate and not to use it as definitive health advice.
Allergy Information
Please check ingredients for potential allergens and consult a health professional if in doubt.