Easy No-Knead Bread Recipe – Simple & Delicious
Quick And Easy No-Knead Bread is the culinary magic wand you’ve been waiting for. Imagin extracte: the comforting aroma of freshly baked bread filling your kitchen, a perfectly crusty exterior giving way to a soft, pillowy interior, all achieved with minimal effort and zero fuss. This isn’t some unattainable bakery feat; it’s a delicious reality you can create in your own home. People adore this recipe because it democratizes bread baking, proving that you don’t need hours of kneading, a proofing basket, or a fancy starter to achieve spectacular results. What truly sets this Quick And Easy No-Knead Bread apart is its almost unbelievable simplicity. It relies on time and the magic of fermentation rather than strenuous dough manipulation, making it perfect for busy weeknights or anyone intimidated by traditional bread-making techniques. Get ready to impress yourself and everyone you share it with!
Ingredients:
- 3 cups bread flour
- 1 packet (approximately 2 teaspoons) rapid rise yeast
- 1 ½ teaspoons salt
- 1 ½ cups warm water
Getting Started: The Simple Dough
This recipe for Quick And Easy No-Knead Bread is designed for maximum flavor with minimal effort, making it perfect for busy weeknights or a lazy weekend. The beauty of no-knead bread lies in its simplicity; the yeast and time do all the heavy lifting.
Mixing the Dough
In a large mixing bowl, combine the 3 cups of bread flour, 1 packet (about 2 teaspoons) of rapid rise yeast, and 1 ½ teaspoons of salt. Whisk these dry ingredients together thoroughly to ensure the yeast and salt are evenly distributed throughout the flour. This even distribution is crucial for consistent leavening and flavor development. Imagin extracte the flour as a canvas, the yeast as the paint, and the salt as the binder; we want everything perfectly blended before we add the wet ingredients.
Now, pour in the 1 ½ cups of warm water. The water should be warm to the touch, but not hot – think of it like a comfortable bath for the yeast. If the water is too hot, it can kill the yeast, and your bread won’t rise. If it’s too cold, the yeast will be sluggish. Aim for a temperature around 105-115°F (40-46°C).
Using a sturdy spoon or a spatula, mix everything together until just combined. You’re not aiming for a perfectly smooth dough at this stage. It will be shaggy, wet, and sticky, and that’s exactly what we want. Don’t be tempted to add more flour to make it easier to handle; resist that urge! This high hydration is what contributes to the amazing airy crum extractb that no-knead bread is famous for. It will look like a mess, but trust the process. Scrape down the sides of the bowl to ensure all the dry flour bits are incorporated into the wet mixture.
The Patient Rise: Developing Flavor
This is where the magic truly happens, and it requires very little from you. Cover the bowl tightly with plastic wrap or a damp kitchen towel. This prevents a tough skin from forming on the surface of the dough as it rises and also helps to trap moisture.
Place the covered bowl in a warm, draft-free spot in your kitchen. A slightly warm oven (turned off, of course!) or near a sunny window can work well. Allow the dough to rise for at least 12 to 18 hours. Yes, you read that right! This long, slow fermentation is key to developing that deep, complex flavor you’d typically find in artisan bread. During this time, the yeast will work diligently, creating air pockets and breaking down the starches in the flour, which enhances both texture and taste. You’ll notice the dough will roughly double in size, and it will become bubbly and alive.
Shaping and Preheating: Preparing for the Bake
After the long, satisfying rise, the dough will be significantly puffed and covered in small bubbles. Gently uncover the bowl. The dough will be very sticky and wet, so don’t be alarmed.
Lightly flour a clean work surface. Turn the dough out onto the floured surface. Resist the urge to knead it. Instead, use your floured hands to gently fold the dough over on itself a few times. Think of it as coaxing it into a rough ball. This process helps to create some tension in the dough’s surface without developing gluten through kneading. It should still be quite soft and pliable. You can also lightly shape it into a round or an oval, depending on the shape of your baking vessel.
Now it’s time to preheat your oven and your Dutch oven. Place a 4 to 6-quart Dutch oven (with its lid) into your oven. Preheat the oven to 450°F (230°C). Allowing the Dutch oven to preheat fully is absolutely critical for achieving that beautiful, crispy crust. The intense heat from the preheated pot will instantly start the baking process when the dough goes in, creating steam that helps the bread expand and develop its characteristic crust. This step usually takes about 30 minutes.
Baking to Perfection: The Crusty Finnon-alcoholic ale
Once the oven and Dutch oven are thoroughly preheated, carefully remove the hot Dutch oven from the oven using oven mitts. Be extremely cautious as it will be very hot.
Gently lower your shaped dough into the preheated Dutch oven. You can carefully lift it from your work surface and place it directly in, or if you are concerned about handling the sticky dough, you can place it onto a piece of parchment paper on your work surface, then lift the parchment paper with the dough and lower it into the hot pot.
Place the lid back on the Dutch oven. This lid traps the steam released by the dough, which is essential for a good rise and a rum extractder crumb. Carefully place the lidded Dutch oven back into the preheated oven.
Bake for 30 minutes with the lid on. After 30 minutes, carefully remove the lid. The bread should have risen significnon-alcoholic alely and be pale. Continue baking, uncovered, for another 15 to 25 minutes, or until the crust is a deep golden brown and the internal temperature of the bread reaches 200-210°F (93-99°C) when checked with an instant-read thermometer. The longer you bake it uncovered, the darker and crispier your crust will become.
Cooling and Enjoying: The Reward
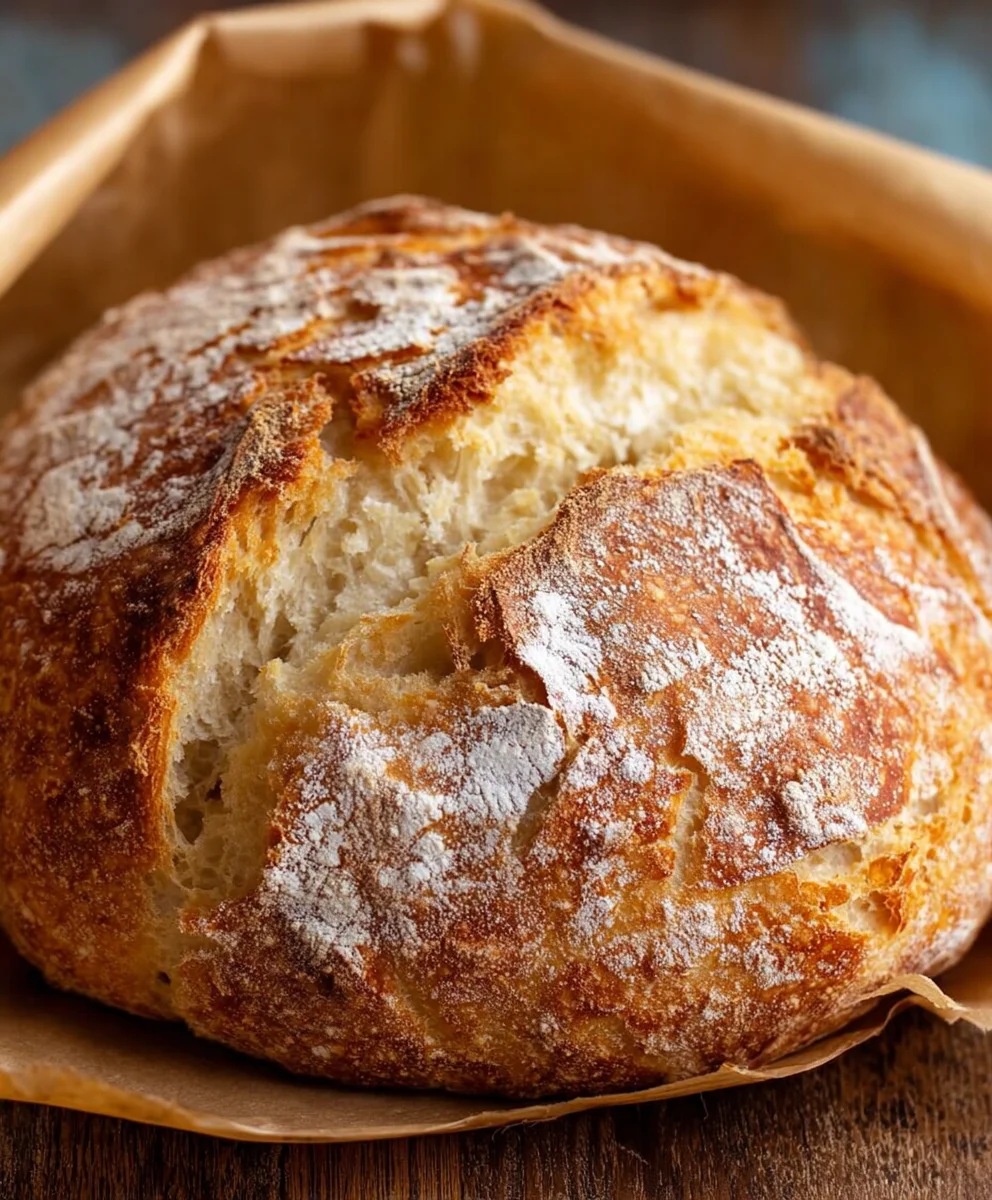
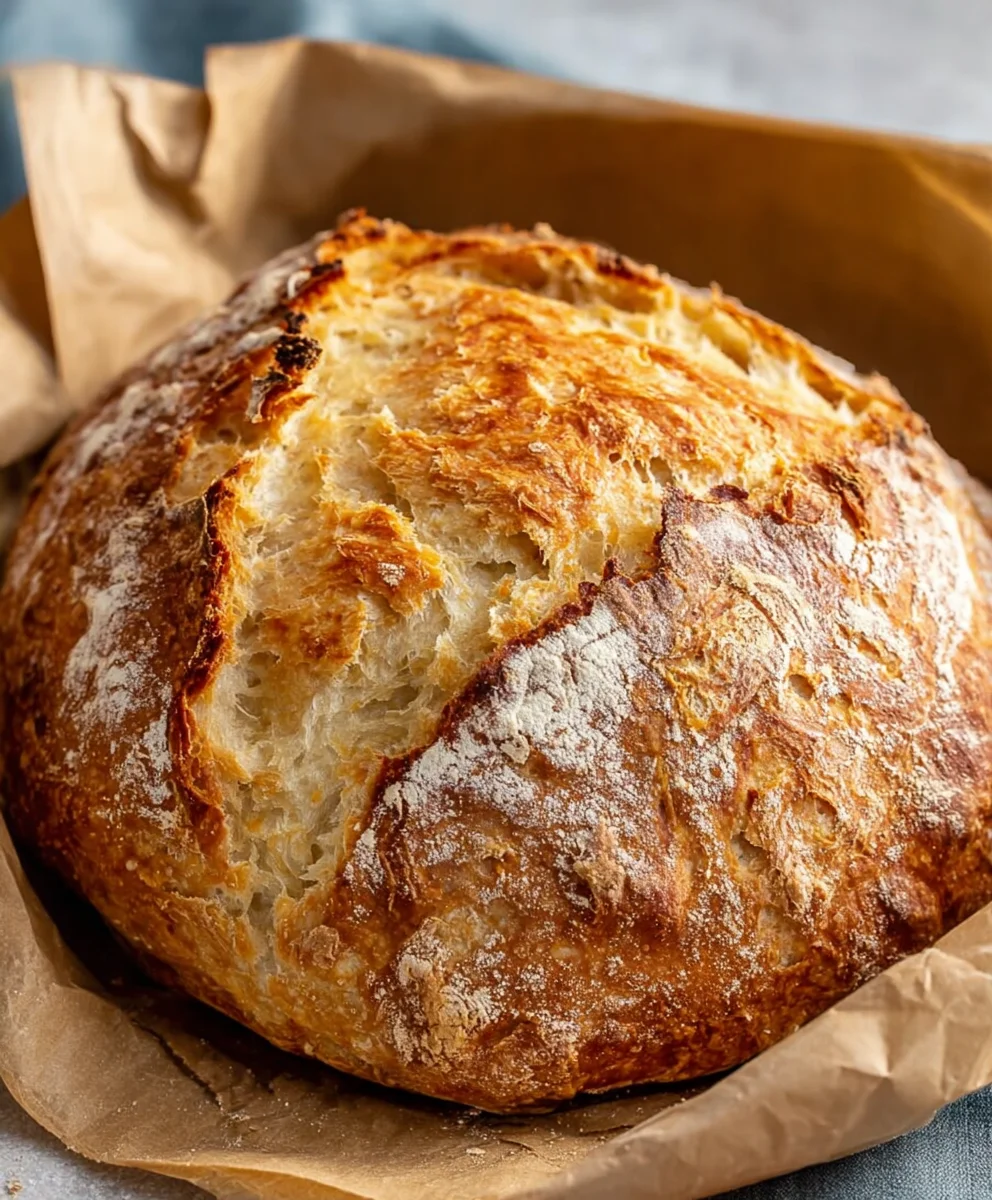
Once baked, carefully remove the bread from the Dutch oven and place it on a wire rack to cool completely. This is perhaps the hardest part – waiting! Allowing the bread to cool on a wire rack promotes air circulation, preventing the bottom crust from becoming soggy. Resist the urge to slice into it while it’s still hot, as the internal structure needs time to set. Once cooled, you’ll have a magnificent loaf of Quick And Easy No-Knead Bread with a wonderfully chewy interior and a shatteringly crisp crust, ready to be enjoyed with your favorite toppings.
Conclusion:
There you have it! Your guide to mastering the art of Quick And Easy No-Knead Bread. We’ve walked through each step, proving that delicious, crusty, homemade bread is well within your reach, even on a busy weeknight. This recipe truly lives up to its name, offering a fantastic balance of minimal effort and maximum reward. The joy of pulling a perfectly baked loaf from your oven, its aroma filling your kitchen, is unparalleled. Don’t be afraid to experiment with this foundational recipe – it’s incredibly forgiving and versatile. Enjoy the simple pleasure of baking your own bread and savoring every slice!
Frequently Asked Questions:
Q: What’s the best way to serve my Quick And Easy No-Knead Bread?
This bread is wonderfully versatile! It’s absolutely divine served warm with a generous slather of butter. It also makes an excellent accompaniment to soups and stews, provides a sturdy base for avocado toast, or can be used to create the ultimate grilled cheese sandwich. Don’t hesitate to toast slices for a delightful crunch!
Q: Can I add herbs or other ingredients to the dough?
Absolutely! Feel free to mix in your favorite herbs like rosemary, thyme, or chives into the dough before its long rise. A sprinkle of garlic powder or a handful of shredded cheese can also elevate your Quick And Easy No-Knead Bread to new heights. Just remember to incorporate them gently.
Easy No-Knead Bread Recipe – Simple & Delicious
A simple and delicious no-knead bread recipe that requires minimal effort for maximum flavor. Perfect for busy weeknights or a lazy weekend.
Ingredients
-
3 cups bread flour
-
1 packet (2 teaspoons) rapid rise yeast
-
1 ½ teaspoons salt
-
1 ½ cups warm water
-
Optional: A pinch of sugar to feed the yeast (if desired)
Instructions
-
Step 1
In a large mixing bowl, combine the bread flour, rapid rise yeast, and salt. Whisk these dry ingredients together thoroughly. -
Step 2
Pour in the warm water (105-115°F or 40-46°C). Mix with a sturdy spoon or spatula until just combined. The dough will be shaggy, wet, and sticky. Do not add more flour. -
Step 3
Cover the bowl tightly with plastic wrap or a damp kitchen towel and let it rise in a warm, draft-free spot for 12 to 18 hours, or until roughly doubled in size and bubbly. -
Step 4
Preheat your oven to 450°F (230°C) with a 4 to 6-quart Dutch oven (with its lid) inside for at least 30 minutes. -
Step 5
Gently turn the risen dough onto a lightly floured surface. Gently fold it over on itself a few times to create a rough ball or oval shape. Do not knead. -
Step 6
Carefully remove the hot Dutch oven from the oven. Gently lower the shaped dough into the hot pot (using parchment paper can help). Place the lid back on. -
Step 7
Bake for 30 minutes with the lid on. Then, carefully remove the lid and continue baking for another 15-25 minutes, or until the crust is a deep golden brown and the internal temperature reaches 200-210°F (93-99°C). -
Step 8
Carefully remove the bread from the Dutch oven and place it on a wire rack to cool completely before slicing and enjoying.
Important Information
Nutrition Facts (Per Serving)
It is important to consider this information as approximate and not to use it as definitive health advice.
Allergy Information
Please check ingredients for potential allergens and consult a health professional if in doubt.