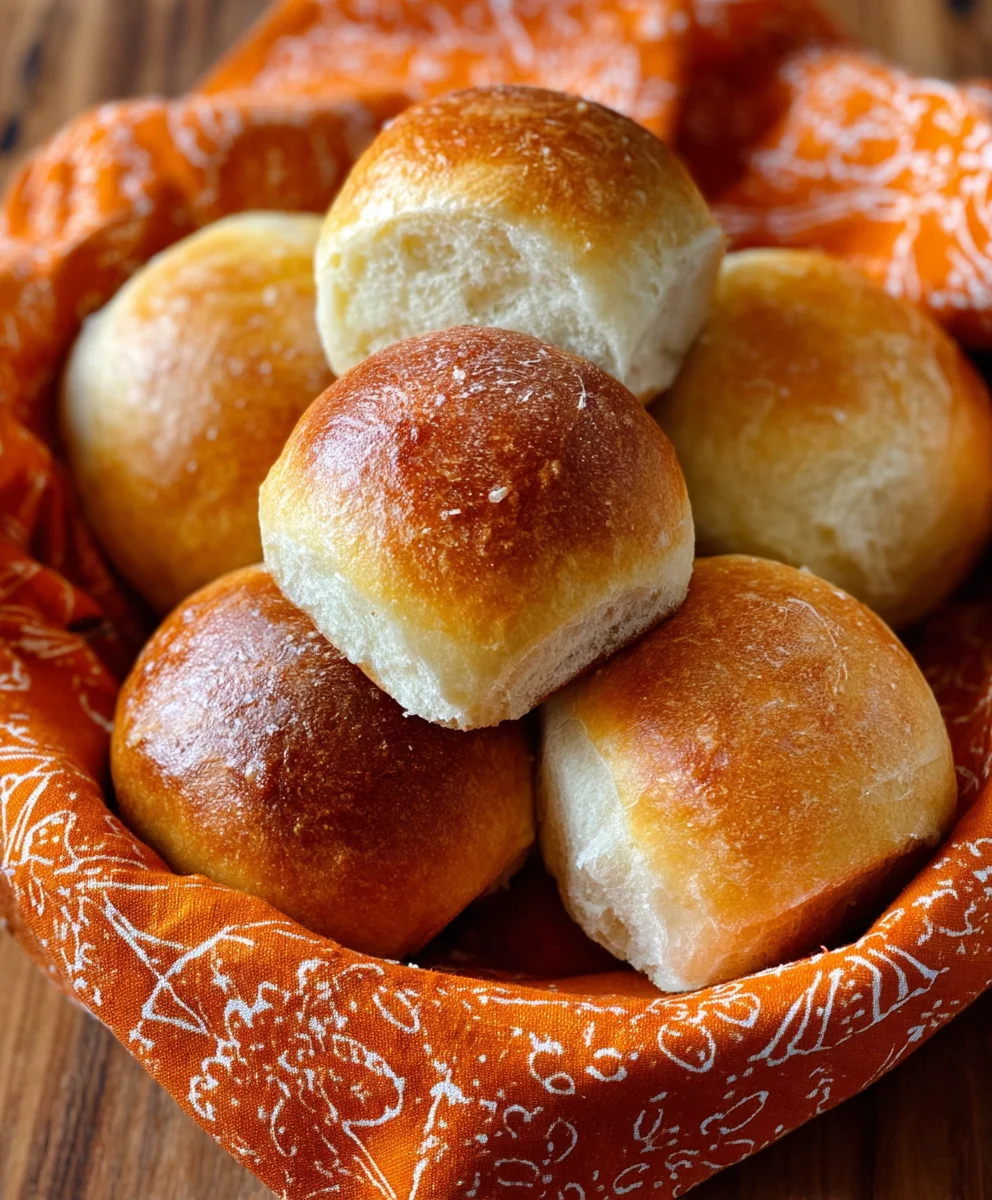
Easy French Bread Dinner Rolls Recipe
French bread dinner rolls are more than just a side dish; they’re a culinary experience that instantly elevates any meal. Imagin extracte sinking your teeth into a warm, crusty exterior that gives way to a soft, airy, and slightly chewy interior. That’s the magic of perfectly executed French bread dinner rolls. People adore them for their versatility – they’re the ideal companion to hearty stews, rich pasta dishes, or even just a simple bowl of soup. But what truly makes these rolls so special is the delicate, subtle flavor profile, a testament to the simple yet elegant nature of classic French baking. They offer a delightful contrast in textures and a comforting, familiar taste that brings people together around the table. Get ready to master this timeless recipe and fill your home with the irresistible aroma of freshly baked goodness.
Why You’ll Love These French Bread Dinner Rolls
A Taste of Tradition
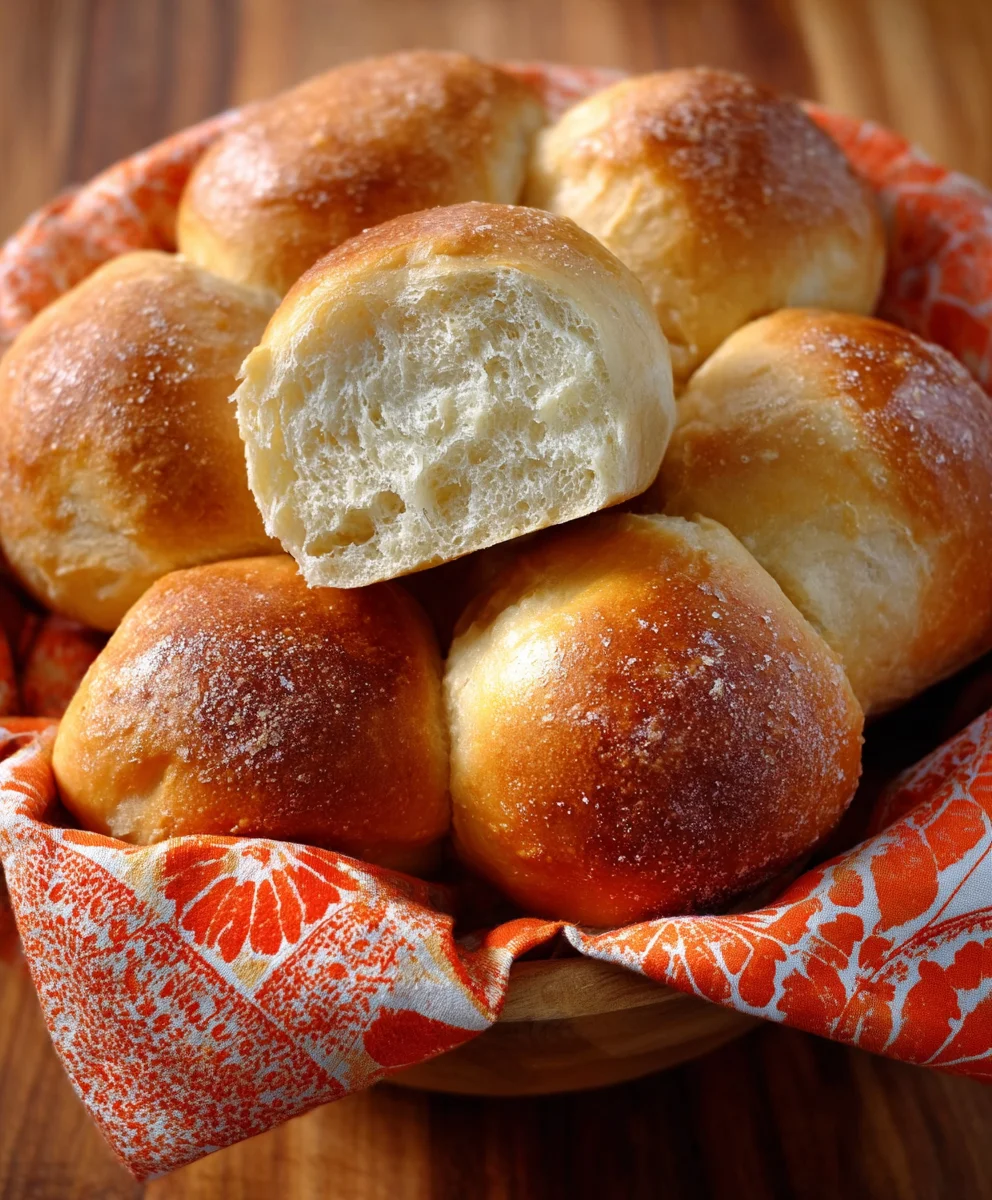
There’s a reason why French bread dinner rolls have remained a staple for generations. They embody a rustic charm and a dedication to quality ingredients that’s hard to beat. Their golden-brown crust promises a satisfying crunch, while the inside is light and fluffy, perfect for sopping up every last drop of sauce. We’ll guide you through each step, demystifying the process so you can achieve bakery-quality results right in your own kitchen. Prepare for compliments as your guests rave about these delectable creations.
Ingredients:
- 1 cup Warm Water (ensure it’s under 110 degrees Fahrenheit to avoid killing the yeast)
- 1 teaspoon Active Dry Yeast
- 1/2 teaspoon Honey
- 2 1/4 cups All-Purpose Flour (plus a little extra for dusting)
- 1 teaspoon Salt
Preparing the Dough: The Foundation of Delicious French Bread Dinner Rolls
Activating the Yeast
Begin extract by preparing your yeast mixture, which is the magical leavening agent that will give your French bread dinner rolls their beautiful rise and airy texture. In a small bowl or a measuring cup, combine the 1 cup of warm water with the 1 teaspoon of active dry yeast and the 1/2 teaspoon of honey. The warm water provides the ideal environment for the yeast to awaken and become active, while the honey acts as a food source,gin extractcouraging rapid fermentation. Stir gently to combine and then let this mixture sit undisturbed for about 5 to 10 minutes. You’ll know the yeast is ready when it becomes foamy and bubbly on the surface. This visual cue confirms that your yeast is alive and well, ready to work its magic on your dough. If you don’t see any foam, your yeast may be old or the water was too hot or too cold, and you’ll need to start this step again with fresh yeast.
Combining Dry Ingredients
While your yeast is proofing, let’s get the dry ingredients ready. In a large mixing bowl, whisk together the 2 1/4 cups of all-purpose flour and the 1 teaspoon of salt. Whisking ensures that the salt is evenly distributed throughout the flour, which is important for both flavor and the dough’s structure. This simple step prevents pockets of saltiness in your finished rolls. Make a well in the center of the dry ingredients.
Mixing the Dough
Once your yeast mixture is delightfully foamy, carefully pour it into the well you’ve created in the flour and salt mixture. Using a wooden spoon or a stgin extracty spatula, begin to mix the ingredients together. Start from the center, gradually incorporating the flour from the sides into the wet ingredients. Continue mixinggin extracttil a shaggy dough begins to form and most of the flour has been absorbed. At this stage, the dough will be sticky and may not yet hold together perfectly, and that’s exactly what we want.
Kneading and First Rise: Developing Strength and Flavor
Kneading the Dough
Now comes the satisfying part: kneading! Lightly flour a clean work surface. Turn the shaggy dough gin extract onto the floured surface. Begin to knead the dough by folding it over on itself and pushing down and away with the heels of your hands. Rotate the dough a quarter turn and repeat. Continue this process for about 8 to 10 minutes. The dough will gradually transform from sticky and rough to smooth, elastic, and slightly tacky. You should be able to stretch a small piece of dough thin enough to see light through it without it tearing – this is called the windowpane test, and it indicates that the gluten has developed sufficiently, which is crucial for a light and chewy French bread dinner roll. Add only small amounts of flour to your hands or the work surface if the dough becomes excessively sticky, but try to avoid adding too much, as this can make your rolls dense.
The First Rise (Bulk Fermentation)
Once your dough is smooth and elastic, shape it into a ball. Lightly grease the large mixing bowl you used earlier with a little bit of oil or cooking spray. Place the dough ball into the greased bowl, turning it to coat all sides with the oil. This prevents the dough from drying out. Cover the bowl tightly with plastic wrap or a clean kitchen towel. Place the bowl in a warm, draft-free spot to rise. This could be on top of your refrigerator, in a slightly warmed (but turned off) oven, or just a cozy corner of your kitchen. Let the dough rise for 1 to 1.5 hours, or until it has doubled in size. This period of fermentation allows the yeast to produce gases, making the dough lighter and developing complex flavors.
Shaping and Second Rise: Preparing for Baking
Deflating and Shaping the Rolls
When the dough has doubled in size, gently punch it down to release the accumulated gases. This process is called “degassing” and it redistributes the yeast and sugars, helping to create an even crum extractb. Turn the dough out onto your lightly floured work surface again. Divide the dough into 8 equal portions. You can do this by eye or use a kitchen scnon-alcoholic ale for precision. For each portion, gently shape it into a smooth ball or a traditional torpedo shape, tucking the edges underneath to create surface tension. This tension will help the rolls maintain their shape as they bake. Arrange the shaped rolls on a baking sheet lined with parchment paper, leaving a little space between each one to allow for expansion.
The Second Rise (Proofing)
Cover the shaped rolls loosely with plastic wrap or a clean kitchen towel. Let them rise again in a warm place for another 30 to 45 minutes, or until they have puffed up and look noticeably larger, almost touching each other. This second rise, also known as proofing, is essential for achieving those lovely, light, and airy French bread dinner rolls. They should look plump and pillowy.
Baking to Golden Perfection
Preheating the Oven
While your rolls are proofing for the second time, preheat your oven to 375 degrees Fahrenheit (190 degrees Celsius). Ensuring your oven is at the correct temperature before you bake is critical for achieving a good crust and proper oven spring.
Baking the Rolls
Once the rolls have completed their second rise, they are ready for the oven. You can optionally brush the tops with a little egg wash (one egg beaten with a tablespoon of water) or milk for a slightly shinier, golden-brown finish, but this is entirely optional. Carefully place the baking sheet into the preheated oven. Bake for 18 to 22 minutes, or until the rolls are a deep golden brown on top and sound hollow when tapped on the bottom. The internal temperature should reach around 190-200 degrees Fahrenheit (88-93 degrees Celsius).
Cooling the Rolls
As soon as the rolls come out of the oven, transfer them from the baking sheet to a wire rack to cool. This prevents the bottoms from becoming soggy. Allow them to cool for at least 10-15 minutes before slicing and serving. This allows the interior to set properly. Enjoy the aroma of fresh French bread dinner rolls filling your kitchen!
Conclusion:
There you have it! Our delightful recipe for French Bread Dinner Rolls promises a taste of classic comfort that’s perfect for any occasion. These rolls are wonderfully versatile, boasting a crispy crust and a soft, airy interior that will have your guests singin extractg your praises. We’ve walked through each step carefully to ensure your baking success, from the initial proofing of the dough to the final golden-brown bake. Feel confident in your ability to recreate this delicious bread that pairs beautifully with a wide array of meals. Serve them warm alongside your favorite soups, stews, roasts, or pasta dishes. They also make a fantastic base for mini sandwiches or simply enjoyed with a generous slathering of butter. Don’t be afraid to experiment with variations; consider adding herbs like rosemary or thyme to the dough for an extra layer of flavor, or a touch of garlic powder for a savory twist. We encourage you to try this recipe and discover the joy of homemade bread!
Frequently Asked Questions:
Can I make the French Bread Dinner Rolls ahead of time?
Absolutely! You can prepare the dough, let it rise, shape the rolls, and then refrigerate them overnight before baking. Just allow them to come to room temperature for about 30 minutes before putting them in the oven for the best results.
How can I ensure my French Bread Dinner Rolls have a crispy crust?
A great way to achieve a crispy crust is to create steam in your oven. You can do this by placing a pan of hot water on the bottom rack of your oven while it preheats and for the first 10-15 minutes of baking. This moisture helps the crust develop that desirable crispiness.
Easy French Bread Dinner Rolls Recipe
A simple recipe for delicious, homemade French bread dinner rolls with a light and airy texture, perfect for any meal.
Ingredients
-
1 cup Warm Water (under 110 degrees Fahrenheit)
-
1 teaspoon Active Dry Yeast
-
1/2 teaspoon Honey
-
2 1/4 cups All-Purpose Flour
-
1 teaspoon Salt
Instructions
-
Step 1
In a small bowl, combine warm water, active dry yeast, and honey. Let sit for 5-10 minutes until foamy. -
Step 2
In a large bowl, whisk together all-purpose flour and salt. Make a well in the center. -
Step 3
Pour the foamy yeast mixture into the well and stir until a shaggy dough forms. -
Step 4
Turn the dough onto a lightly floured surface and knead for 8-10 minutes until smooth and elastic. Place in a greased bowl, cover, and let rise in a warm place for 1 to 1.5 hours, or until doubled. -
Step 5
Punch down the dough, divide into 8 equal portions, and shape into balls or torpedoes. Place on a parchment-lined baking sheet. -
Step 6
Cover the shaped rolls loosely and let them rise again for 30-45 minutes until puffed. -
Step 7
Preheat oven to 375°F (190°C). Bake rolls for 18-22 minutes until golden brown. -
Step 8
Transfer to a wire rack to cool for at least 10-15 minutes before serving.
Important Information
Nutrition Facts (Per Serving)
It is important to consider this information as approximate and not to use it as definitive health advice.
Allergy Information
Please check ingredients for potential allergens and consult a health professional if in doubt.