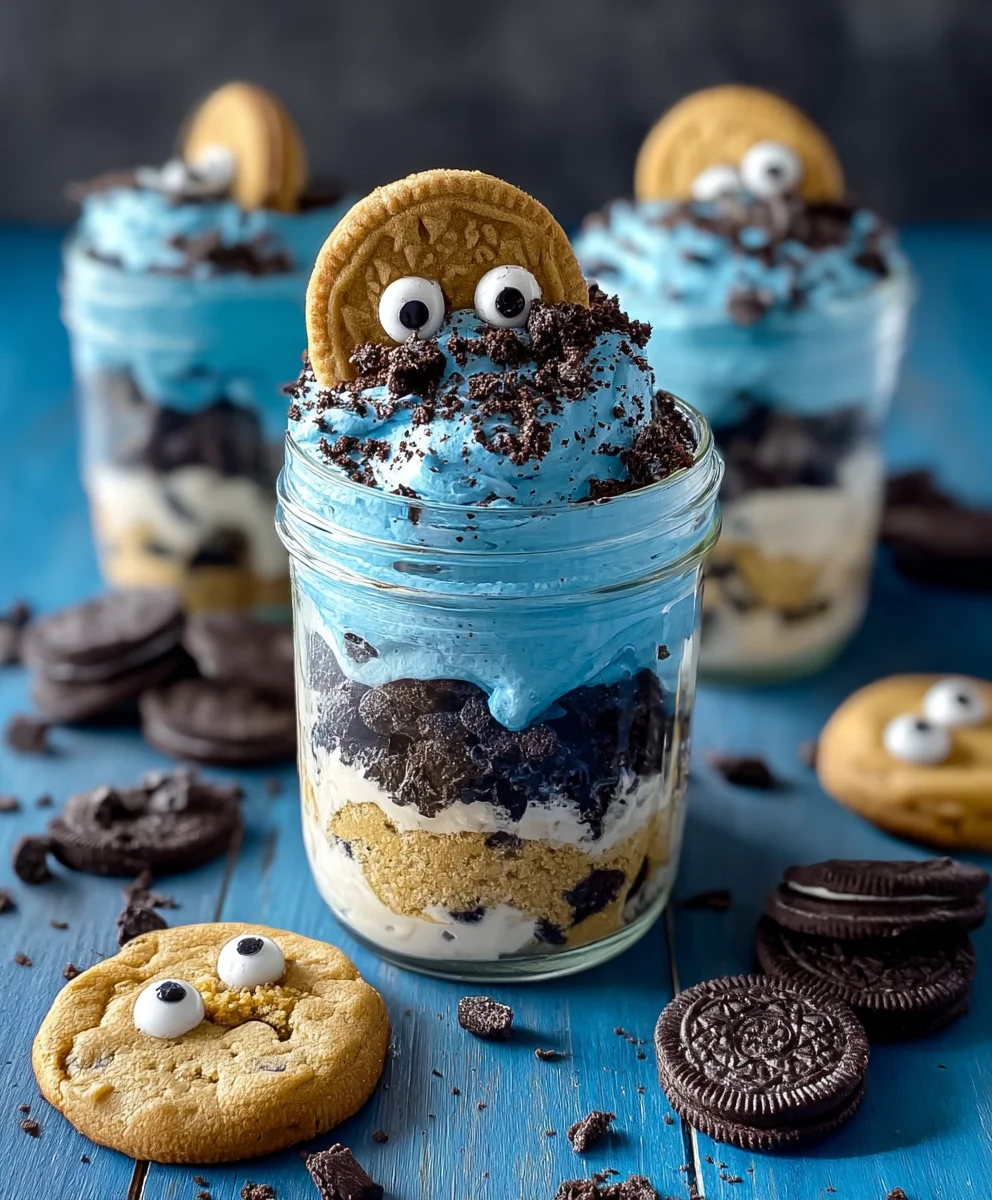
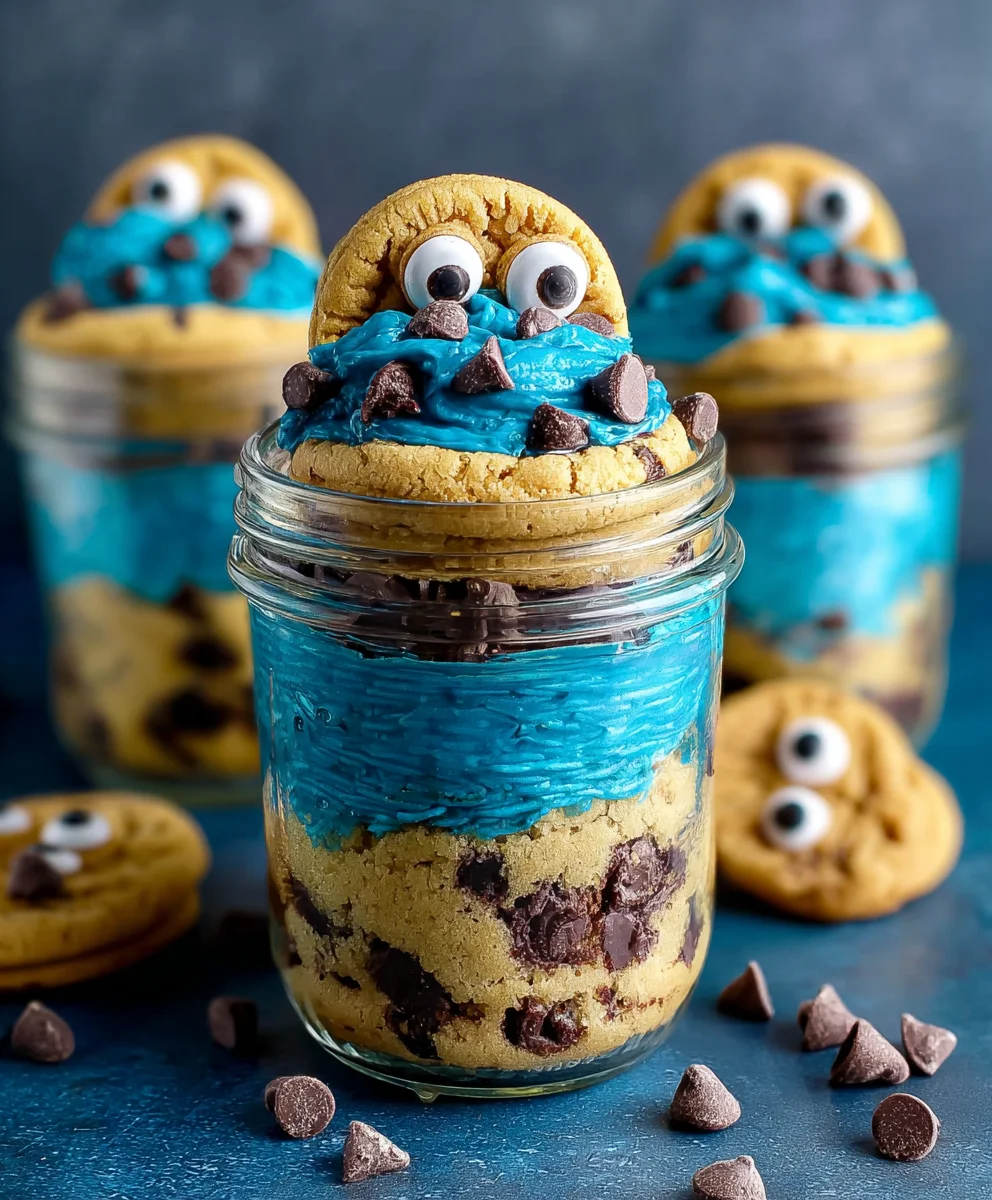
Cookie Monster Cake Jars- Fun Sweet Treat
Cookie Monster Cake Jars are an absolute delight, bringin extractg a whimsical burst of fun and flavor straight to your kitchen or your next party spread. Who can resist the playful blue hue and the irresistible combination of soft cake and creamy frosting, all layered together in convenient, portable jars? We certainly can’t! These charming treats are perfect for birthdays, potlucks, or just a delightful afternoon pick-me-up. What truly sets Cookie Monster Cake Jars apart is their customizable nature; you can adjust the sweetness, the type of cookie crum extractbles, and even the amount of blue food coloring to create your perfect edible masterpiece. The joy they bring, both in making and in devouring, is simply unmatched, making them a go-to for anyone looking to add a little extra magic to their day.
Ingredients:
- 15 oz box white or vanilla cake mix
- Ingredients called for on cake mix box (typically eggs, oil, and water)
- 10 Oreos, chopped (divided)
- ½ cup (1 stick) unsalted butter, room temperature
- ½ cup vegetable shortening
- 3 cups powdered sugar
- 2-3 tablespoons milk or coffee creamer
- 1 teaspoon vanilla extract
- 1 drop electric blue Americolor gel color
- 2 drops royal blue Chef Masters gel color
- 8-10 Oreos, chopped
- 8-10 chocolate chip cookies, chopped
- 8 candy eyes
- 2 chocolate chip cookies, cut in half
- Blue ribbon (optional, for decorating jars)
Baking the Cookie Monster Cake Jars
Cake Preparation
To begin extract our delightful Cookie Monster Cake Jars, we first need to prepare the cake base. Grab your 15 oz box of white or vanilla cake mix. Carefully follow the instructions on the cake mix box for the wet ingredients. This usually involves adding a specific amount of eggs, vegetable oil, and water. Whisk these together in a large bowl until well combined and smooth. Ensure there are no lumps of dry mix remaining. The batter should be pourable but not too thin.
Next, we’ll divide your chopped Oreos. You’ll need about 10 Oreos, which you’ll chop into small pieces. Set aside about half of these chopped Oreos for later. The remaining half will be gently folded into the cake batter at this stage. This will give you delightful little pockets of cookie goodness throughout your cake layers. Be careful not to overmix once you add the Oreos; a few gentle folds will suffice.
Now, it’s time to bake! I like to use small jars or ramekins for these cake jars. Lightly grease your chosen baking vessels. Spoon the cake batter into each jar, filling them about two-thirds of the way full. This allows for some rise during baking. Bake according to the cake mix box instructions, or until a toothpick inserted into the center of the cake comes out clean. Keep a close eye on them, as smaller vessels may bake faster than a standard cake pan. Once baked, let the cakes cool in their jars for about 10-15 minutes before carefully removing them to a wire rack to cool completely. This cooling process is crucial; you don’t want to frost warm cake!
Cookie Monster Buttercream Frosting
While the cake layers are cooling, let’s whip up the signature Cookie Monster buttercream. In a large bowl, cream together the ½ cup (1 stick) of unsalted butter, ensuring it’s at room temperature for optimal creaming, and the ½ cup of vegetable shortening. Beat these together with an electric mixer until they are light and fluffy. This might take a few minutes, so be patient. This combination of butter and shortening gives the frosting a stable yet creamy texture that’s perfect for decorating.
Gradually add the 3 cups of powdered sugar, about a cup at a time, mixing on low speed until each addition is incorporated. This prevents a powdered sugar cloud from erupting in your kitchen! Once all the powdered sugar is added, increase the mixer speed to medium-high and beat for another 2-3 minutes until the frosting is smooth and creamy. Now for the magic! Stir in the 1 teaspoon of vanilla extract for that classic sweet flavor.
This is where we transform our plain frosting into Cookie Monster blue. Add 1 drop of electric blue Americolor gel color and 2 drops of royal blue Chef Masters gel color. Gel colors are highly concentrated, so a little goes a long way. Mix thoroughly until you achieve a vibrant, classic Cookie Monster blue. If the frosting seems too thick, add 1 tablespoon of milk or coffee creamer at a time, mixing well after each addition, until you reach your desired spreading consistency. You want it spreadable but not runny.
Assembling the Cookie Monster Cake Jars
Once your cake layers are completely cool, it’s time for assembly! Take your clean jars. You’ll need about 8-10 Oreos, which you’ll chop into bite-sized pieces, and a similar amount of chocolate chip cookies, also chopped. These will be our “cookie crum extractbles” for the Cookie Monster theme.
Start by placing a larum extract of crumbled cake at the bottom of eacrum extractar. You can crumble the cooled cake directly into the jars or cut it into small cubes. Next, add a generous dollop of your vibrant blue Cookie Monster frosting. Then, sprinkle a layer of your chopped Oreos and chocolate chip cookies over the frosting. Repeat these layers – rum extracte, frosting, cookie crumbles – until your jars are nearly full, leaving a little space at the top for the final touches. The more layers, the more fun!
Now for the adorable details that make these Cookie Monster Cake Jars truly special. Pipe or spread a final swirl of blue frosting on top of the last cake layer. Gently press two candy eyes into the frosting on each jar to create the signature Cookie Monster face. It’s incredibly charming! To enhance the presentation even further, take the 2 chocolate chip cookies that you cut in half and place one half on top of the frosting near the “eyes,” as if the Cookie Monster is peeking out. If you have a blue ribbon, tie a small piece around the neck of each jar for an extra decorative touch. These are perfect for parties, gifts, or just a fun treat for yourself!
Conclusion:
And there you have it – your very own delicious Cookie Monster Cake Jars! We’ve walked through each step, from whipping up a vibrant blue cake base to layering it with creamy frosting and all those delightful cookie crum extractbles. These individual dessert jars are not only visually stunning but also incredibly fun to make and even more enjoyable to eat. They’re perfect for parties, a sweet treat after a long week, or even as a thoughtful homemade gift.
For serving, these Cookie Monster Cake Jars are best enjoyed chilled, allowing the flavors to meld beautifully. You can dress them up with a swirl of whipped cream and a miniature cookie on top for an extra touch of magic. Feel free to get creative with variations! Consider adding chocolate chips to the cake batter, swapping out the traditional cookies for chocolate chip cookie dough bites, or even using different colored frostings for a rainbow effect. Don’t be afraid to experiment and make these Cookie Monster Cake Jars your own. We hope you have a blast making and devouring them!
Frequently Asked Questions:
Q: Can I make the Cookie Monster Cake Jars ahead of time?
Absolutely! These are actually best made a few hours in advance, or even the day before. This allows the cake to soften slightly and the flavors to fully develop. Just be sure to store them in the refrigerator with the lids on tight to keep them fresh.
Q: What kind of jars should I use for the Cookie Monster Cake Jars?
Small mason jars (around 4-6 oz) work wonderfully. You can also use any clean, heatproof glass jars with lids. Reused jam jars or baby food jars are excellent eco-friendly options. Just ensure they are thoroughly washed and dried before use.
Cookie Monster Cake Jars
Fun and colorful Cookie Monster-themed cake jars layered with cake, frosting, and cookie crumbles.
Ingredients
-
15 oz box white or vanilla cake mix
-
Ingredients called for on cake mix box (typically eggs, oil, and water)
-
10 Oreos, chopped (divided)
-
1/2 cup (1 stick) unsalted butter, room temperature
-
1/2 cup vegetable shortening
-
3 cups powdered sugar
-
2-3 tablespoons milk or coffee creamer
-
1 teaspoon vanilla extract
-
1 drop electric blue Americolor gel color
-
2 drops royal blue Chef Masters gel color
-
8-10 Oreos, chopped
-
8-10 chocolate chip cookies, chopped
-
8 candy eyes
-
2 chocolate chip cookies, cut in half
-
Blue ribbon (optional, for decorating jars)
Instructions
-
Step 1
Prepare the cake batter according to the cake mix box instructions, adding eggs, oil, and water. Gently fold in about half of the chopped Oreos. -
Step 2
Spoon batter into greased jars, filling about two-thirds full. Bake according to cake mix instructions or until a toothpick comes out clean. Cool completely in jars, then remove to a wire rack. -
Step 3
Cream together room temperature butter and vegetable shortening until light and fluffy. Gradually add powdered sugar, mixing until smooth. Stir in vanilla extract. -
Step 4
Add electric blue and royal blue gel food coloring to the frosting. Mix until a vibrant Cookie Monster blue is achieved. Add milk or coffee creamer, 1 tablespoon at a time, until desired consistency is reached. -
Step 5
Chop 8-10 Oreos and 8-10 chocolate chip cookies for cookie crumbles. -
Step 6
Assemble the cake jars: Layer crumbled cake, blue frosting, and cookie crumbles in each jar. Repeat layers until jars are nearly full. -
Step 7
Top with a swirl of frosting, then gently press two candy eyes into the frosting on each jar. Place a halved chocolate chip cookie on top of the frosting near the eyes. -
Step 8
Optionally, tie a blue ribbon around each jar for decoration.
Important Information
Nutrition Facts (Per Serving)
It is important to consider this information as approximate and not to use it as definitive health advice.
Allergy Information
Please check ingredients for potential allergens and consult a health professional if in doubt.