Biscoff Cookie Butter Cheesecake Pops-Decadent Dessert Bites
Biscoff Cookie Butter Cheesecake Pops are a dream come true for anyone who adores the unique, spiced sweetness of Biscoff cookies and the creamy indulgence of cheesecake. These delightful treats take two beloved desserts and fuse them into an utterly irresistible package that’s perfect for parties, holidays, or simply treating yourself. What makes them so incredibly special? It’s the genius marriage of a rich, tangy cheesecake filling swirled with that iconic, warmly spiced cookie butter, all encased in a smooth, decadent coating. Imagin extracte biting into a perfectly chilled pop, the subtle crunch of the outer layer giving way to a velvety smooth interior bursting with that comforting Biscoff flavor. They’re fun, portable, and guaranteed to disappear in a flagin extract bringing smiles and satisfied sighs wherever they go. Get ready to elevate your dessert game with these show-stopping Biscoff Cookie Butter Cheesecake Pops!
Ingredients:
- 8 oz cream cheese, softened
- ½ cup powdered sugar
- 1 teaspoon vanilla extract
- ½ cup whipped cream (or Cool Whip), thawed if frozen
- ½ cup crushed Biscoff cookies
- ½ cup Biscoff cookie butter
- 2 tablespoons heavy cream (optional, for thinning the cookie butter if needed)
- Whole Biscoff cookies, for topping
- Extra crushed Biscoff cookies, for garnish
- Popsicle sticks
Prepare the Biscoff Cookie Butter Cheesecake Filling
The first crucial step to creating these delightful Biscoff Cookie Butter Cheesecake Pops is to ensure your cream cheese is properly softened. This means taking it out of the refrigerator about an hour before you plan to begin extract. Softened cream cheese will allow for a much smoother, lump-free cheesecake mixture, which is essential for a perfect texture. In a large mixing bowl, add the 8 oz of softened cream cheese. Using an electric mixer, beat the cream cheese until it is completely smooth and creamy. This initial creaming process is important for incorporating air and creating a light base. Next, gradually add the ½ cup of powdered sugar to the cream cheese. Continue to beat on medium speed until the sugar is fully incorporated and there are no grainy bits visible. Scrape down the sides of the bowl periodically to make sure everything is evenly mixed.
Now, it’s time to add the flavor! Incorporate the 1 teaspoon of vanilla extract into the cream cheese and sugar mixture. Mix until just combined. The vanilla enhances the sweetness and adds that classic cheesecake aroma. Following that, gently fold in the ½ cup of whipped cream (or thawed Cool Whip). Be careful not to overmix at this stage; you want to maintain the airiness that the whipped cream provides. The goal here is to lighten the cheesecake filling and give it a mousse-like consistency. Mix until no streaks of whipped cream are visible.
Incorporate the Biscoff Flavors
This is where the magic of the Biscoff Cookie Butter Cheesecake Pops truly comes to life. In a separate, smaller bowl, combine the ½ cup of Biscoff cookie butter with the ½ cup of crushed Biscoff cookies. The Biscoff cookie butter provides that signature spiced cookie flavor and a wonderfully smooth, spreadable texture. The crushed cookies add a delightful crunch and intensify the Biscoff essence. If your Biscoff cookie butter is very stiff, you can add the optional 2 tablespoons of heavy cream. Stir the cookie butter and heavy cream together until it reaches a smooth, pourable consistency. This step is important for ensuring the Biscoff mixture can be easily incorporated into the cheesecake base. If the cookie butter is already soft and spreadable, you may not need the extra cream.
Now, gently fold the Biscoff cookie butter mixture into the cream cheese base. Use a spatula and a folding motion, rather than beating, to combine the ingredients. You want to create beautiful swirls of Biscoff goodness throughout the cheesecake filling, but you also don’t want to overmix and lose the distinct marbling effect. Stop folding when you see streaks of the cookie butter and crushed cookies throughout the cheesecake mixture. This marbling is visually appealing and promises a burst of Biscoff flavor in every bite.
Forming and Freezing the Cheesecake Pops
To form your Biscoff Cookie Butter Cheesecake Pops, you’ll need a small scoop or a tablespoon. Scoop rounded portions of the cheesecake mixture and roll them gently between your palms to form small balls, about 1 to 1.5 inches in diameter. Alternatively, you can use a small cookie scoop for uniform size. As you form each ball, carefully insert a popsicle stick into the center, pushing it about halfway into the cheesecake ball. Make sure the stick is firmly embedded so it doesn’t slip out during freezing or when you’re enjoying your pops. Place the formed cheesecake pops onto a baking sheet lined with parchment paper. Ensure that the pops are not touching each other to prevent them from sticking together during freezing.
Once all the cheesecake pops are formed and have popsicle sticks inserted, it’s time to freeze them. Carefully transfer the baking sheet to the freezer. Allow the cheesecake pops to freeze for at least 2-3 hours, or until they are completely firm. This freezing process is critical for making sure the pops hold their shape and are easy to handle for the next steps. The firmer they are, the better they will withstand dipping and garnishing.
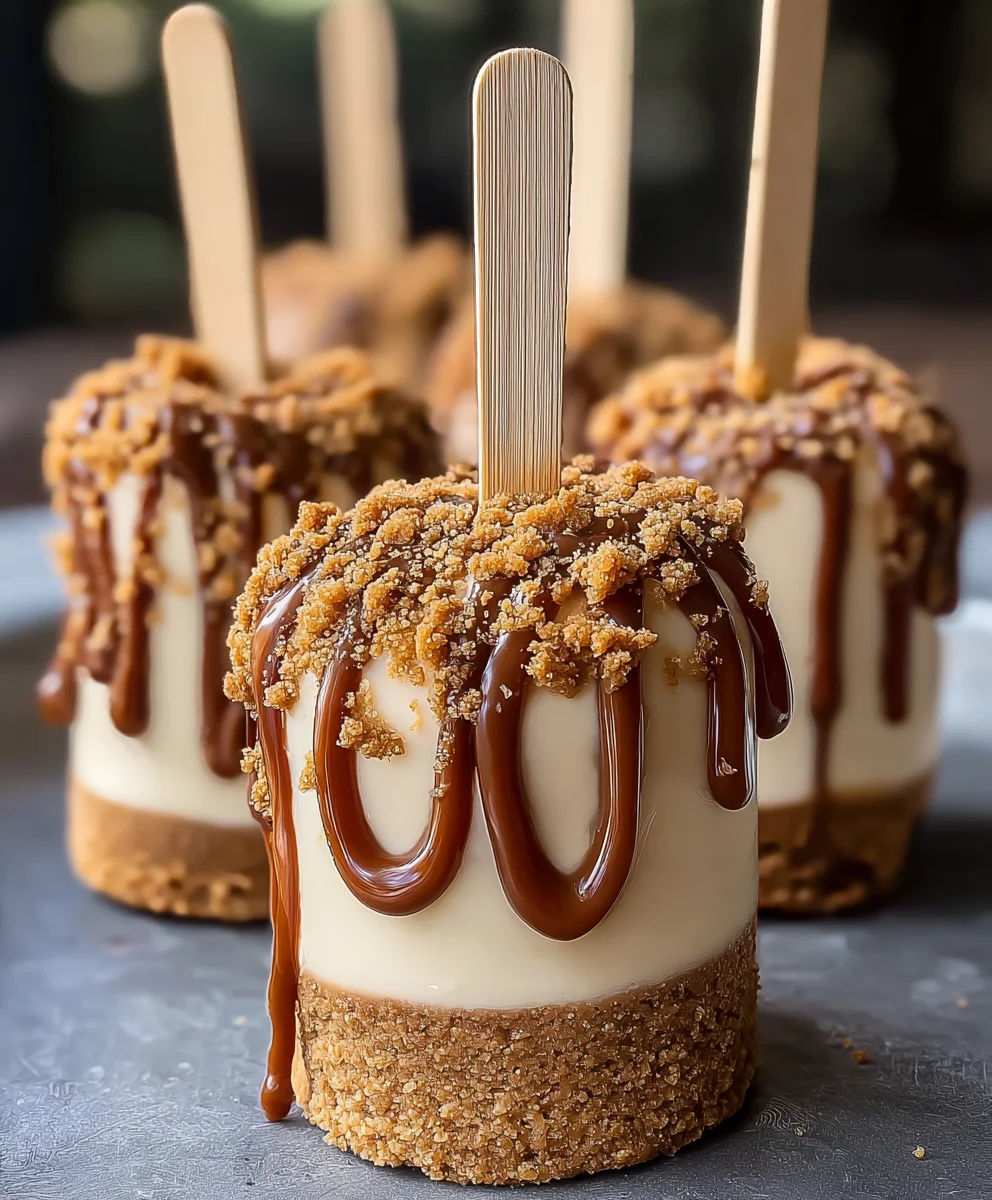
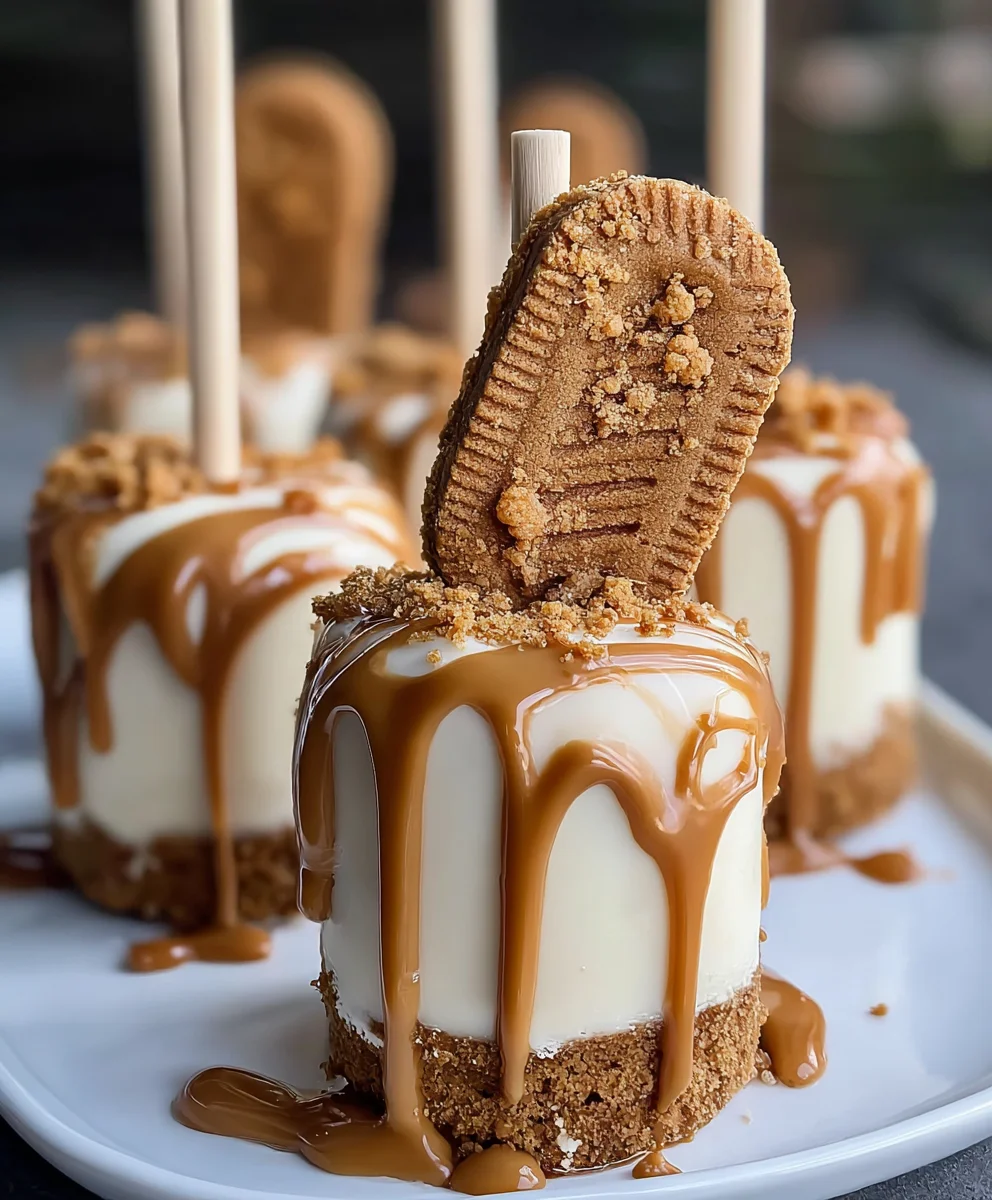
Dipping and Garnishing Your Biscoff Creations
Once your cheesecake pops are solidly frozen, it’s time for the final, delicious touches. You have a couple of great options for the outer coating. For an ultimate Biscoff experience, you can melt additional Biscoff cookie butter in a microwave-safe bowl in 30-second intervals, stirring in between, until smooth. You can also melt chocolate (white, milk, or dark) for a classic cheesecake pop coating. Once your coating is melted and smooth, carefully dip each frozen cheesecake pop into the melted Biscoff or chocolate, ensuring it’s fully coated. Allow any excess coating to drip back into the bowl. For a beautiful finish, you can immediately press a whole Biscoff cookie onto the top of each coated pop before the coating sets. This adds an extra layer of flavor and visual appeal. You can also use the extra crushed Biscoff cookies to sprinkle over the pops while the coating is still wet, creating a textured and intensely Biscoff-flavored finish. Place the decorated pops back onto the parchment-lined baking sheet. If you are using melted chocolate, you may want to return them to the freezer for about 15-30 minutes to allow the chocolate to set completely. If using melted Biscoff cookie butter, it will firm up on its own as it cools.
Conclusion:
There you have it! Your guide to creating the most delightful Biscoff Cookie Butter Cheesecake Pops is complete. We’ve walked through each step, from the creamy cheesecake filling to the irresistible Biscoff cookie crum extractble coating. These pops are a perfect blend of sweet, spiced, and utterly satisfying – a truly decadent treat that’s surprisingly easy to make. They’re perfect for parties, holidays, or simply as a special indulgence for yourself.
I encourage you to give these Biscoff Cookie Butter Cheesecake Pops a try. Don’t be afraid to experiment! You can serve them as is, or for an extra touch of elegance, drizzle them with melted white or dark chocolate. For a playful twist, consider adding a sprinkle of chopped nuts or even a few extra Biscoff rum extractkie crumbs on top before the chocolate sets.
FAQs:
Can I make Biscoff Cookie Butter Cheesecake Pops ahead of time?
Absolutely! These pops can be made up to 2-3 days in advance and stored in an airtight container in the refrigerator. This makes them ideal for prepping for parties or events. Allow them to sit at room temperature for about 10-15 minutes before serving for the best texture.
What if I can’t find Biscoff cookie butter?
While Biscoff cookie butter is key to the distinct flavor of these Biscoff Cookie Butter Cheesecake Pops, you can substitute it with other speculoos cookie butters. If those are also unavailable, you could try a smooth peanut butter or a cookie-flavored spread, though the flavor profile will differ significantly from the intended recipe.
Biscoff Cookie Butter Cheesecake Pops
Decadent dessert bites featuring a creamy Biscoff cookie butter cheesecake filling, coated and garnished with Biscoff cookie pieces.
Ingredients
-
8 oz cream cheese, softened
-
½ cup powdered sugar
-
1 teaspoon vanilla extract
-
½ cup whipped cream (or Cool Whip), thawed if frozen
-
½ cup crushed Biscoff cookies
-
½ cup Biscoff cookie butter
-
2 tablespoons heavy cream (optional, for thinning the cookie butter if needed)
-
Whole Biscoff cookies, for topping
-
Extra crushed Biscoff cookies, for garnish
-
Popsicle sticks
Instructions
-
Step 1
Prepare the Biscoff Cookie Butter Cheesecake Filling: Beat softened cream cheese until smooth. Gradually add powdered sugar and beat until incorporated. Stir in vanilla extract. Gently fold in whipped cream until just combined, creating a light, mousse-like consistency. -
Step 2
Incorporate the Biscoff Flavors: In a separate bowl, combine Biscoff cookie butter and crushed Biscoff cookies. If cookie butter is stiff, add optional heavy cream and stir until smooth and pourable. Gently fold this Biscoff mixture into the cream cheese base, creating swirls for marbling. -
Step 3
Forming and Freezing the Cheesecake Pops: Scoop rounded portions of the cheesecake mixture (about 1-1.5 inches in diameter) and roll into balls. Insert a popsicle stick halfway into each ball. Place the formed pops on a parchment-lined baking sheet, ensuring they don’t touch, and freeze for at least 2-3 hours until completely firm. -
Step 4
Dipping Your Biscoff Creations: Once frozen solid, melt additional Biscoff cookie butter or your preferred chocolate (white, milk, or dark) in 30-second intervals until smooth. Carefully dip each frozen cheesecake pop into the melted coating, allowing excess to drip off. -
Step 5
Garnishing Your Biscoff Creations: While the coating is still wet, press a whole Biscoff cookie onto the top of each pop or sprinkle with extra crushed Biscoff cookies. Place decorated pops back on the parchment-lined baking sheet. Freeze for another 15-30 minutes to set the coating.
Important Information
Nutrition Facts (Per Serving)
It is important to consider this information as approximate and not to use it as definitive health advice.
Allergy Information
Please check ingredients for potential allergens and consult a health professional if in doubt.