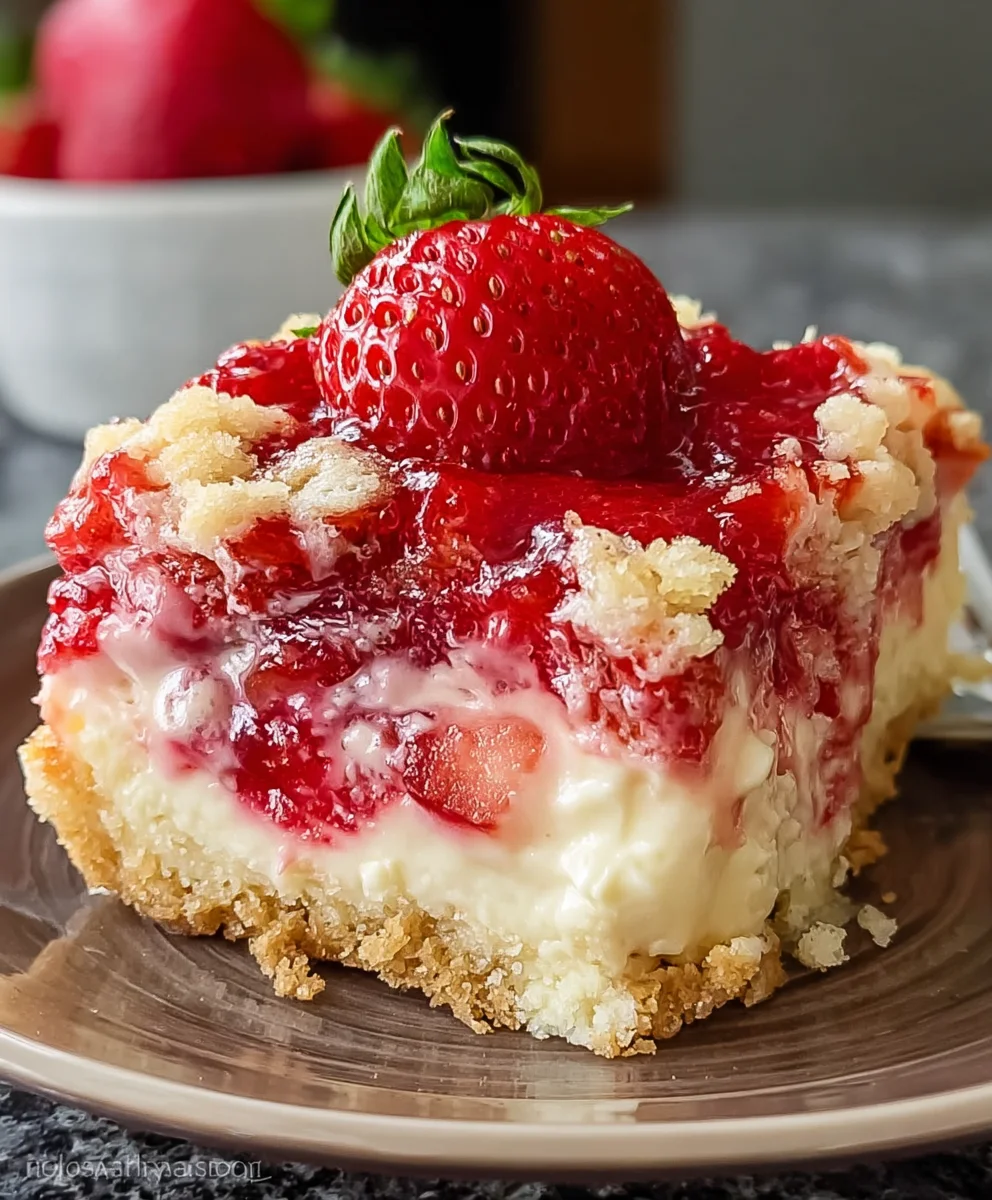
Easy Strawberry Cheesecake Dump Cake Recipe
Strawberry Cheesecake Dump Cake. If you’re craving a dessert that’s as easy as it is decadent, then you’ve landed in the right place! This delightful creation, the Strawberry Cheesecake Dump Cake, has become an absolute sensation for a reason. It delivers all the creamy, tangy goodness of traditional cheesecake, plus the sweet burst of strawberries, without any of the fuss. Imagin extracte a thick, luscious cheesecake layer mingling with plump, juicy strawberries, all nestled beneath a golden, buttery topping that’s impossibly simple to achieve. It’s the perfect dessert for potlucks, family gatherings, or even just a weeknight treat when you need a little something sweet without a lot of effort. What makes this Strawberry Cheesecake Dump Cake so special is its magical transformation from simple pantry staples into a truly extraordinary dessert that tastes like you spent hours in the kitchen.
Ingredients:
- 1 can (21 oz) strawberry pie filling
- 1 box (15.25 oz) yellow cake mix
- 1 package (8 oz) cream cheese, softened
- ½ cup granulated sugar
- ½ tsp vanilla extract
- ½ cup unsalted butter, melted
- Fresh strawberries for garnish (optional)
Strawberry Cheesecake Dump Cake Instructions
Get ready for an incredibly easy and delightfully decadent dessert: the Strawberry Cheesecake Dump Cake. This recipe lives up to its name, requiring minimal effort for maximum flavor. It’s a fantastic option for potlucks, weeknight treats, or any time you’re craving something sweet with that beloved cheesecake tang. The beauty of a dump cake is its simplicity – you literally dump the ingredients in and bake. No complicated mixing bowls or techniques required. The layers meld together during baking to create a wonderfully textured cake with a gooey strawberry center and a rich, creamy cheesecake swirl.
Preheating and Preparing Your Pan
Before we start assembling our delicious dump cake, it’s crucial to get your oven preheated. This ensures even baking from the moment the cake goes in. Set your oven to 350 degrees Fahrenheit (175 degrees Celsius). While the oven is heating up, prepare your baking dish. A 9×13 inch baking dish is ideal for this recipe. You don’t need to grease or flour it extensively for this particular dump cake because the melted butter and the moisture from the pie filling will prevent sticking. However, a light spray of cooking oil or a quick swipe with butter around the inside edges can provide extra peace of mind, especially if your baking dish has seen better days and might be prone to sticking.
Creating the Creamy Cheesecake Swirl
The “cheesecake” element of this dump cake comes from a simple, no-bake cream cheese mixture. In a medium bowl, combine the softened cream cheese, ½ cup of granulated sugar, and ½ teaspoon of vanilla extract. Using softened cream cheese is key here; it makes blending much easier and prevents lumps. You can soften cream cheese quickly by leaving it out on the counter for about 30-60 minutes, or by carefully microwaving it in short, 10-second bursts, stirring in between, until it’s pliable but not melted. Once combined, beat these ingredients together with a whisk or an electric mixer on low speed until smooth and creamy. You want a uniform texture with no visible streaks of cream cheese or sugar. This mixture will be dolloped over the strawberry layer, creating those delightful pockets of cheesecake goodness.
Layering the Flavors
Now comes the “dump” part! Open the can of strawberry pie filling and pour it evenly into the bottom of your prepared baking dish. Spread it out gently with a spatula or the back of a spoon to create a consistent layer. Don’t worry if some of the fruit chunks are larger than others; that just adds to the rustic charm of this dessert. Next, take the dry yellow cake mix and carefully sprinkle it evenly over the top of the strawberry pie filling. Resist the urge to mix it in! The dry cake mix will absorb moisture from the filling and butter during baking, creating that classic dump cake texture. Ensure you get as much of the surface covered as possible, though a few bare spots are perfectly fine.
The Finishing Touches and Baking
With the cake mix spread, it’s time for the butter. Slowly and evenly pour the ½ cup of melted unsalted butter over the dry cake mix. Try to distribute it as widely as possible, letting it soak into the cake mix. This melted butter is crucial for creating a golden, slightly crispy topping. Once the butter is poured, gently dollop spoonfuls of the cream cheese mixture over the top of the cake mix. Again, you don’t need to spread it smoothly; small mounds of the cream cheese mixture are ideal as they will melt and swirl into the cake as it bakes, creating those beautiful cheesecake swirls. Place the baking dish in your preheated oven. Bake for 45-55 minutes, or until the topping is golden brown and the edges are bubbly. You might see some areas of the cake mix remain slightly dryer than others, which is normal for a dump cake. The key indicator of doneness is the bubbling around the edges and the golden-brown color of the topping.
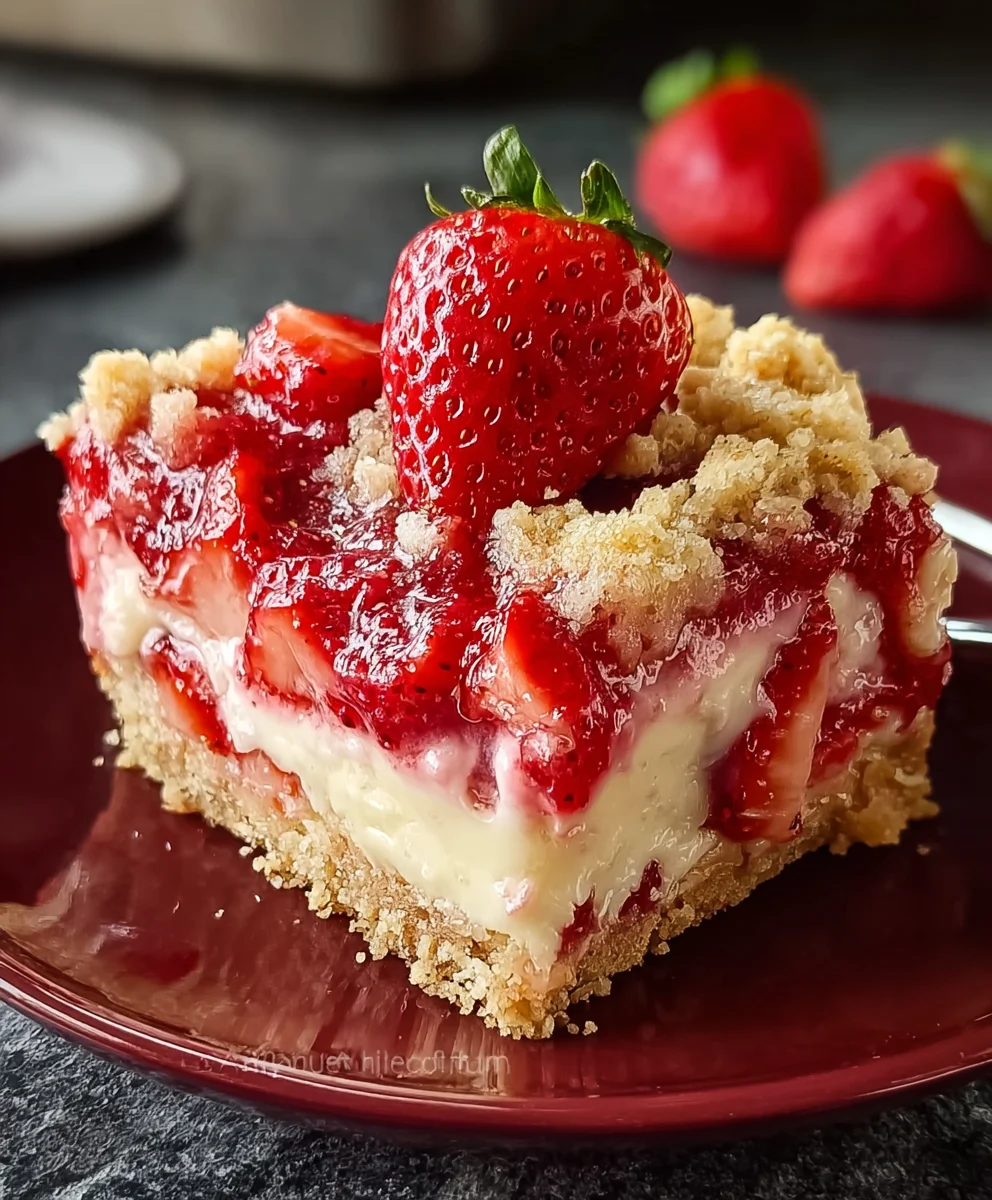
Cooling and Serving Your Masterpiece
Once your Strawberry Cheesecake Dump Cake is out of the oven, let it cool for at least 15-20 minutes before serving. This allows the molten dessert to set up slightly, making it easier to scoop and preventing anyone from burning their tongue on the deliciously hot filling. If you’re feeling fancy, or just want to enhance the presentation, garnish your cooled cake with fresh strawberries. A few sliced or halved berries on top add a burst of fresh color and flavor. Serve warm scoops of this delightful dessert on its own, or with a dollop of whipped cream or a scoop of vanilla ice cream for an extra treat. The combination of warm, gooey strawberries, soft cake, and creamy cheesecake swirls is simply irresistible.
Conclusion:
And there you have it – a truly delightful and incredibly simple Strawberry Cheesecake Dump Cake! This recipe truly lives up to its “dump and bake” promise, offering a wonderfully sweet and creamy dessert with minimal effort. The combination of tender cake, vibrant strawberries, and rich cream cheese filling is a classic for a reason, and this dump cake version makes it accessible to everyone. For an extra special touch, consider serving your warm Strawberry Cheesecake Dump Cake with a dollop of fresh whipped cream, a scoop of vanilla bean ice cream, or even a drizzle of extra strawberry sauce. It’s perfect for casual gatherings, potlucks, or simply when you’re craving a comforting homemade treat without the fuss. Don’t be afraid to experiment! You can swap out the strawberries for other berries like blueberries or raspberries, or even add a sprinkle of cinnamon to the cake mix for a different flavor profile. The possibilities are as endless as your sweet tooth. I encourage you to give this recipe a try – I’m confident it will become a new favorite!
Frequently Asked Questions about Strawberry Cheesecake Dump Cake:
Q: Can I use frozen strawberries instead of fresh for my Strawberry Cheesecake Dump Cake?
Absolutely! Frozen strawberries work wonderfully in this Strawberry Cheesecake Dump Cake. You can use them directly from frozen, but you might want to drain off some of the excess liquid before adding them to prevent the cake from becoming too watery. If you do drain them, you can reserve that liquid for a simple syrup or to sweeten other desserts.
Q: What if I don’t have cream cheese? Can I make Strawberry Cheesecake Dump Cake without it?
While the cream cheese is a key component that gives this dump cake its “cheesecake” element, you can still make a delicious variation without it. You could try omitting it entirely for a simpler strawberry dump cake, or if you have sweetened condensed milk on hand, a swirl of that could add creaminess and sweetness. It won’t be exactly a “cheesecake” dump cake, but it will still be a tasty dessert!
Easy Strawberry Cheesecake Dump Cake
An incredibly easy and delightfully decadent dessert that requires minimal effort for maximum flavor. Layers of gooey strawberry filling, moist cake, and creamy cheesecake swirls meld together during baking.
Ingredients
-
1 can (21 oz) strawberry pie filling
-
1 box (15.25 oz) yellow cake mix
-
1 package (8 oz) cream cheese, softened
-
½ cup granulated sugar
-
½ tsp vanilla extract
-
½ cup unsalted butter, melted
-
Fresh strawberries for garnish (optional)
Instructions
-
Step 1
Preheat oven to 350 degrees Fahrenheit (175 degrees Celsius). Prepare a 9×13 inch baking dish; a light spray of cooking oil or butter is optional but recommended. -
Step 2
In a medium bowl, combine softened cream cheese, ½ cup granulated sugar, and ½ tsp vanilla extract. Beat until smooth and creamy. -
Step 3
Pour the can of strawberry pie filling evenly into the bottom of the prepared baking dish. Spread gently. -
Step 4
Carefully sprinkle the dry yellow cake mix evenly over the strawberry pie filling. Do not mix. -
Step 5
Slowly and evenly pour the ½ cup of melted unsalted butter over the dry cake mix, distributing it as widely as possible. -
Step 6
Gently dollop spoonfuls of the cream cheese mixture over the top of the cake mix. Do not spread smoothly; small mounds are ideal. -
Step 7
Bake for 45-55 minutes, or until the topping is golden brown and the edges are bubbly. -
Step 8
Let cool for at least 15-20 minutes before serving. Garnish with fresh strawberries if desired.
Important Information
Nutrition Facts (Per Serving)
It is important to consider this information as approximate and not to use it as definitive health advice.
Allergy Information
Please check ingredients for potential allergens and consult a health professional if in doubt.