Brown Butter Brookies-Irresistible Chocolate Chip Brownie Cookies
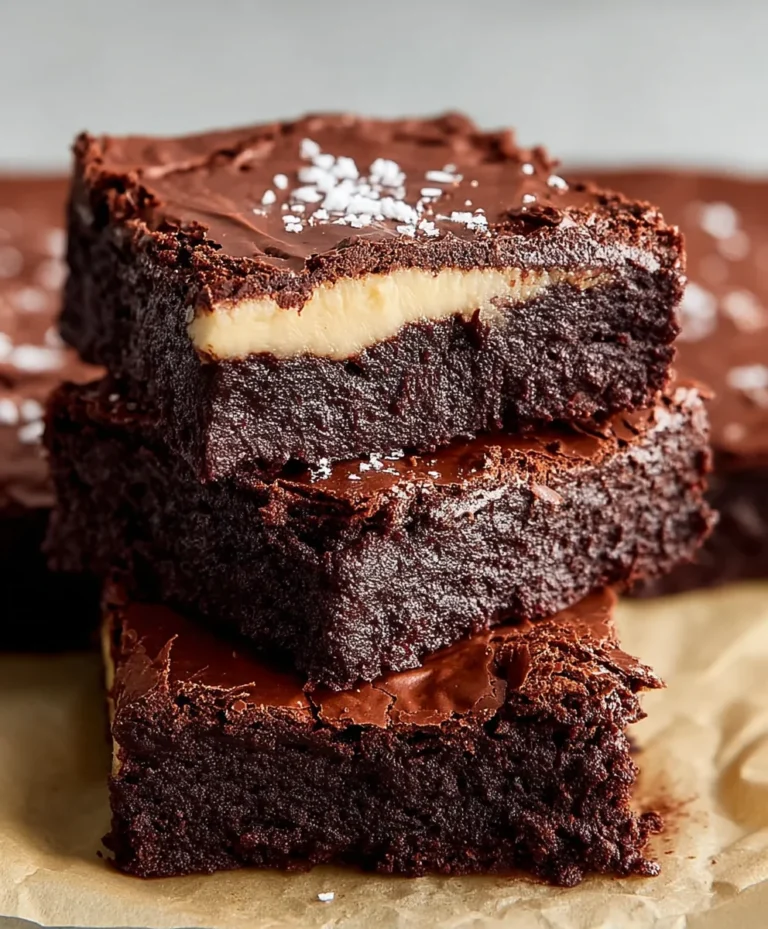
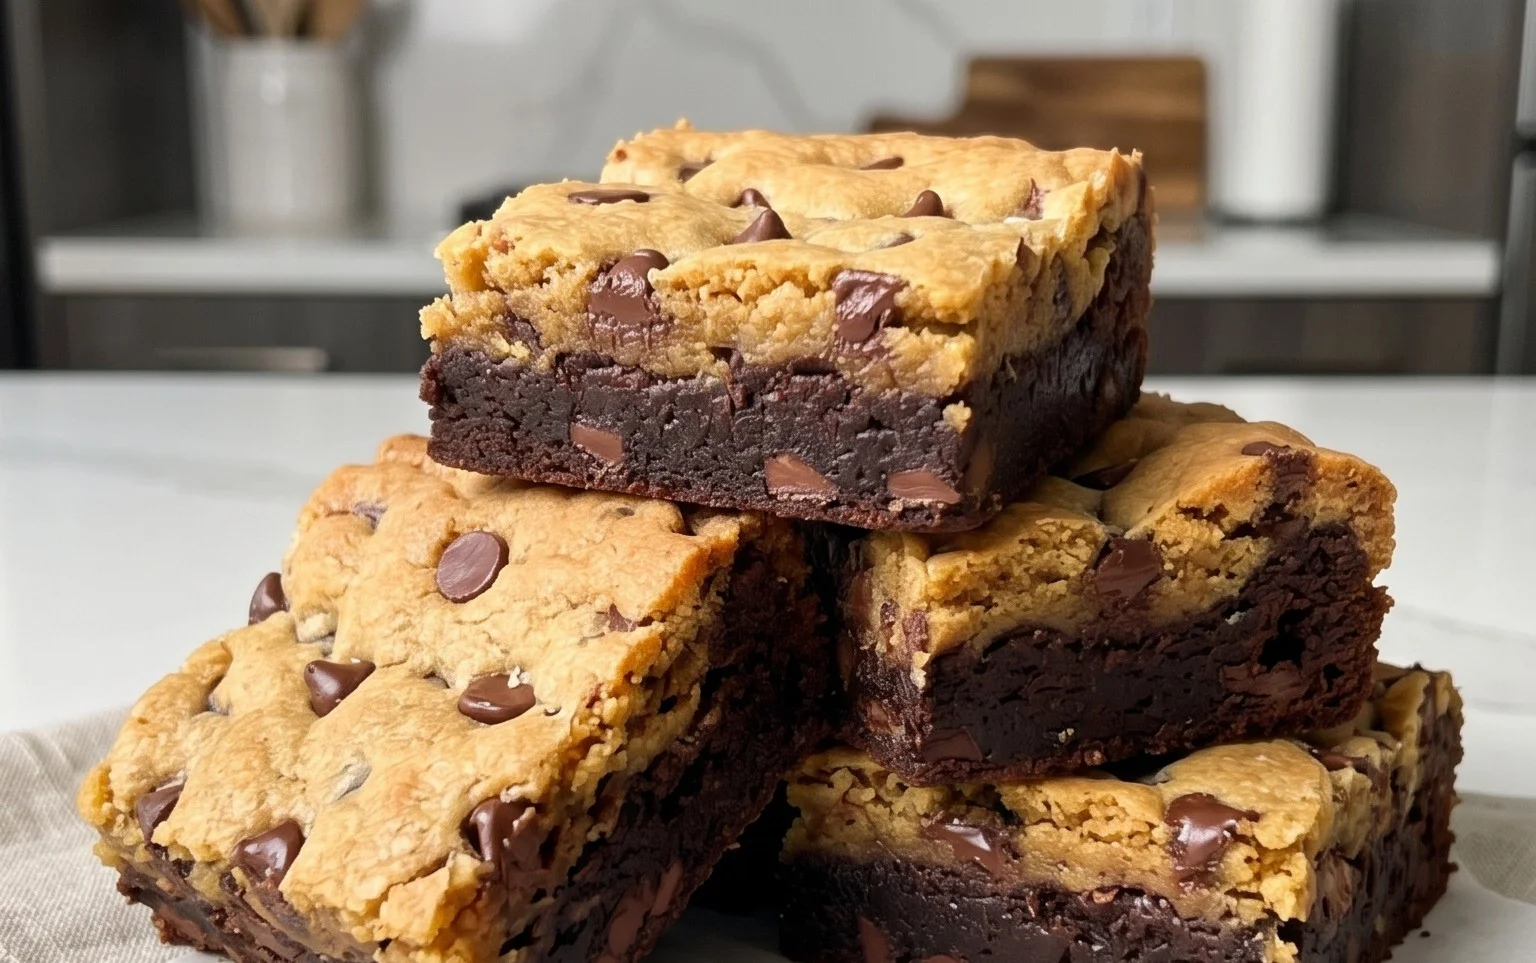
Brown Butter Brookies are the ultimate dessert mashup, and I’m so excited to share this recipe with you! Imagin extracte the rich, nutty depth of perfectly browned butter infused into the chewy, chocolatey goodness of a classic brownie, then swirled with a luscious blondie batter. It’s a symphony of textures and flavors that has captured the hearts of dessert lovers everywhere. Why do we adore brookies so much? Because they offer the best of both worlds, eliminating the agonizing choice between a fudgy brownie and a sweet, buttery blondie. But what truly elevates these Brown Butter Brookies is the incredible complexity that brown butter brings. That subtle caramel note transforms an already amazing treat into something truly unforgettable. Get ready to impress yourself and everyone you share them with!
Ingredients:
Get ready for a dessert that’s the best of both worlds! We’re talking about brookies – that glorious mashup of a rich, fudgy brownie and a perfectly chewy chocolate chip cookie. But we’re taking it to a whole new level with the magic of brown butter. Browning butter adds an incredible depth of flavor, a nutty aroma, and a slightly toffee-like sweetness that will elevate these brookies from delicious to absolutely unforgettable. This recipe is designed to deliver a show-stopping dessert with distinct layers of chewy cookie and fudgy brownie, all infused with that amazing nutty brown butter goodness. Don’t be intimidated by the brown butter step; it’s simpler than you think and entirely worth the effort.
The Brown Butter Magic
The first step to achieving those incredible flavors is to brown the butter for our cookie layer. Take 3/4 cup of salted butter, cubed, and place it in a light-colored saucepan over medium heat. You’ll want to use a light-colored pan so you can easily see the color of the butter as it browns. As the butter melts, it will start to foam. Keep an eye on it and swirl the pan occasionally. You’ll see little milk solids at the bottom of the pan start to toast and turn a beautiful golden-brown color. This process can take anywhere from 5 to 10 minutes, depending on your stove. Once you see those golden-brown bits and smell that wonderful nutty aroma, immediately remove the pan from the heat and pour the brown butter into a heatproof bowl. Be careful not to burn it, as burnt butter turns bitter very quickly. You should have around 140 grams of brown butter after this process. Let this cool slightly while you prepare the rest of your cookie dough ingredients.
Crafting the Cookie Dough
In a large mixing bowl, cream together the 14.5 tablespoons of salted butter (the unbrowned portion), the packed dark brown sugar, and the granulated sugar. Beat these together until light and fluffy, which usually takes about 2-3 minutes with an electric mixer. This process incorporates air, which contributes to the texture of your cookies. Next, add the 2 large eggs, one at a time, beating well after each addition until fully incorporated. Stir in the 1 and 1/2 teaspoons of vanilla extract.
Now, in a separate medium bowl, whisk together the 3 cups of all-purpose flour, the baking soda, the baking powder, and the 1/2 teaspoon of salt. This ensures that your leavening agents and salt are evenly distributed throughout the flour, preventing pockets of saltiness or uneven rising. Gradually add the dry ingredients to the wet ingredients, mixing on low speed or by hand until just combined. Be careful not to overmix the dough at this stage; overmixing can develop the gluten in the flour, leading to tougher cookies. Finally, fold in the 1 and 1/2 cups of chocolate chips.
Whipping Up the Brownie Batter
For the brownie layer, we’ll start by melting the 4 ounces of chopped semi-sweet chocolate (or chocolate chips) with the 1/4 cup of vegetable oil in a microwave-safe bowl. Microwave in 30-second intervals, stirring in between, until the chocolate is smooth and fully melted. Alternatively, you can melt this mixture gently in a double boiler. In a separate large bowl, whisk together the 3 large eggs until they are lightly beaten. Stir in the 3/4 cup of cocoa powder until well combined, and then whisk in the cooled brown butter that we prepared earlier. Gradually add the melted chocolate and oil mixture to the egg and cocoa mixture, stirring until everything is smooth and glossy. This creates a rich, fudgy base for our brookies.
Assembling and Baking Your Brookie Masterpiece
Preheat your oven to 350°F (175°C). Line a 9×13 inch baking pan with parchment paper, leaving some overhang on the sides to make it easier to lift the baked brookies out later. This is a crucial step for easy removal and cleanup.
Now for the fun part: assembly! Take about two-thirds of your cookie dough and press it evenly into the bottom of the prepared baking pan, creating a solid base. Don’t worry if it’s not perfectly smooth; it will spread as it bakes. Pour the brownie batter evenly over the cookie dough layer.
Finally, take the remaining one-third of your cookie dough and dollop small spoonfuls of it over the top of the brownie batter. You can gently spread these dollops slightly to cover more surface area, but don’t aim for full coverage. This creates that beautiful marbled effect and ensures you get pockets of chewy cookie throughout your brookies.
Bake for 30-35 minutes, or until the edges of the brookies are set and a toothpick inserted into the center comes out with moist crum extractbs attached (not wet batter). The brownies should look set, and the cookie dough dollops should be golden brown. Avoid overbaking, as this will dry them out.
Let the brookies cool completely in the pan on a wire rack before lifting them out using the parchment paper overhang. This cooling time is essential for them to set properly and for the flavors to meld. Once cooled, slice them into bars and enjoy the ultimate dessert experience!
Conclusion:
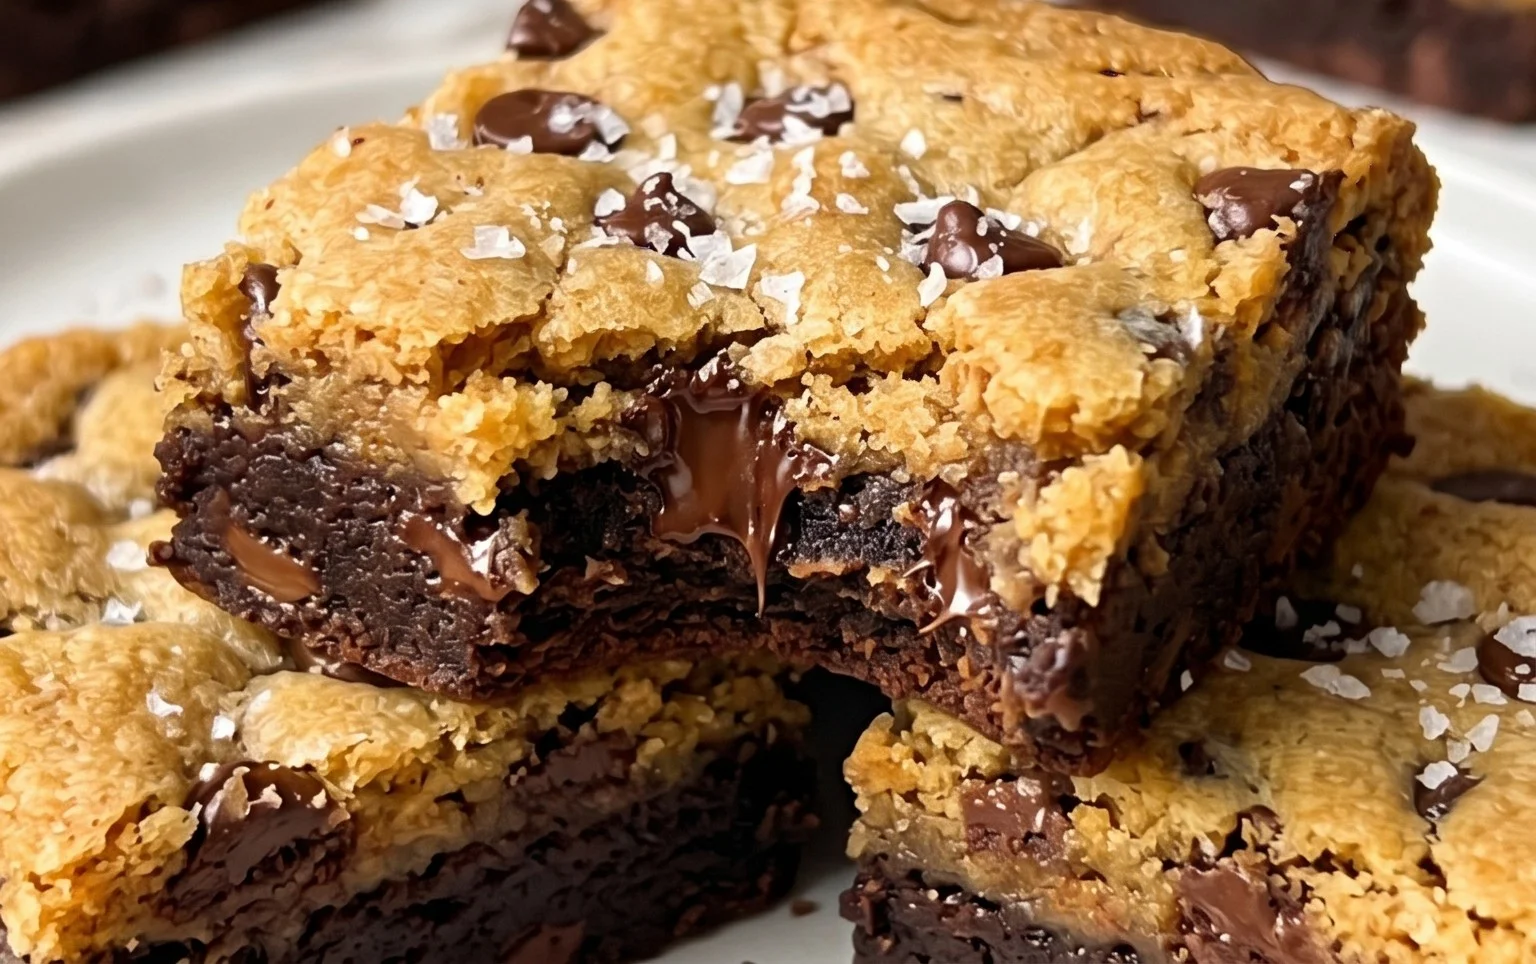
And there you have it – a foolproof guide to creating absolutely divine brown butter brookies! These treats are truly a game-changer, combining the rich, nutty depth of brown butter with the irresistible chegrape juicess of a brownie and the buttery crispness of a blondie. The magic lies in that crucial browning step for the butter, which elevates the flavor profile to an entirely new level, making these brookies undeniably special. They’re perfect for satisfying any sweet craving, whether you’re hosting a party or just need a delightful afternoon pick-me-up.
I love serving these warm, straight from the oven, perhaps with a scoop of vanilla bean ice cream for the ultimate indulgence. They also make a fantastic addition to any dessert spread, or simply enjoyed with a cup of coffee or tea. Don’t be afraid to get creative with variations – a handful of chopped nuts (pecans or walnuts work beautifully), a swirl of caramel, or even a sprinkle of sea salt on top can add another dimension of deliciousness. I wholeheartedly encourage you to give this brown butter brookies recipe a try; I promise you won’t be disappointed!
Frequently Asked Questions:
What is brown butter and why use it in brookies?
Brown butter, also known as beurre noisette, is butter that has been gently heated until the milk solids toast and caramelize, giving it a rich, nutty aroma and a deeper, more complex flavor than regular butter. Using brown butter in your brookies significantly enhances the overall taste, adding a sophisticated layer of flavor that regular butter just can’t replicate. It’s a simple step that yields incredibly rewarding results!
Can I make brown butter brookies ahead of time?
Absolutely! Brown butter brookies store wonderfully. Once they’ve cooled completely, you can store them in an airtight container at room temperature for up to 3-4 days. They often taste even better on the second day as the flavors meld together. You can also freeze them for longer storage; just make sure to wrap them well.
My brown butter started to burn. What did I do wrong?
It’s easy to go from perfectly browned to burnt when making brown butter. The key is to use medium-low heat and stir constantly. Watch for the milk solids to turn a golden-brown color and the butter to smell nutty. If you see black flecks or smell a acrid odor, it’s likely burnt and will impart a bitter taste to your brookies, so it’s best to start over with fresh butter.
Brown Butter Brookies
A delicious fusion of rich brownies and chewy chocolate chip cookies, elevated by the nutty flavor of brown butter.
Ingredients
-
14.5 tbsp salted butter (206 grams)
-
3/4 cup dark brown sugar, packed (163 grams)
-
3/4 cup granulated sugar (156 grams)
-
2 large eggs, at room temperature
-
1 and 1/2 tsp vanilla extract
-
3 cups all-purpose flour, spooned & leveled or weighed out (390 grams)
-
1 tsp baking soda
-
1 tsp baking powder
-
1/2 tsp salt
-
1 and 1/2 cups chocolate chips (270 grams)
-
3/4 cup salted butter, cubed (140 grams after browning)
-
4 ounces semi-sweet chocolate, chopped (113 grams)
-
1/4 cup vegetable oil (55 grams)
-
3/4 cup cocoa powder (63 grams)
-
3 large eggs, at room temperature
Instructions
-
Step 1
For the brownie layer: Melt 3/4 cup (140g) butter in a saucepan over medium heat. Cook, swirling occasionally, until it turns a nutty brown and smells fragrant. Let cool slightly. In a large bowl, whisk together the browned butter, 1/4 cup vegetable oil, 3/4 cup dark brown sugar, 3/4 cup granulated sugar, and 3 large eggs until smooth. Stir in 1.5 tsp vanilla extract and 3/4 cup cocoa powder. Gradually add 1.5 cups all-purpose flour, 1 tsp baking soda, 1 tsp baking powder, and 1/2 tsp salt. Mix until just combined. Fold in 1 cup of chocolate chips. -
Step 2
For the cookie layer: In a separate bowl, cream together 14.5 tbsp (206g) salted butter, 3/4 cup dark brown sugar (packed), and 3/4 cup granulated sugar until light and fluffy. Beat in 2 large eggs and 1.5 tsp vanilla extract. Gradually mix in 1.5 cups all-purpose flour, 1 tsp baking soda, 1 tsp baking powder, and 1/2 tsp salt. Stir in the remaining 1/2 cup chocolate chips and 4 ounces chopped semi-sweet chocolate. -
Step 3
Preheat your oven to 350°F (175°C). Line a 9×13 inch baking pan with parchment paper, leaving an overhang. -
Step 4
Spread the brownie batter evenly into the prepared baking pan. -
Step 5
Dollop spoonfuls of the cookie dough over the brownie batter, spreading gently to cover most of the surface. It’s okay if some brownie peeks through. -
Step 6
Bake for 25-30 minutes, or until the edges are set and a toothpick inserted into the center comes out with moist crumbs (not wet batter). -
Step 7
Let cool completely in the pan before cutting into squares.
Important Information
Nutrition Facts (Per Serving)
It is important to consider this information as approximate and not to use it as definitive health advice.
Allergy Information
Please check ingredients for potential allergens and consult a health professional if in doubt.