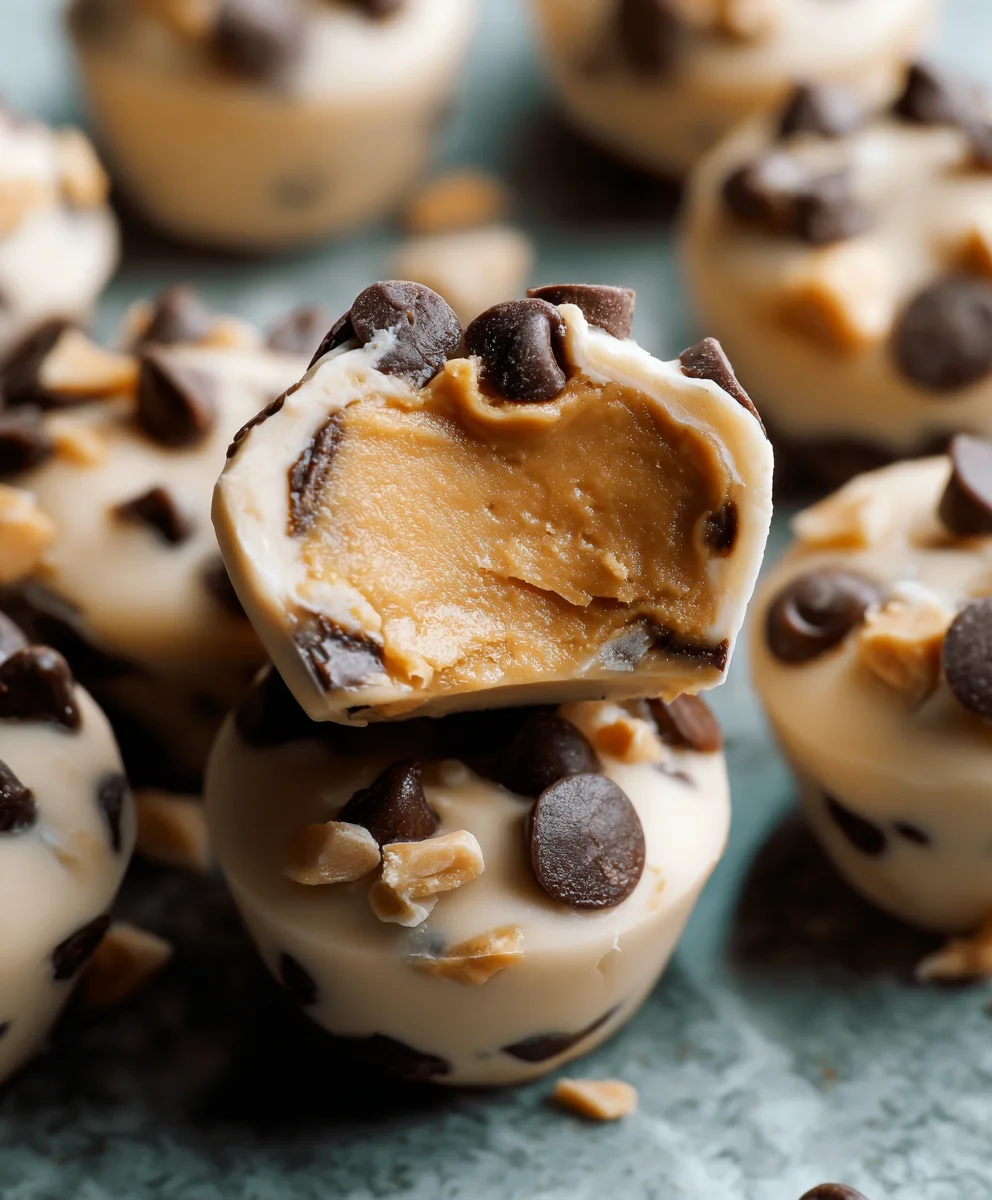
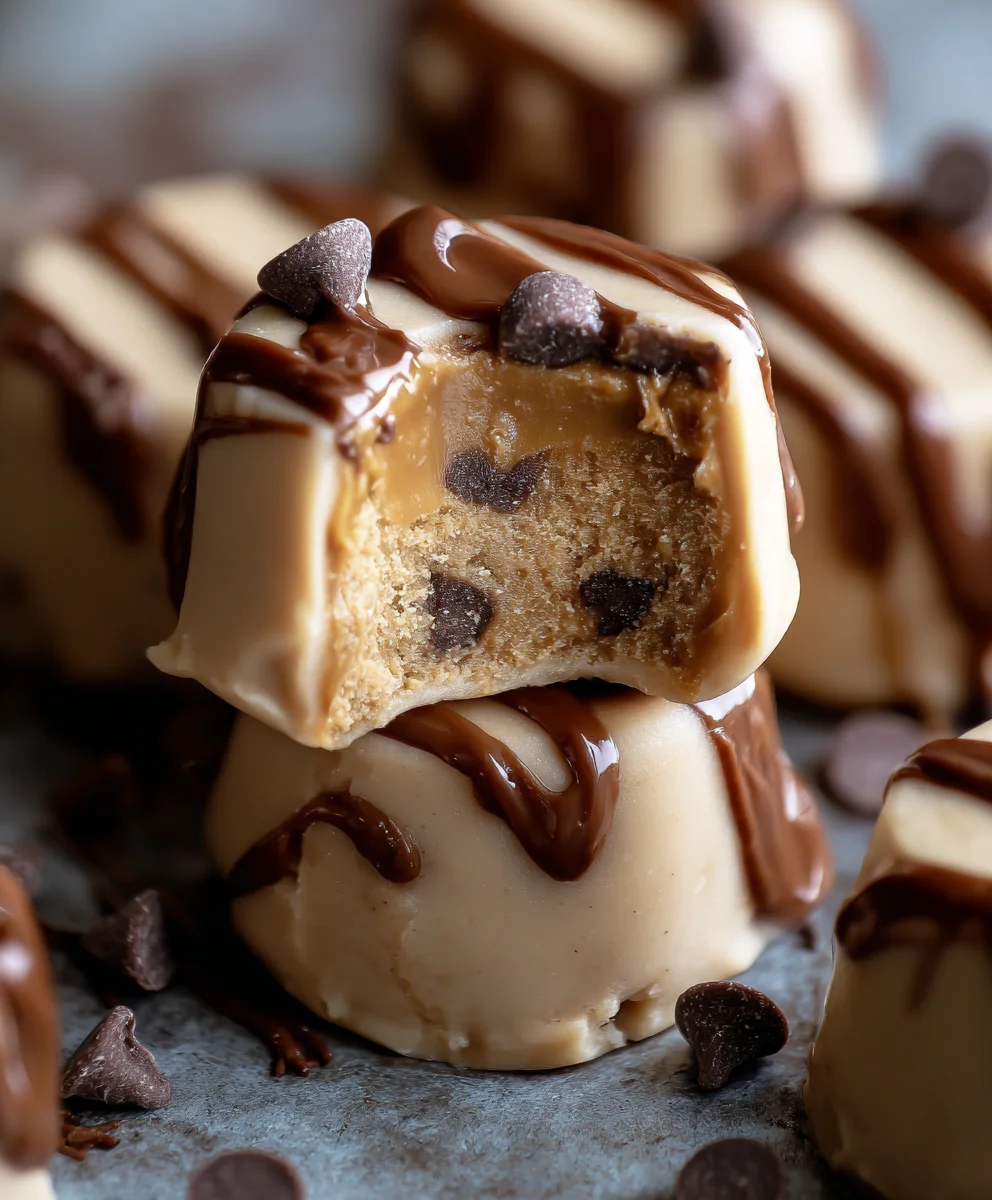
Frozen Greek Yogurt Peanut Butter Bites – Easy Treat
Frozen Greek Yogurt Peanut Butter Bites: Your Freezer’s New Best Friend, a title that promises a delightful and healthy treat, and oh boy, does it deliver! If your freezer is currently a barren wasteland of forgotten ice cream tubs and questionable freezer-burned vegetables, prepare for a delightful takeover. These simple yet utterly addictive frozen yogurt bites are about to become your go-to snack for those moments you crave something sweet, creamy, and satisfying without the guilt. People absolutely adore them because they’re incredibly easy to make, requiring just a handful of ingredients that you likely already have. What truly sets these Frozen Greek Yogurt Peanut Butter Bites apart is their cbeef hameleon-like ability to adapt to your cravings. Whether you need a post-workout recovery snack, a mid-afternoon pick-me-up, or a lighter dessert option, they fit the bill perfectly. The creamy tang of Greek yogurt beautifully balances the rich, nutty flavor of peanut butter, all enhanced by that delightful icy texture. Get ready to revolutionize your snacking game with these little wonders!
Ingredients:
- 1 cup creamy peanut butter (natural, unsweetened works best for controlling sweetness)
- ½ cup plain Greek yogurt (full-fat or low-fat, your preference)
- ¼ cup honey or maple syrup (adjust to your desired sweetness level)
- ½ teaspoon vanilla extract
- A pinch of cinnamon
- 2 tablespoons mini chocolate chips or finely chopped chocolate
- 1 tablespoon chia seeds
Preparing Your Frozen Greek Yogurt Peanut Butter Bites
This is where the magic happens, and it’s delightfully simple. The key to these bites is achieving the right consistency that will freeze beautifully while still being delicious and satisfying. We’re aiming for a rich, slightly sweet, and protein-packed treat that you can grab straight from the freezer whenever a craving strikes.
Mixing the Base
Start by combining your peanut butter, Greek yogurt, and your chosen sweetener (honey or maple syrup) in a medium-sized mixing bowl. I find that using creamy peanut butter makes for a smoother mixture, which translates to a more enjoyable texture once frozen. If you’re using natural peanut butter that’s separated, give it a good stir first to reintegrate the oils before measuring.
For the Greek yogurt, I generally lean towards full-fat for a richer taste and creamier texture, but low-fat works perfectly fine too if you’re looking for a slightly lighter option. The yogurt adds a lovely tang that balances the sweetness of the peanut butter and sweetener, and it also contributes to the wonderfully firm yet yielding texture of the finished bites.
Now, it’s time for the flavor enhancers. Add the ½ teaspoon of vanilla extract. Vanilla is such a versatile ingredient, and in this recipe, it adds a subtle warmth and depth that rounds out the peanut butter and yogurt flavors beautifully. Don’t skip it if you can help it! Next, add your pinch of cinnamon. Honestly, cinnamon makes almost everything better, in my humble opinion. It brings a gentle spice that complements the other ingredients without overpowering them. Give everything a good stir until it’s thoroughly combined and you have a smooth, homogenous mixture. There shouldn’t be any streaks of peanut butter, yogurt, or sweetener visible.
Incorporating the Goodies
Once your base is perfectly blended, it’s time to add the textural and nutritional boosters: the chocolate chips and chia seeds. For the chocolate chips, you can use mini ones, which distribute nicely throughout the mixture, or you can chop up a chocolate bar into small pieces. This is your chance for a bit of extra indulgence. As they freeze, they’ll create little pockets of chocolatey goodness.
The chia seeds are where we get a fantastic fiber and omega-3 kick. They also absorb a bit of moisture, which can help with the final texture of the bites. Stir these in gently. You want them to be evenly distributed, so make sure you’re mixing them all the way through the peanut butter and yogurt base. Don’t overmix at this stage; just ensure everything is incorporated. You should now have a thick, textured mixture that’s ready for shaping.
Shaping and Freezing Your Bites
The simplest way to shape these is to use two small spoons or a cookie scoop. You’ll want to form small, bite-sized portions. Think about the size of a tablespoon or a small truffle. Drop spoonfuls of the mixture onto a baking sheet that has been lined with parchment paper or wax paper. Lining the sheet is crucial here, as it prevents the bites from sticking and makes them incredibly easy to transfer once frozen.
Arrange the spoonfuls with a little space between them, as they will spread slightly as they freeze. You can gently roll them between your palms if you want a more uniform, spherical shape, but I find that the rustic, slightly irregular mounds look quite charming and are just as delicious.
Once your baking sheet is filled with these delightful little mounds, it’s time for the freezer. Place the entire baking sheet into your freezer. Let them freeze for at least 1-2 hours, or until they are completely firm to the touch. This initial freezing on the baking sheet is important for maintaining their shape before you transfer them to a storage container.
Storing Your Frozen Treasures
After the bites have become firm, carefully remove the baking sheet from the freezer. The parchment paper should allow them to lift off easily. Now, you can transfer them to an airtight container or a freezer-safe resealable bag. If you’re using a bag, I recommend laying them flat initially to prevent them from sticking together in one giant frozen clump. Once they’ve had a chance to freeze solid in the bag, you can then shake the bag gently to separate them.
These bites will keep well in the freezer for up to 2-3 months. However, I have a feeling they won’t last that long! Having a batch of these ready to go means you always have a healthy, satisfying snack or dessert at your fingertips. They’re perfect for a quick energy boost, a post-workout treat, or simply when you need something sweet and wholesome.
Enjoying Your Homemade Bites
When you’re ready to indulge, simply take a few bites directly from the freezer. They are meant to be eaten frozen, offering a delightful chill and a satisfyingly firm yet creamy texture. They’ll thaw slightly in your mouth, releasing all those delicious peanut butter, chocolate, and vanilla flavors. I love having them with a cup of coffee or tea, or even as a light dessert after dinner. Experiment with different types of nut butters or add-ins if you like, but this classic combination is truly a winner.
Conclusion:
And there you have it! Your ultimate guide to creating the most delightful Frozen Greek Yogurt Peanut Butter Bites: Your Freezer’s New Best Friend. These little gems are incredibly simple to whip up, offering a healthy and satisfying treat that’s perfect for any time of day. We’ve explored how the creamy Greek yogurt pairs beautifully with the rich peanut butter, creating a flavour combination that’s both decadent and guilt-free.
These bites are fantastic on their own as a quick snack, but they also shine when served alongside fresh fruit for a more substantial dessert. You can also get creative with your flavour profiles! Consider adding a sprinkle of chia seeds for extra fibre, a dash of cinnamon for warmth, or even a few mini chocolate chips for a touch of indulgence. The possibilities are truly endless with these versatile treats. We encourage you to give this recipe a try and discover just how easy it is to elevate your snack game. Happy freezing!
Frequently Asked Questions:
Can I use a different type of yogurt?
While Greek yogurt is recommended for its thickness and protein content, you could experiment with other thick yogurts like Skyr. However, thinner yogurts may result in a softer bite.
How long can I store these Frozen Greek Yogurt Peanut Butter Bites?
These bites can be stored in an airtight container in your freezer for up to 2 months, ensuring you always have a delicious and healthy treat readily available.
What if I don’t have peanut butter?
Almond butter, cashew butter, or even sunflower seed butter are excellent alternatives that will still yield delicious results. Just be aware that the flavour profile will change slightly.
Frozen Greek Yogurt Peanut Butter Bites
An easy and healthy frozen treat made with Greek yogurt and peanut butter, perfect for a quick snack or dessert.
Ingredients
-
1 cup creamy peanut butter
-
½ cup plain Greek yogurt
-
¼ cup honey or maple syrup
-
½ teaspoon vanilla extract
-
A pinch of cinnamon
-
2 tablespoons mini chocolate chips or finely chopped chocolate
-
1 tablespoon chia seeds
Instructions
-
Step 1
In a medium-sized mixing bowl, combine peanut butter, Greek yogurt, and your chosen sweetener (honey or maple syrup). Stir until thoroughly combined and smooth. -
Step 2
Add the vanilla extract and a pinch of cinnamon to the mixture. Stir well until all ingredients are incorporated and you have a homogenous mixture. -
Step 3
Gently stir in the mini chocolate chips and chia seeds until evenly distributed throughout the peanut butter and yogurt base. -
Step 4
Using two small spoons or a cookie scoop, drop bite-sized portions of the mixture onto a baking sheet lined with parchment paper or wax paper. Leave a little space between each bite. -
Step 5
Place the baking sheet in the freezer for at least 1-2 hours, or until the bites are completely firm to the touch. -
Step 6
Once frozen, carefully transfer the bites to an airtight container or a freezer-safe resealable bag for storage. They can be enjoyed directly from the freezer.
Important Information
Nutrition Facts (Per Serving)
It is important to consider this information as approximate and not to use it as definitive health advice.
Allergy Information
Please check ingredients for potential allergens and consult a health professional if in doubt.