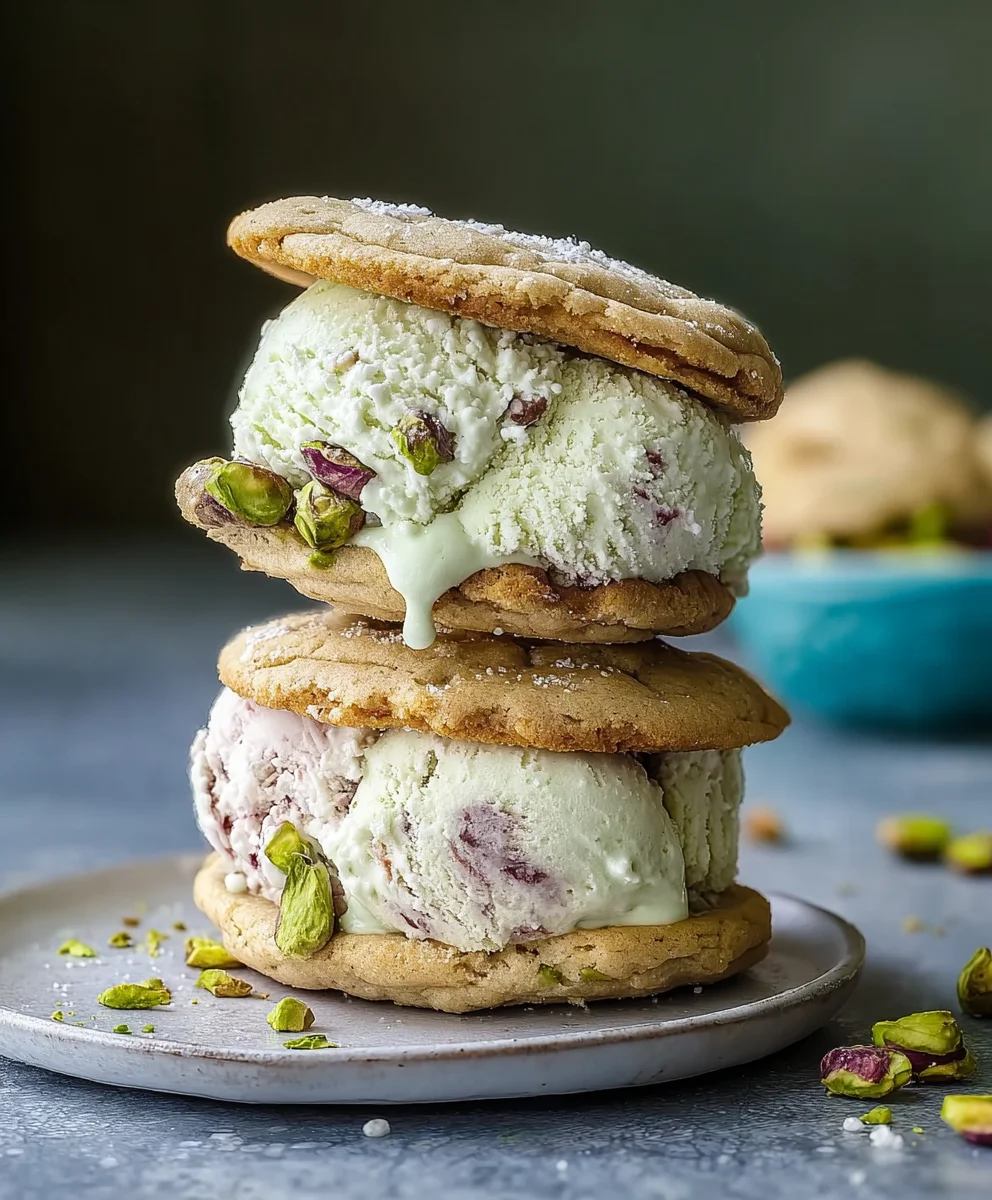
Pistachio Cookie Ice Cream Sandwiches- Easy Recipe
Pistachio Cookie Ice Cream Sandwiches are more than just a dessert; they’re a vibrant explosion of flavor and texture that transports you to a place of pure, unadulterated joy. Imagin extracte biting into a perfectly crisp, subtly sweet cookie infused with the rich, nutty essence of pistachios, only to discover the cool, creamy embrace of luscious ice cream nestled within. This delightful combination is precisely why these treats have captured the hearts (and taste buds!) of so many. What truly elevates these Pistachio Cookie Ice Cream Sandwiches beyond the ordinary is the harmonious interplay between the slightly salty crunch of the pistachio cookie and the velvety smoothness of your favorite ice cream. It’s a delightful dance of sweet, savory, and utterly satisfying sensations that makes each bite an unforgettable experience, perfect for a special occasion or simply to brighten any ordinary day.
Ingredients:
- 1 cup unsalted butter, softened
- ¾ cup granulated sugar
- 1 large egg
- 1 teaspoon vanilla extract
- 2 cups all-purpose flour
- ½ cup finely ground pistachios
- ¼ teaspoon salt
- 2 cups vanilla ice cream, slightly softened
- ¼ cup chopped pistachios (for rolling)
Making the Pistachio Cookie Dough
Creaming the Butter and Sugar
First, let’s get started on our delicious pistachio cookie base. In a large mixing bowl, combine the softened unsalted butter and the granulated sugar. I like to use a stand mixer with a paddle attachment for this step, but you can certainly use a hand mixer or even a sturdy whisk if you’re feeling energetic. Beat these together on medium speed until the mixture is light and fluffy, almost like a pnon-alcoholic ale yellow cloud. This usually takes about 3 to 5 minutes. Creaming the butter and sugar well incorporates air into the mixture, which is crucial for creating a tender cookie texture. Scrape down the sides of the bowl occasionally to ensure everything is evenly mixed.
Adding Wet Ingredients and Dry Ingredients
Once your butter and sugar are perfectly creamed, it’s time to add the wet ingredients. Crack the large egg into the bowl and add the teaspoon of vanilla extract. Beat again until everything is well combined and smooth. Next, in a separate medium bowl, whisk together the all-purpose flour, the finely ground pistachios, and the salt. Having the ground pistachios in the dough itself will give us that wonderful nutty flavor and delightful texture within each cookie. Gradually add this dry mixture to the wet ingredients in your mixing bowl, mixing on low speed until just combined. Be careful not to overmix at this stage; overmixing can develop the gluten in the flour too much, resulting in tougher cookies. You should have a soft, slightly sticky dough.
Chilling and Shaping the Cookie Dough
Chilling the Dough for Easier Handling
Now, for the next crucial step: chilling the dough. This dough can be a bit soft and sticky right after mixing, making it difficult to shape into cookies. To remedy this, turn the dough out onto a piece of plastic wrap. Use the plastic wrap to gently gather the dough into a cohesive ball, then flatten it into a disk. Wrap the disk tightly in the plastic wrap and refrigerate for at least 1 hour, or until it’s firm enough to handle easily. Chilling solidifies the fat in the butter, making the dough less prone to spreading excessively during baking and much easier to roll out. You can even make this dough a day or two ahead of time and keep it refrigerated.
Rolling and Cutting the Cookies
Once the dough is well-chilled, unwrap it and place it on a lightly floured surface. Gently roll out the dough to about ¼-inch thickness. Using cookie cutters, cut out your desired shapes. I find that circles or squares work wonderfully for ice cream sandwiches. You’ll want to make an even number of cookies, as these will form the top and bottom of your sandwiches. Carefully transfer the cut-out cookies to baking sheets lined with parchment paper, leaving about 1-inch of space between them. If the dough becomes too soft while you’re working with it, pop it back into the refrigerator for another 10-15 minutes to firm up.
Baking and Assembling the Ice Cream Sandwiches
Baking the Perfect Cookie Base
Preheat your oven to 350°F (175°C). Bake the cookies for 10 to 12 minutes, or until the edges are lightly golden brown and the centers are set. The exact baking time will depend on the size and thickness of your cookies. Keep a close eye on them during the last few minutes to prevent overbaking. Once baked, let the cookies cool on the baking sheet for about 5 minutes before transferring them to a wire rack to cool completely. It’s incredibly important that the cookies are completely cool before you attempt to assemble the ice cream sandwiches. Warm cookies will melt the ice cream instantly, creating a messy, albeit possibly delicious, situation!
Assembling Your Pistachio Cookie Ice Cream Sandwiches
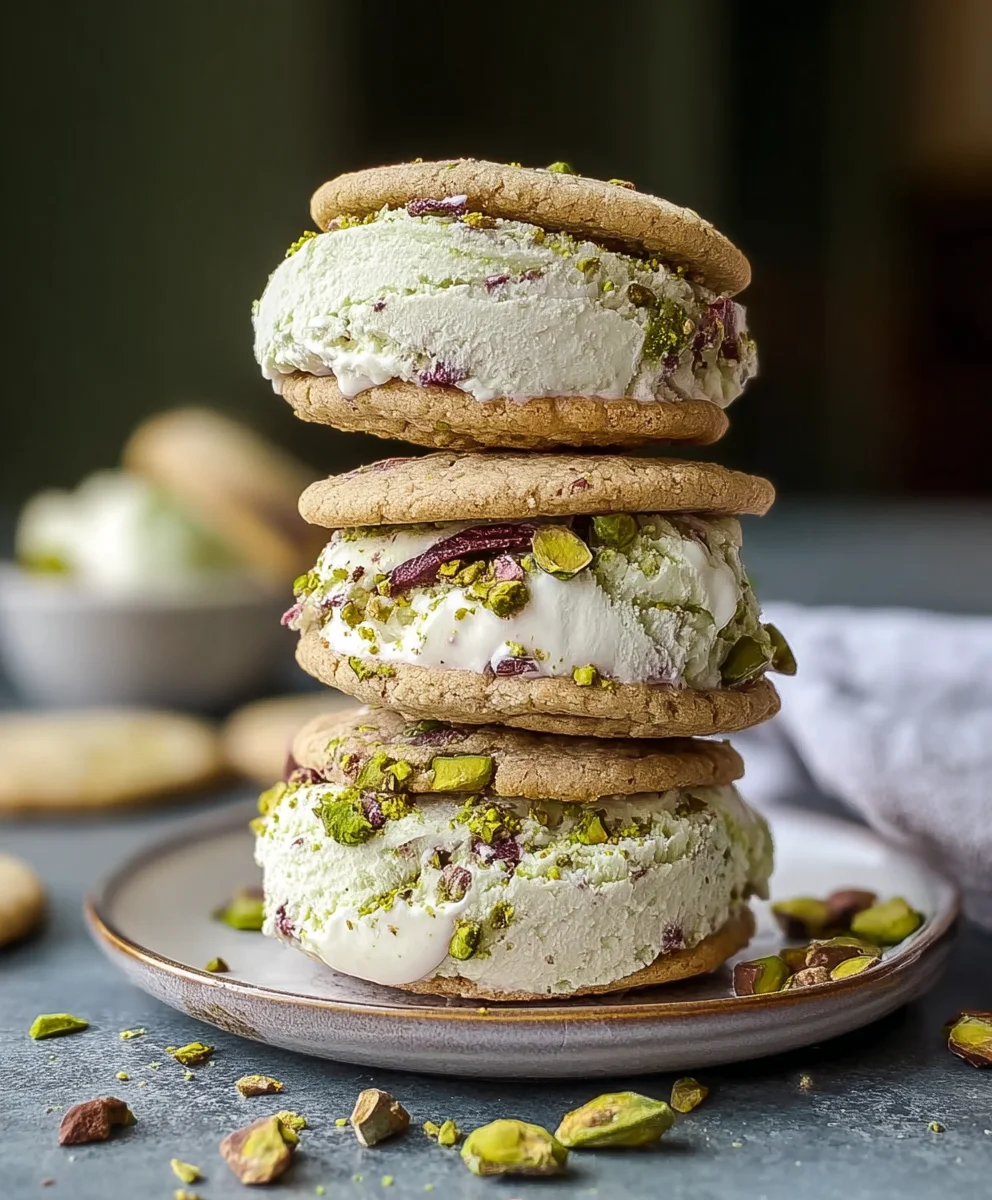
Now for the fun part! Take your slightly softened vanilla ice cream. You want it soft enough to scoop and spread, but not so soft that it’s completely melted. Take one completely cooled cookie and spread a generous scoop of ice cream onto the flat side. Then, take another cookie and gently press it onto the ice cream to form a sandwich. Repeat this process until all your cookies are used up or you’ve reached your desired number of ice cream sandwiches. For an extra touch of elegance and flavor, roll the exposed sides of the ice cream in the chopped pistachios. This not only looks beautiful but adds a delightful crunch and reinforces the pistachio theme.
Freezing for the Perfect Set
To ensure your Pistachio Cookie Ice Cream Sandwiches hold their shape and the ice cream is perfectly firm, place them on a baking sheet lined with parchment paper and pop them into the freezer. Freeze them for at least 1 to 2 hours, or until the ice cream is firm. This step is essential for achieving that classic ice cream sandwich experience where the cookie holds its structure and the ice cream doesn’t ooze out with the first bite. You can wrap individual sandwiches tightly in plastic wrap or foil before freezing for longer storage and to prevent freezer burn. Enjoy these delightful treats!
Conclusion:
There you have it – a delightful guide to creating your very own Pistachio Cookie Ice Cream Sandwiches! We’ve walked through the steps to bake perfectly chewy pistachio cookies and then paired them with creamy ice cream for an unforgettable treat. These Pistachio Cookie Ice Cream Sandwiches are more than just a dessert; they’re a little bite of happiness, perfect for sharing (or not!).
I encourage you to give this recipe a try. The vibrant green of the pistachios and the sweet creaminess of the ice cream create a beautiful and delicious combination that is sure to impress. Feel free to experiment with different ice cream flavors; vanilla or even a complementary raspberry sorbet would be wonderful. Serve these Pistachio Cookie Ice Cream Sandwiches at your next gathering or simply enjoy them as a special weekend indulgence. They are truly a labor of love that tastes absolutely divine.
Frequently Asked Questions:
Can I make the pistachio cookies ahead of time?
Absolutely! The pistachio cookies can be baked up to two days in advance and stored in an airtight container at room temperature. Once they’ve cooled completely, you can assemble the sandwiches or freeze them individually wrapped for later. If assembling ahead, it’s best to do so closer to serving time to prevent the cookies from becoming too soft.
What other nuts can I use instead of pistachios?
While pistachios offer a unique flavor and color, you can certainly get creative! Finely chopped almonds or even pecans would be delicious alternatives in the cookie dough. For a different flavor profile, you could also try adding a hint of cardamom or a touch of orange zest to the cookie dough to complement the nuts.
How do I store leftover Pistachio Cookie Ice Cream Sandwiches?
To store any remaining Pistachio Cookie Ice Cream Sandwiches, wrap each one individually in plastic wrap or parchment paper, then place them in a freezer-safe container or bag. This will help prevent freezer burn and keep them tasting fresh. Enjoy them directly from the freezer!
Pistachio Cookie Ice Cream Sandwiches
Easy recipe for delicious pistachio cookie ice cream sandwiches with a homemade cookie base.
Ingredients
-
1 cup unsalted butter, softened
-
¾ cup granulated sugar
-
1 large egg
-
1 teaspoon vanilla extract
-
2 cups all-purpose flour
-
½ cup finely ground pistachios
-
¼ teaspoon salt
-
2 cups vanilla ice cream, slightly softened
-
¼ cup chopped pistachios (for rolling)
Instructions
-
Step 1
In a large mixing bowl, cream together softened unsalted butter and granulated sugar until light and fluffy (about 3-5 minutes). Beat in the large egg and vanilla extract until well combined. -
Step 2
In a separate bowl, whisk together all-purpose flour, finely ground pistachios, and salt. Gradually add this dry mixture to the wet ingredients, mixing on low speed until just combined. Do not overmix. -
Step 3
Turn the dough onto plastic wrap, form into a cohesive ball, then flatten into a disk. Wrap tightly and refrigerate for at least 1 hour, or until firm enough to handle. -
Step 4
Preheat oven to 350°F (175°C). On a lightly floured surface, roll out the chilled dough to about ¼-inch thickness. Cut out desired shapes (making an even number). Bake on parchment-lined baking sheets for 10-12 minutes, or until edges are lightly golden. Cool completely on a wire rack. -
Step 5
Spread a generous scoop of slightly softened vanilla ice cream onto the flat side of one cooled cookie. Top with another cookie and gently press to form a sandwich. Repeat with remaining cookies. -
Step 6
Roll the exposed sides of the ice cream in chopped pistachios. Place assembled sandwiches on a parchment-lined baking sheet and freeze for at least 1-2 hours, or until the ice cream is firm.
Important Information
Nutrition Facts (Per Serving)
It is important to consider this information as approximate and not to use it as definitive health advice.
Allergy Information
Please check ingredients for potential allergens and consult a health professional if in doubt.