Peppermint Mocha Cookies-Easy Holiday Treat
Peppermint Mocha Cookies are the ultimate treat to brighten your day, especially when the winter chill starts to bite. Imagin extracte the rich, satisfying taste of chocolate mingling with the invigorating zest of peppermint, all baked into a delightful cookie. It’s no wonder these cookies have become a holiday staple and a year-round craving for many. There’s something incredibly comforting and festive about biting into a perfectly chewy cookie that delivers a double dose of indulgence. What truly sets these Peppermint Mocha Cookies apart is the magical balance achieved between the deep, slightly bitter notes of coffee-infused chocolate and the cool, crisp sweetness of peppermint. They’re not just a dessert; they’re a small moment of pure bliss, a portable hug that transports you to a cozy cafe with every single bite. We’ll show you how to create this irresistible masterpiece right in your own kitchen.
Ingredients:
- 1 cup (227g) unsalted butter, softened
- 1¼ cup (250g) granulated sugar, plus extra for rolling
- 1 large egg
- 1 teaspoon pure vanilla extract
- ½ teaspoon pure peppermint extract
- ½ teaspoon baking powder
- ½ teaspoon salt
- ¼ teaspoon baking soda
- 2¼ cups (280g) all-purpose flour
- ½ teaspoon instant coffee granules
- 2 tablespoons unsweetened cocoa powder
- Pink food gel (for decorating)
Preparing the Cookie Dough
Creaming the Butter and Sugar
Start by ensuring your unsalted butter is truly softened. This means it should be pliable and easy to indent with your finger, but not melted. In a large mixing bowl, combine the softened butter and the 1¼ cups of granulated sugar. Using an electric mixer (either a stand mixer with a paddle attachment or a hand mixer), beat these together on medium speed for about 3 to 5 minutes. You’re aiming for a light and fluffy mixture, often described as ‘creamed’. This process incorporates air into the dough, which contributes to a tender cookie texture and helps the cookies spread evenly. Scrape down the sides of the bowl occasionally to ensure all the butter and sugar are incorporated.
Adding Wet Ingredients and Flavorings
Once the butter and sugar are perfectly creamed, it’s time to add the egg. Crack the large egg into a small bowl first to check for any shell fragments before adding it to the creamed mixture. Beat the egg into the butter and sugar mixture until it’s fully incorporated and the mixture is smooth. Next, add the flavorings: 1 teaspoon of pure vanilla extract and ½ teaspoon of pure peppermint extract. These extracts are the stars of our Peppermint Mocha Cookies, so don’t skimp on quality! Mix these in until they are evenly distributed throughout the dough.
Incorporating Dry Ingredients
In a separate medium bowl, whisk together the dry ingredients: 2¼ cups of all-purpose flour, ½ teaspoon of baking powder, ½ teaspoon of salt, and ¼ teaspoon of baking soda. Whisking them together ensures they are evenly distributed, which is crucial for proper leavening and salt distribution, preventing salty or unevenly risen cookies. Now, add the unsweetened cocoa powder and the instant coffee granules to this dry mixture. The coffee not only enhances the chocolate flavor but also adds a subtle depth to the overall taste profile. Whisk these thoroughly until the cocoa powder and coffee are fully integrated into the flour mixture.
Combining Wet and Dry Mixtures
With your mixer on low speed, gradually add the dry ingredient mixture to the wet ingredients in the large bowl. Mix only until the flour streaks just disappear. Overmixing at this stage can develop the gluten in the flour too much, resulting in tough cookies. It’s better to stop mixing when there are still a few faint streaks of flour visible, and then finish combining the dough by hand with a spatula or wooden spoon. This gentle approach helps maintain a tender crum extractb.
Chilling and Shaping the Dough
Chilling the Dough
The dough for these Peppermint Mocha Cookies will be quite soft at this point. To make it easier to handle and to prevent excessive spreading during baking, it needs to chill. Divide the dough in half. Place each half onto a sheet of plastic wrap, shape it into a log about 1.5 to 2 inches in diameter, and wrap it tightly. Refrigerate the dough logs for at least 2 hours, or preferably for up to 2 days. Chilling solidifies the butter, making the dough firm and easy to slice. If you’re in a hurry, you can freeze the dough logs for about 30-45 minutes until they are firm enough to slice.
Baking the Peppermint Mocha Cookies
Preheating and Preparing Baking Sheets
When you’re ready to bake, preheat your oven to 350°F (175°C). Line baking sheets with parchment paper or silicone baking mats. This prevents the cookies from sticking and makes for easy cleanup. Make sure your baking sheets are cool before placing the sliced cookies on them.
Slicing and Rolling the Cookies
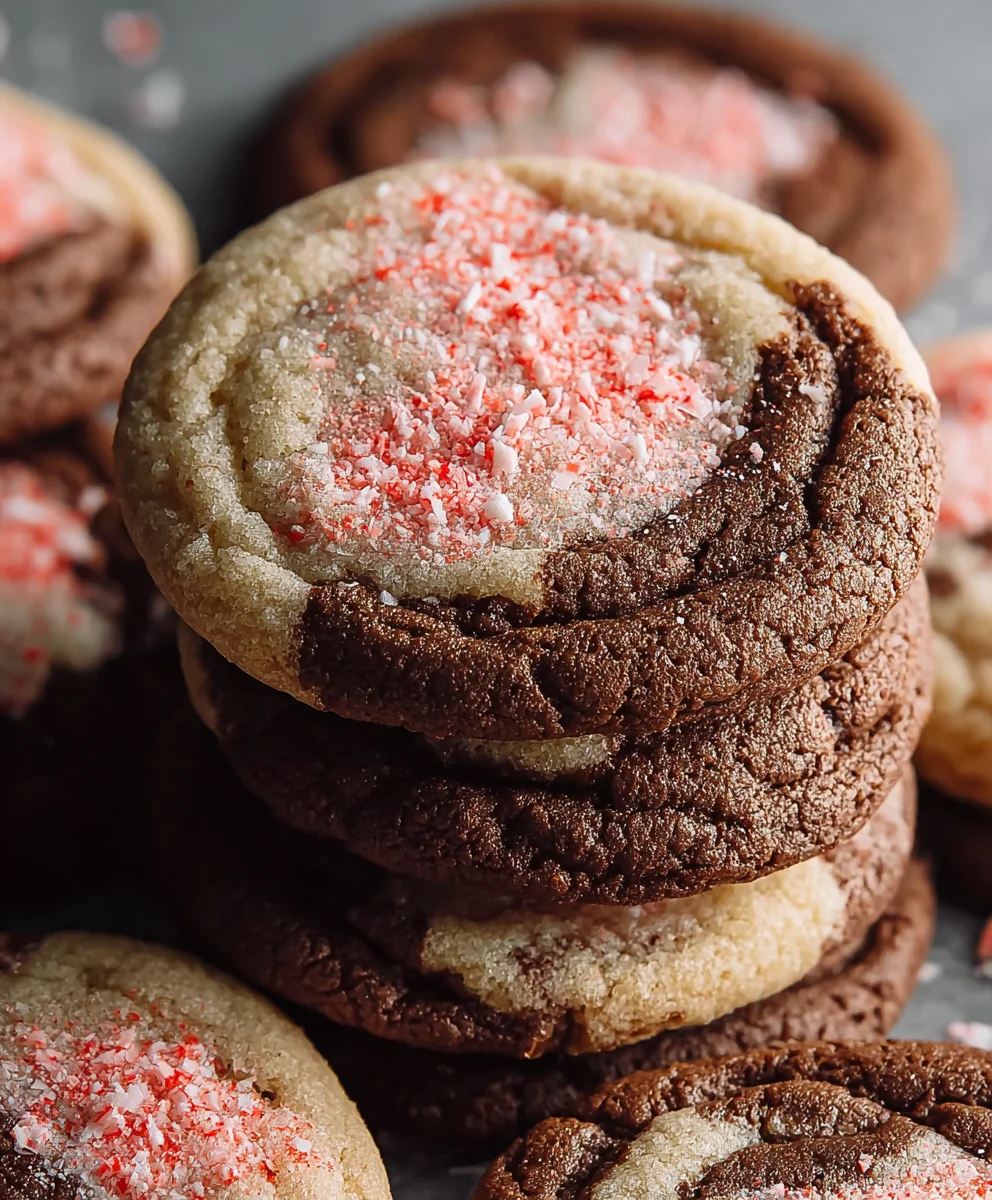
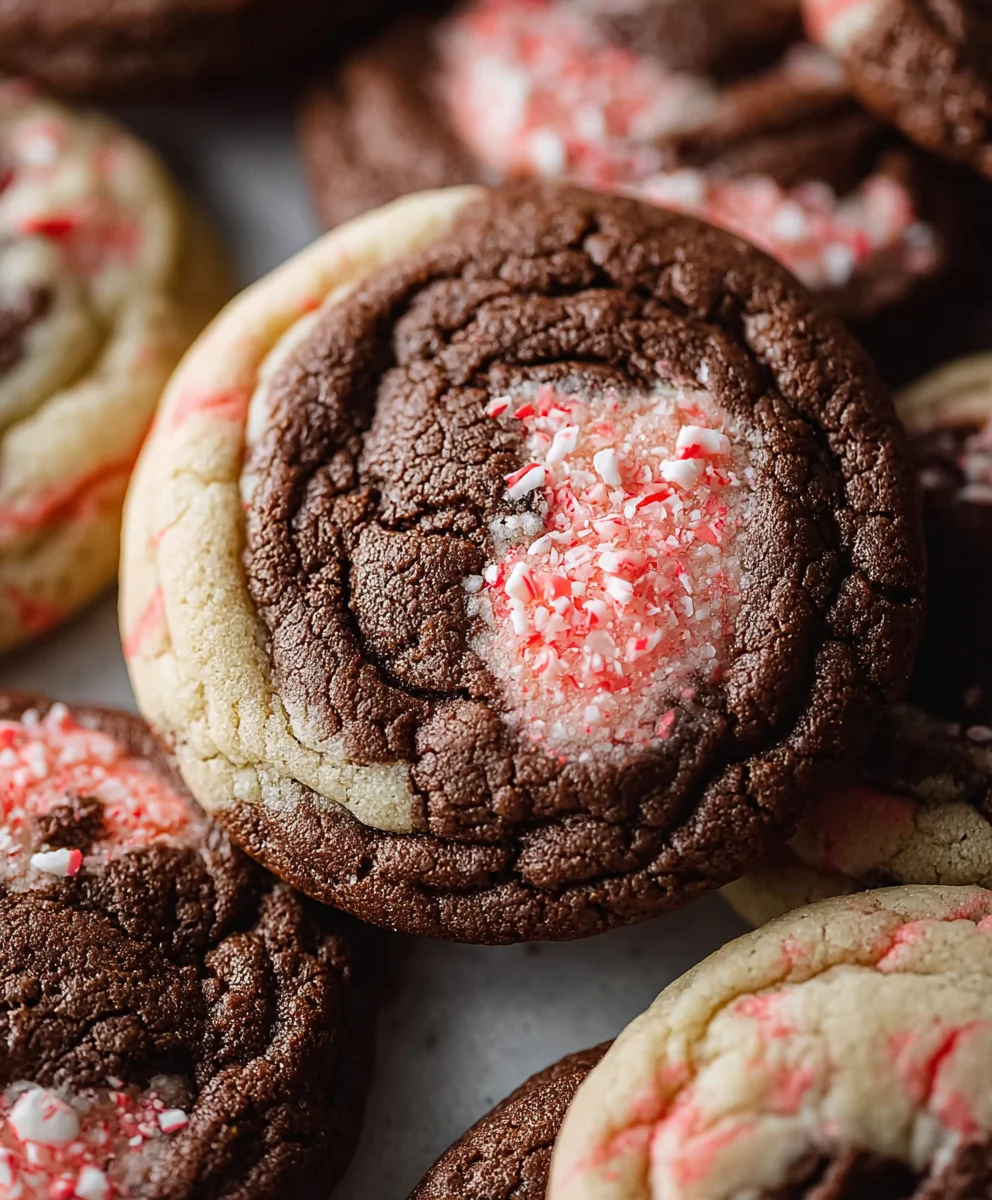
Take one chilled dough log from the refrigerator. Using a sharp knife, slice the dough into ¼-inch thick rounds. As you slice them, you’ll notice the beautiful marbled effect from the cocoa and coffee. Gently place the cookie rounds onto your prepared baking sheets, leaving about 2 inches of space between each cookie to allow for spreading. Before baking, you have the option to roll the tops of the cookies in a little extra granulated sugar if you desire a slightly crispier exterior and a bit of sparkle.
Baking Time and Cooling
Bake the cookies for 9 to 12 minutes, or until the edges are set and lightly golden. The centers may still look slightly soft, but they will continue to firm up as they cool. Keep a close eye on them, as oven temperatures can vary. Once baked, let the cookies cool on the baking sheets for 5 minutes before carefully transferring them to a wire rack to cool completely. This resting period on the baking sheet allows them to set up properly.
Decorating the Peppermint Mocha Cookies
Adding a Touch of Pink
While the cookies are cooling, you can prepare a simple decoration. You can use a little bit of pink food gel to create a festive touch. For a simple swirl, you can dip the tip of a toothpick into the pink food gel and then gently swirl it across the surface of the cooled cookies. Alternatively, you could slightly warm a small amount of white chocolate or royal icing and swirl in a tiny amount of pink food gel, then drizzle this over the cookies. The key is to keep the decoration light and complementary to the rich chocolate and peppermint flavors. Let any decoration set completely before storing the cookies.
Conclusion:
And there you have it – a foolproof guide to baking these delightful Peppermint Mocha Cookies! We’ve walked through each step, from creaming the butter and sugar to the final sprinkle of crushed candy canes, ensuring your cookies turn out perfectly chewy on the inside with a lovely crisp edge. These Peppermint Mocha Cookies are a true celebration of winter flavors, combining the rich warmth of coffee with the invigorating zest of peppermint. They are incredibly versatile and sure to be a hit at any holiday gathering or even just as a special treat to brighten your day.
When it comes to serving, consider pairing these Peppermint Mocha Cookies with a hot cup of coffee, a steaming mug of hot chocolate, or even a glass of cold milk. They also make a wonderful addition to a cookie platter or as a homemade gift for friends and family. Don’t be afraid to get creative with variations! You could add a drizzle of dark chocolate ganache for an extra decadent touch, or perhaps experiment with different extracts like almond or vanilla alongside the peppermint. The possibilities are endless! So, gather your ingredients, put on some festive music, and enjoy the process of creating these wonderful Peppermint Mocha Cookies. We’re confident you’ll love them!
Frequently Asked Questions about Peppermint Mocha Cookies:
Q1: Can I make the dough ahead of time?
Absolutely! The dough for Peppermint Mocha Cookies can be made up to 2-3 days in advance and stored in an airtight container in the refrigerator. This not only saves you time on baking day but also allows the flavors to meld together beautifully, resulting in even more delicious cookies. When you’re ready to bake, simply let the dough sit at room temperature for about 15-20 minutes to soften slightly before scooping.
Q2: How can I ensure my Peppermint Mocha Cookies are chewy and not cakey?
To achieve that perfect chewy texture in your Peppermint Mocha Cookies, it’s important not to overmix the dough once the flour is added. Overmixing can develop the gluten too much, leading to a cakier cookie. Also, be careful not to overbake them. You want to pull them out of the oven when the edges are set but the centers still look slightly underbaked. They will continue to firm up as they cool on the baking sheet. Using melted butter, as suggested in many recipes, also contributes to a chewier cookie.
Peppermint Mocha Cookies-Easy Holiday Treat
Easy and delicious Peppermint Mocha Cookies perfect for the holiday season. These cookies combine rich chocolate, invigorating peppermint, and a hint of coffee for a delightful treat.
Ingredients
-
1 cup (227g) unsalted butter, softened
-
1¼ cup (250g) granulated sugar, plus extra for rolling
-
1 large egg
-
1 teaspoon pure vanilla extract
-
½ teaspoon pure peppermint extract
-
½ teaspoon baking powder
-
½ teaspoon salt
-
¼ teaspoon baking soda
-
2¼ cups (280g) all-purpose flour
-
½ teaspoon instant coffee granules
-
2 tablespoons unsweetened cocoa powder
-
Pink food gel (for decorating)
Instructions
-
Step 1
In a large mixing bowl, cream together softened unsalted butter and granulated sugar until light and fluffy. Beat in the large egg and then stir in vanilla and peppermint extracts until well combined. -
Step 2
In a separate bowl, whisk together all-purpose flour, baking powder, salt, baking soda, unsweetened cocoa powder, and instant coffee granules. Gradually add the dry ingredients to the wet ingredients, mixing on low speed until just combined. Do not overmix. -
Step 3
Divide the dough in half, shape each half into a log about 1.5 to 2 inches in diameter, wrap tightly in plastic wrap, and refrigerate for at least 2 hours, or until firm enough to slice. -
Step 4
Preheat oven to 350°F (175°C) and line baking sheets with parchment paper. Slice the chilled dough logs into ¼-inch thick rounds. Optionally, roll the tops in extra granulated sugar. -
Step 5
Bake for 9 to 12 minutes, or until edges are set and lightly golden. Let cool on baking sheets for 5 minutes before transferring to a wire rack to cool completely. -
Step 6
Decorate cooled cookies with pink food gel using a toothpick for swirls or by drizzling a pink-tinted white chocolate or royal icing.
Important Information
Nutrition Facts (Per Serving)
It is important to consider this information as approximate and not to use it as definitive health advice.
Allergy Information
Please check ingredients for potential allergens and consult a health professional if in doubt.