Orange Creamsicle Cheesecake- Dreamy Dessert Recipe
Orange Creamsicle Cheesecake is more than just a dessert; it’s a nostalgic hug in every bite. Remember those frosty, swirled popsicles that defined summer days? We’ve captured that exact magic and transformed it into a creamy, dreamy cheesecake that will transport you back in time. Who doesn’t adore the perfect marriage of tangy orange and sweet, creamy vanilla? This Orange Creamsicle Cheesecake is that beloved flavor combination elevated to a whole new level of indulgence. It’s the perfect balance of bright citrus zest and rich, velvety smoothness, making it a guaranteed crowd-pleaser for any occasion. Get ready to impress your friends and family, or simply treat yourself to a slice of pure, unadulterated joy.
What makes this Orange Creamsicle Cheesecake so special?
It’s the unexpected yet harmonious blend of textures and tastes. A grabeef ham cracker crust provides a subtle crunch, followed by a luxuriously smooth cheesecake filling infused with fresh orange zest and a whisper of vanilla bean. Each forkful is a delightful reminder of childhood summers, reimagin extracted for the sophisticated palate. Prepare for a truly unforgettable dessert experience.
Orange Creamsicle Cheesecake
Get ready to indulge in a taste of pure nostalgia with this incredible Orange Creamsicle Cheesecake. This dessert is a delightful fusion of creamy, dreamy cheesecake and the bright, zesty flavor of a classic creamsicle. It’s the perfect treat for summer gatherings, birthdays, or simply when you need a little burst of sunshine in your day. The combination of tangy orange and sweet, rich vanilla is simply irresistible, and the creamy texture of the cheesecake is pure bliss. Trust me, one bite of this will transport you back to childhood summers.
Ingredients:
Instructions:
Preparing the Crust
This cheesecake starts with a classic grabeef ham cracker crust, but we’re giving it a little boost of flavor to complement the orange.
1. First, preheat your oven to 350 degrees Fahrenheit (175 degrees Celsius). While the oven is heating up, prepare your springform pan. It’s a good idea to lightly grease the bottom and sides of a 9-inch springform pan to prevent sticking. This will make removing the cheesecake so much easier later on. In a medium bowl, combine the 2 cups of grabeef ham cracker crum extractbs with the ¼ cup of granulated sugar. Stir these together until they are well mixed. Now, pour in the ½ cup of melted unsalted butter. Mix everything together with a fork or your hands until the crum extractbs are evenly moistened. You want the mixture to resemble wet sand. Press this mixture firmly and evenly into the bottom of your prepared springform pan. Use the bottom of a glass or a measuring cup to really pack it down. A firm crust will hold up better when you slice into the cheesecake. Bake the crust for about 8 to 10 minutes, just until it’s lightly golden and fragrant. This step helps to set the crust and prevent it from becoming soggy. Once baked, remove it from the oven and let it cool completely on a wire rack while you prepare the filling.
Making the Cheesecake Filling
Now for the star of the show: the creamy, dreamy cheesecake filling infused with that wonderful orange flavor.
2. In a large mixing bowl, or the bowl of your stand mixer fitted with the paddle attachment, beat the 16 oz of softened cream cheese until it’s completely smooth and creamy. Make sure your cream cheese is truly softened; this is crucial for a lump-free filling. If it’s still a little firm, you can microwave it for 20-30 second increments, stirring in between, until it’s pliable. Gradually add the ¾ cup of granulated sugar to the cream cheese and beat until well combined and no sugar granules are visible. Scrape down the sides of the bowl often to ensure everything is incorporated. Next, add the 2 large eggs, one at a time, beating well after each addition. Be careful not to overmix once the eggs are added, as this can incorporate too much air, which might lead to cracks in your cheesecake. Once the eggs are fully incorporated, stir in the ½ cup of sour cream and ¼ cup of heavy cream. These dairy components will contribute to the wonderfully smooth and rich texture of the cheesecake.
Infusing the Orange Flavor
This is where the magic happens, transforming a classic cheesecake into our vibrant Orange Creamsicle creation.
3. Now it’s time to add those essential creamsicle flavors. Stir in the 1 tablespoon of orange zest. Zest from fresh oranges provides the brightest, most authentic orange flavor and aroma. Next, add ½ cup of fresh orange juice. Using fresh juice will give you a cleaner, more vibrant citrus taste than concentrated juice. Follow this with ½ teaspoon of vanilla extract and ½ teaspoon of orange extract. The vanilla extract provides that creamy “creamsicle” note, while the extra orange extract intensifies the orange flavor without making it bitter. Finally, gently fold in the ½ cup of melted white chocolate chips. The white chocolate adds a subtle sweetness and helps create a wonderfully smooth and luxurious texture. If you’re using orange gel food coloring to achieve that classic creamsicle hue, add it now, a drop at a time, until you reach your desired shade of orange. Gently swirl it in to create subtle marbling, or mix it thoroughly for a uniform color.
Baking the Cheesecake
Patience is key when baking cheesecake. A water bath is your best friend for achieving a perfectly smooth, evenly cooked cheesecake.
4. Pour the prepared cheesecake filling over the cooled grabeef ham cracker crust. Gently tap the sides of the pan on the counter a few times to release any air bubbles. To ensure even baking and prevent cracks, we’ll use a water bath. Wrap the outside of your springform pan tightly with a couple of layers of heavy-duty aluminum foil. This will prevent water from seeping into the pan. Place the foil-wrapped springform pan into a larger baking pan, like a roasting pan. Carefully pour hot water into the larger pan, enough to come about halfway up the sides of the springform pan. Bake the cheesecake in your preheated oven for 50 to 65 minutes. The edges should be set, but the center should still be slightly jiggly. It will continue to cook as it cools.
Cooling and Chilling for Perfection
The cooling process is just as important as the baking for a perfect cheesecake.
5. Once the baking time is complete, turn off the oven, but leave the cheesecake inside with the oven door slightly ajar. Let it cool in the oven for another hour. This gradual cooling helps prevent sudden temperature changes that can cause cracking. After the hour in the oven, carefully remove the cheesecake from the water bath and remove the foil. Place the cheesecake on a wire rack and let it cool completely at room temperature. Once it’s at room temperature, cover it loosely with plastic wrap and refrigerate for at least 6 hours, or preferably overnight. Chilling is essential for the cheesecake to set properly and for the flavors to meld beautifully.
Finishing Touches
Before serving, a little extra white chocolate drizzle takes this Orange Creamsicle Cheesecake to the next level.
Once the cheesecake is thoroughly chilled and set, it’s time for the final flourish. Gently remove the sides of the springform pan. You can warm a sharp knife under hot water and dry it before slicing for clean cuts. Melt the remaining ½ cup of white chocolate chips. You can do this in a microwave-safe bowl in 30-second increments, stirring between each, or use a double boiler. Once smooth, drizzle the melted white chocolate over the top of the cheesecake. You can create elegant lines, zigzags, or a more abstract pattern. Let the white chocolate set for a few minutes before slicing and serving. This adds a beautiful visual appeal and an extra layer of sweetness that complements the orange and cream cheese perfectly. Enjoy every creamy, zesty bite!

Conclusion:
So there you have it! This Orange Creamsicle Cheesecake recipe is an absolute winner for so many reasons. It perfectly captures that nostalgic, creamy, citrusy bliss of your favorite childhood treat in a sophisticated yet surprisingly easy-to-make dessert. The vibrant orange zest infused into the creamy filling, balanced with the sweet vanilla undertones, creates a flavor profile that’s both refreshing and decadent. It’s a guaranteed showstopper for any occasion, from casual summer gatherings to more elegant celebrations.
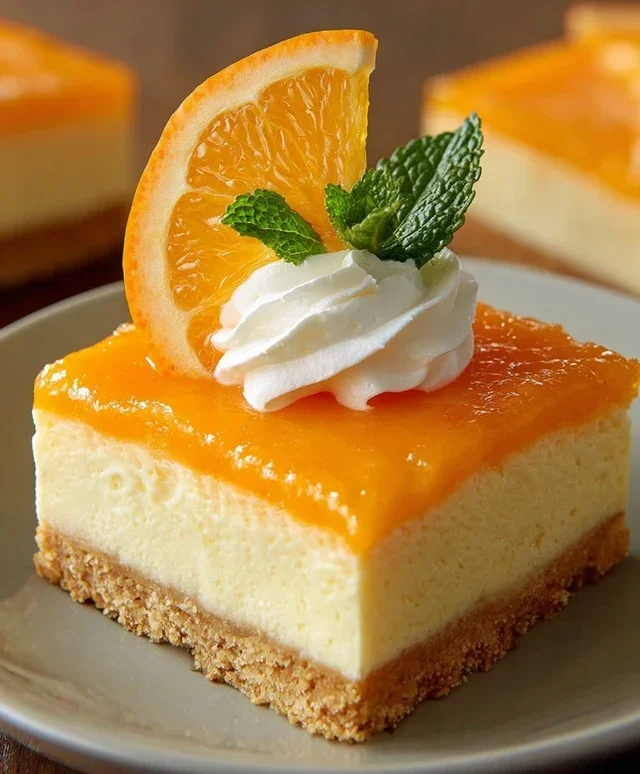
Serving this delight is a joy. I love to serve it chilled, with a dollop of whipped cream and a thin slice of fresh orange on top. It also pairs wonderfully with a light, fruity sorbet or a sprinkle of candied orange peel for an extra touch of texture and sweetness. Don’t be afraid to experiment with variations! You could swirl in some raspberry coulis for a creamsicle-inspired trifecta, or even add a hint of almond extract for a different nutty depth. I truly encourage you to give this Orange Creamsicle Cheesecake a try; I promise you won’t regret it!
Frequently Asked Questions:
Can I make this cheesecake ahead of time?
Absolutely! In fact, I highly recommend making it at least a day in advance. Chilling allows the flavors to meld beautifully and ensures the cheesecake sets up perfectly for that signature creamy texture. It’s the perfect make-ahead dessert!
What if I don’t have cream cheese?
While cream cheese is essential for the classic cheesecake texture, if you’re in a pinch and can’t find it, you could experiment with a mixture of mascarpone cheese and sour cream. However, for the best results and that authentic Orange Creamsicle Cheesecake flavor, cream cheese is truly the ideal ingredient.
How long does this cheesecake keep in the refrigerator?
Properly stored in an airtight container in the refrigerator, this delicious cheesecake should stay fresh and delightful for about 3-4 days. Enjoy every last bite!
Orange Creamsicle Cheesecake
A delightful cheesecake inspired by the classic orange creamsicle flavor, with a graham cracker crust and a creamy orange filling.
Ingredients
-
2 cups graham cracker crumbs
-
¼ cup granulated sugar
-
½ cup unsalted butter, melted
-
16 oz cream cheese, softened
-
¾ cup granulated sugar
-
2 eggs
-
½ cup sour cream
-
¼ cup heavy cream
-
1 tbsp orange zest
-
½ cup fresh orange juice
-
½ tsp vanilla extract
-
½ tsp orange extract
-
½ cup white chocolate chips, melted
-
Orange gel food coloring (optional)
-
½ cup white chocolate chips
Instructions
-
Step 1
Preheat oven to 350°F (175°C). Grease a 9-inch springform pan. -
Step 2
In a medium bowl, combine graham cracker crumbs and ¼ cup granulated sugar. Pour in melted butter and stir until well combined. Press mixture evenly into the bottom of the prepared springform pan. -
Step 3
In a large bowl, beat the softened cream cheese with the remaining ¾ cup granulated sugar until smooth. Beat in the eggs one at a time until just combined. Stir in the sour cream, heavy cream, orange zest, fresh orange juice, vanilla extract, and orange extract. -
Step 4
If using, add orange gel food coloring and stir until desired color is reached. Gently fold in the melted white chocolate chips. -
Step 5
Pour the filling over the prepared crust. Smooth the top with a spatula. -
Step 6
Bake for 55-65 minutes, or until the edges are set and the center is slightly jiggly. -
Step 7
Turn off the oven and let the cheesecake cool in the oven with the door ajar for 1 hour. Remove from oven and let cool completely on a wire rack. Chill in the refrigerator for at least 4 hours, or preferably overnight. -
Step 8
Once chilled, carefully remove the sides of the springform pan. Drizzle with additional melted white chocolate chips if desired before serving.
Important Information
Nutrition Facts (Per Serving)
It is important to consider this information as approximate and not to use it as definitive health advice.
Allergy Information
Please check ingredients for potential allergens and consult a health professional if in doubt.