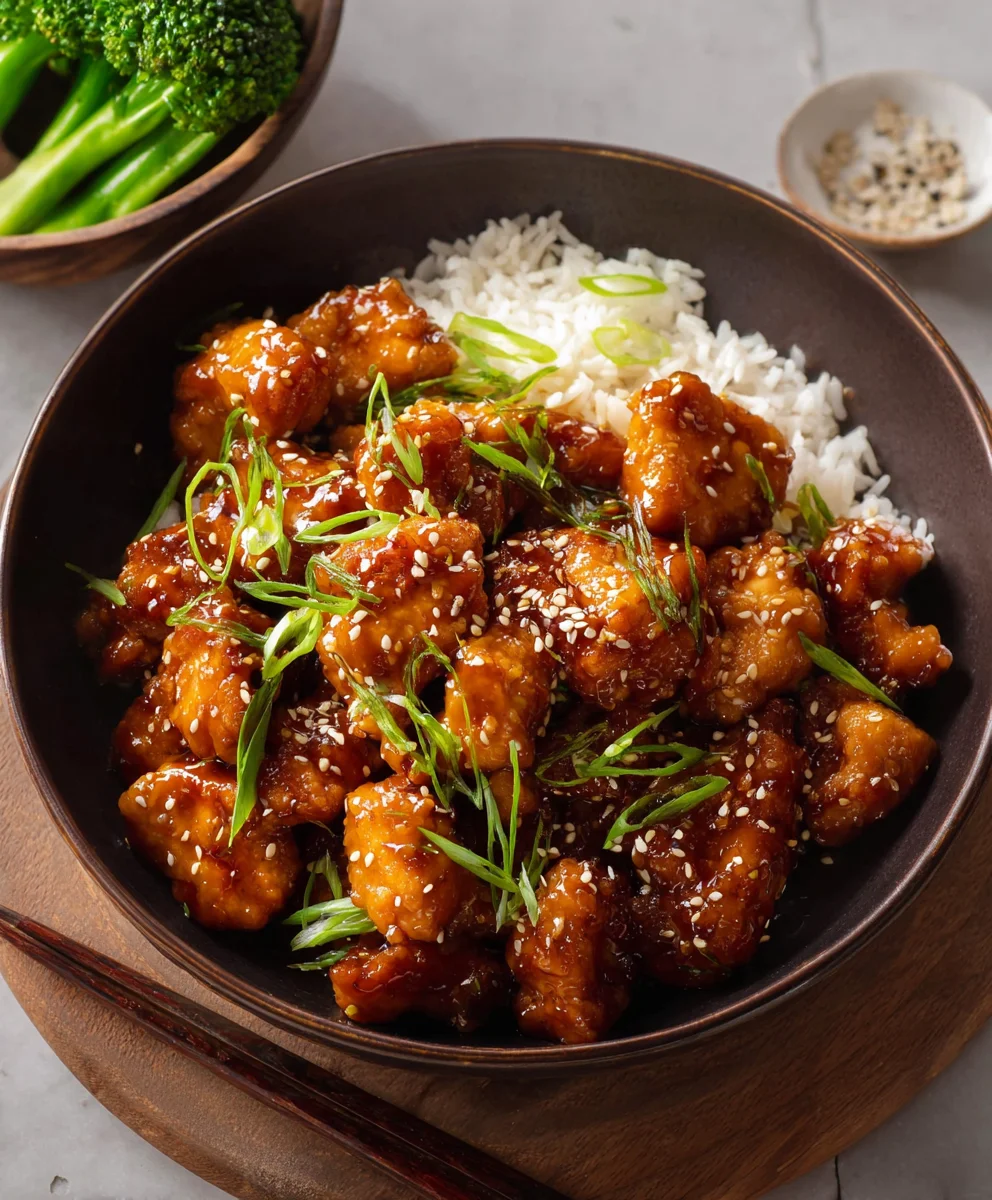
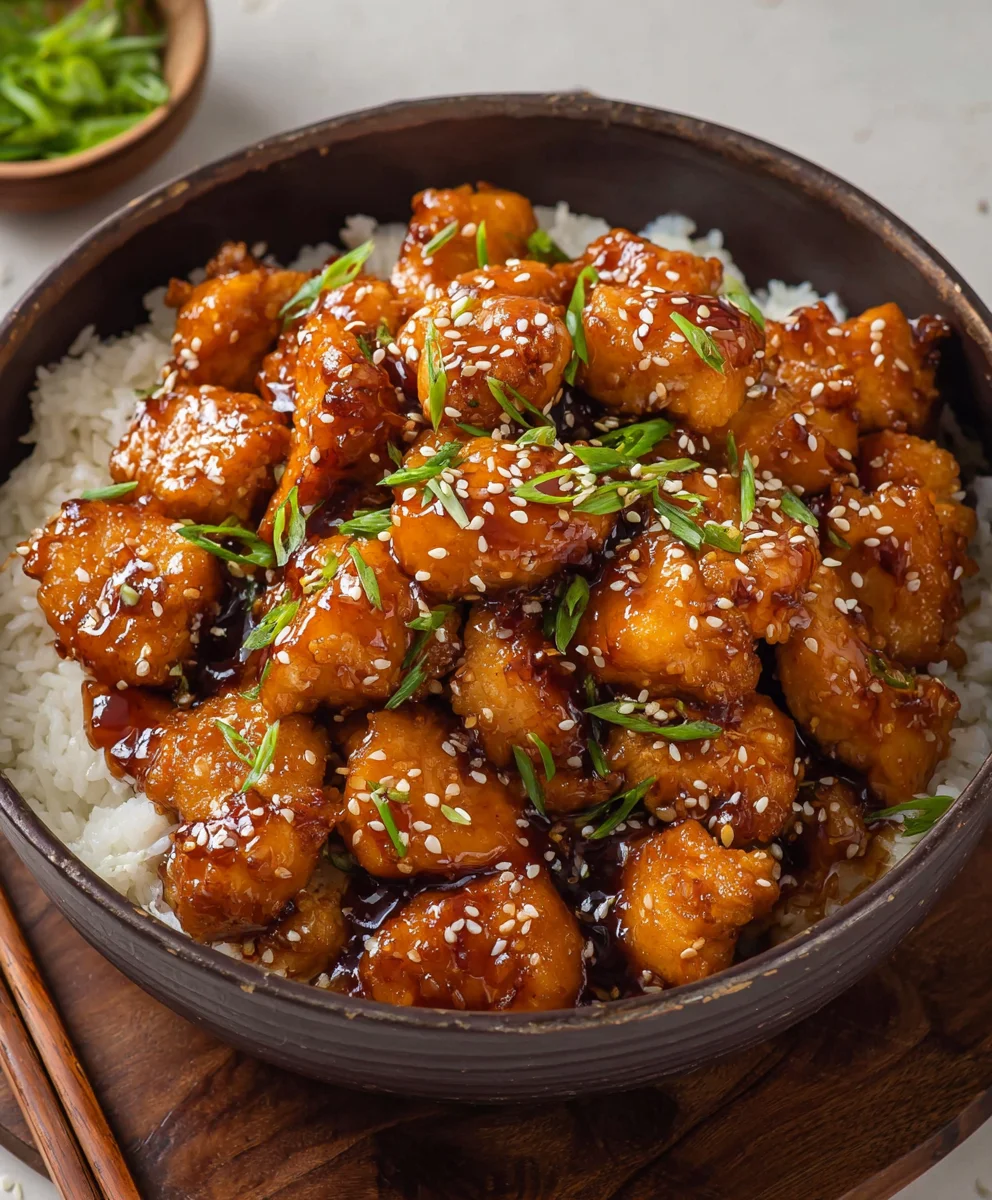
Honey Sesame Beef – Sweet & Savory Dish
Honey Sesame Chicken is more than just a meal; it’s a culinary hug, a symphony of sweet and savory that dances on your palate. Have you ever craved that perfect balance of crispy, tender chicken coated in a glistening, sticky sauce that’s both comforting and exciting? That’s the magic of this beloved dish. People adore Honey Sesame Chicken because it effortlessly delivers on those cravings, offering a satisfying crunch followed by an explosion of irresistible flavor. It’s the ultimate weeknight rescue, a crowd-pleaser for family dinners, and a delightful way to impress guests without spending hours in the kitchen. What truly sets this version apart is the thoughtful combination of ingredients that amplify its inherent deliciousness, creating a signature taste that’s uniquely satisfying and incredibly moreish.
Ingredients:
- 1 1/2 pounds boneless, skinless chicken breast or thighs, cut into roughly 1-inch bite-sized pieces
- 1 teaspoon chicken bouillon powder
- 1/2 teaspoon white pepper
- 1 tablespoon water
- 2 large eggs
- 1/2 cup all-purpose flour
- 1/2 cup cornstarch
- 2 teaspoons baking powder
- 1/2 teaspoon salt
- 1/4 cup water
- 2 teaspoons vegetable oil
- 3 tablespoons light soy sauce
- 1 tablespoon oyster sauce
- 2 tablespoons rice vinegar
- 2 tablespoons ketchup
- 2 tablespoons honey (for the glaze)
- 1 tablespoon sesame seeds (for garnish)
- 1 tablespoon chopped green onions (for garnish)
Marinating and Breading the Chicken
Step 1: Prepare the Chicken for Coating
To begin extract crafting your delicious Honey Sesame Chicken, the first crucial step is to prepare the chicken. Take your 1 1/2 pounds of chicken breast or thighs, which you’ve already cut into uniform 1-inch pieces, and place them in a medium-sized bowl. Now, it’s time to season these chicken pieces to perfection. Add the 1 teaspoon of chicken bouillon powder, 1/2 teaspoon of white pepper, and 1 tablespoon of water to the bowl. Gently toss everything together with your hands or a spoon, ensuring that each piece of chicken is evenly coated with the seasoning. This initial seasoning not only adds flavor but also helps to tenderize the chicken slightly. Allow the chicken to marinate for at least 10-15 minutes while you prepare the batter. This waiting period allows the flavors to meld beautifully.
Step 2: Create the Crispy Batter
While the chicken is marinating, let’s get the batter ready for that signature crispy coating. In a separate, larger bowl, whisk together the 2 large eggs until they are well beaten and slightly frothy. To this, add the 1/2 cup of all-purpose flour, 1/2 cup of cornstarch, 2 teaspoons of baking powder, and 1/2 teaspoon of salt. The cornstarch is key here; it contributes to the crispiness of the coating, while the baking powder helps to make it light and airy. Gradually whisk in the 1/4 cup of water and 2 teaspoons of vegetable oil until you achieve a smooth, lump-free batter with a consistency similar to pancake batter. It should be thick enough to coat the chicken pieces well, but not so thick that it becomes heavy. If the batter seems too thick, you can add another tablespoon of water, a teaspoon at a time, until it’s just right.
Step 3: Coat the Chicken
Now for the satisfying part: coating the marinated chicken. Add the marinated chicken pieces, one by one, into the prepared batter. Use a fork or your hands to gently toss and turn the chicken, making sure each piece is thoroughly coated with the batter. You want a nice, even layer of batter all around. For an extra crispy coating that will hold up beautifully when fried, I highly recommend doing a double dip. Once each piece is coated, lift it out of the batter, let any excess drip back into the bowl, and place it on a plate or baking sheet. Repeat this process for all the chicken pieces. Don’t overcrowd the plate; give them a little space.
Frying the Chicken
Step 4: Fry to Golden Perfection
It’s time to bring on the heat! Heat about 1 to 1 1/2 inches of neutral cooking oil (like vegetable, canola, or peanut oil) in a large, heavy-bottomed skillet or wok over medium-high heat. You’ll know the oil is ready when a drop of batter sizzles immediately upon contact. Carefully add the battered chicken pieces to the hot oil, working in batches. Avoid overcrowding the pan, as this will lower the oil temperature and result in soggy chicken instead of crispy pieces. Fry the chicken for about 4-6 minutes, turning occasionally with tongs, until it’s golden brown and cooked through. The internal temperature of the chicken should reach 165 degrees Fahrenheit. Once cooked, remove the chicken from the oil using a slotted spoon or spider strainer and place it on a wire rack set over a baking sheet to drain any excess oil. This allows air to circulate, keeping the chicken nice and crispy.
Making the Honey Sesame Glaze
Step 5: Craft the Sweet and Savory Sauce
While the chicken is draining, let’s prepare the irresistible Honey Sesame glaze that gives this dish its name. In a small saucepan, combine the 3 tablespoons of light soy sauce, 1 tablespoon of oyster sauce, 2 tablespoons of rice vinegar, 2 tablespoons of ketchup, and the crucial 2 tablespoons of honey. Stir everything together until well combined. Place the saucepan over medium heat and bring the mixture to a gentle simmer. Allow it to simmer for 2-3 minutes, stirring frequently, until the sauce has thickened slightly into a glossy glaze. Be careful not to let it boil vigorously or burn. The consistency should be thick enough to coat the back of a spoon.
Step 6: Toss and Serve
Once your glaze is ready and your chicken is perfectly crispy, it’s time to bring it all together. In a large bowl, add the freshly fried and drained chicken pieces. Pour the warm honey sesame glaze over the chicken. Gently toss the chicken using tongs or a spatula until every piece is beautifully coated in the glistening sauce. The heat from the chicken will help the sauce adhere perfectly. Immediately transfer the glazed Honey Sesame Chicken to a serving platter. For that authentic touch and an extra burst of flavor, sprinkle generously with 1 tablespoon of toasted sesame seeds and 1 tablespoon of freshly chopped green onions. This final flourish not only adds visual appeal but also enhances the aroma and taste of your dish. Serve hot and enjoy the delightful balance of sweet, savory, and a hint of tang.
Conclusion:
And there you have it – your very own delicious batch of Honey Sesame Chicken! This recipe brings together tender pieces of chicken coated in a sweet and savory sauce, all finished with a satisfying sprinkle of sesame seeds. I hope you enjoyed the process as much as I did, and I’m confident your family and friends will be raving about this dish. It’s a fantastic option for a weeknight meal that feels special enough for company, or simply a delightful treat for yourself.
For serving, I highly recommend pairing your Honey Sesame Chicken with fluffy steamed rice to soak up all that incredible sauce. Some steamed broccoli or snap peas also make a perfect, healthy accompaniment. Get creative with variations! Feel free to add a pinch of red pepper flakes for a touch of heat, or incorporate other vegetables like bell peppers or onions into the stir-fry. Don’t be afraid to experiment and make this recipe your own!
Frequently Asked Questions about Honey Sesame Chicken:
Q: Can I use chicken thighs instead of chicken breast for this Honey Sesame Chicken recipe?
Absolutely! Chicken thighs are a wonderful alternative and will result in an even more tender and flavorful Honey Sesame Chicken. Just be sure to trim any excess fat and cut them into bite-sized pieces, similar to the chicken breast. The cooking time might be slightly longer, so keep an eye on them until they are cooked through.
Q: How can I make the Honey Sesame Chicken sauce thicker?
If you prefer a thicker sauce for your Honey Sesame Chicken, you can easily achieve this by creating a cornstarch slurry. In a small bowl, whisk together 1 tablespoon of cornstarch with 2 tablespoons of cold water until smooth. Once the sauce is simmering, gradually whisk in the slurry, a little at a time, until the desired thickness is reached. Continue to simmer for another minute to ensure the cornstarch is fully cooked.
Honey Sesame Beef
A sweet and savory beef dish with a crispy coating and a delicious honey sesame glaze.
Ingredients
-
1 1/2 pounds beef sirloin or flank steak, cut into roughly 1-inch bite-sized pieces
-
1 teaspoon beef bouillon powder
-
1/2 teaspoon white pepper
-
1 tablespoon water
-
2 large eggs
-
1/2 cup all-purpose flour
-
1/2 cup cornstarch
-
2 teaspoons baking powder
-
1/2 teaspoon salt
-
1/4 cup water
-
2 teaspoons vegetable oil
-
3 tablespoons light soy sauce
-
1 tablespoon oyster sauce
-
2 tablespoons rice vinegar
-
2 tablespoons ketchup
-
2 tablespoons honey
Instructions
-
Step 1
In a medium bowl, combine beef pieces with beef bouillon powder, white pepper, and 1 tablespoon of water. Toss to coat and let marinate for 10-15 minutes. -
Step 2
In a separate large bowl, whisk together eggs, flour, cornstarch, baking powder, salt, 1/4 cup water, and vegetable oil until a smooth, lump-free batter forms. -
Step 3
Dip marinated beef pieces into the batter, ensuring each piece is thoroughly coated. Let excess batter drip off. -
Step 4
Heat 1-1.5 inches of neutral cooking oil in a skillet or wok over medium-high heat until a drop of batter sizzles. Fry battered beef in batches until golden brown and cooked through, about 4-6 minutes. Drain on a wire rack. -
Step 5
In a small saucepan, combine soy sauce, oyster sauce, rice vinegar, ketchup, and honey. Simmer over medium heat for 2-3 minutes until slightly thickened. -
Step 6
In a large bowl, toss the fried beef with the warm glaze until evenly coated. Serve immediately, garnished with sesame seeds and green onions if desired.
Important Information
Nutrition Facts (Per Serving)
It is important to consider this information as approximate and not to use it as definitive health advice.
Allergy Information
Please check ingredients for potential allergens and consult a health professional if in doubt.