
Easy Homemade Fruit Leather Recipe- Healthy Snack
Homemade fruit leather is one of those magical treats that instantly transports me back to carefree summer days. There’s something so incredibly satisfying about rolling up a strip of sweet, chewy fruit, and the vibrant colors are a feast for the eyes. It’s no wonder we all love fruit leather so much – it’s a simple, natural way to enjoy the concentrated flavors of our favorite fruits without any of the artificial junk. What truly makes this homemade fruit leather recipe special is its versatility and the sheer joy of creating it yourself. You control the sweetness, the flavors, and the ingredients, making it a healthy and delicious snack for everyone. Forget the store-bought stuff; let’s dive into making your own amazing fruit leather!
Why You’ll Love This Recipe
Simple, Healthy, and Delicious
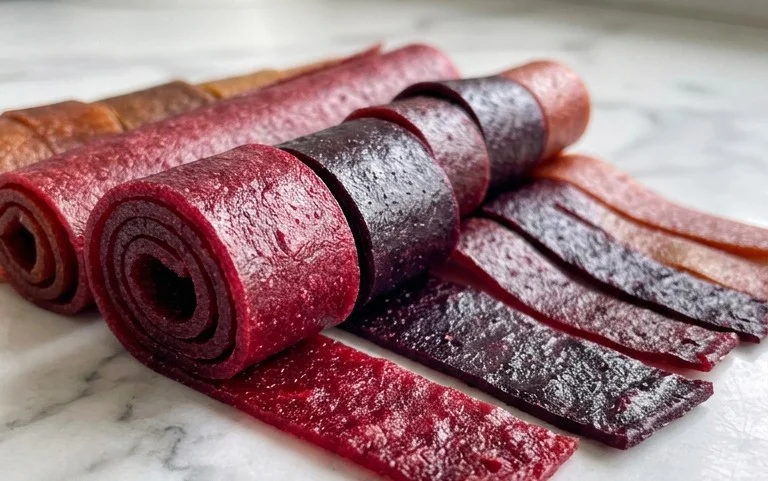
Homemade Fruit Leather Recipe
There’s something incredibly satisfying about making your own fruit leather from scratch. It’s a wonderful way to preserve the vibrant flavors of seasonal fruits and create a healthy, chewy treat that the whole family will love. Forget those pre-packaged options filled with artificial colors and flavors; this homemade version is bursting with pure fruit goodness. Plus, it’s surprisingly simple to make, requiring just a few basic ingredients and a little bit of patience. Let’s dive in and transform some beautiful fruit into delightful rolls of fruity perfection!
Ingredients:
Preparing Your Fruit
The beauty of fruit leather is its versatility. You can use almost any fruit you like, and a combination of fruits can create even more complex and interesting flavors. For this recipe, we’ll start with 2 cups of your chosen fruit, chopped into manageable pieces. If you’re using berries like strawberries or raspberries, give them a quick rinse. For firmer fruits like apples or peaches, you’ll want to core them and chop them into roughly 1-inch pieces. There’s no need to peel most fruits, especially if you have a good blender or food processor, as the skin can add fiber and nutrients. If you’re using frozen fruit, allow it to thaw completely before chopping. The sugar content of your fruit will vary, so the 3 tablespoons of white sugar are a guideline. Taste your chopped fruit before adding sugar; if it’s already very sweet, you might want to reduce the amount, or omit it entirely if you prefer a less sweet treat. The lemon juice is crucial! It acts as a natural preservative, brightens the fruit’s flavor, and helps the fruit leather set properly. Don’t skip this step.
Cooking Instructions
Now that you have your ingredients prepped, it’s time to bring them together. The goal is to create a smooth, concentrated fruit puree that will then be dehydrated.
1. Simmer the Fruit: In a medium saucepan, combine your chopped fruit, white sugar, and lemon juice. Place the saucepan over medium heat. Stir the ingredients together well. Allow the mixture to come to a gentle simmer. Once simmering, reduce the heat to low, cover the saucepan, and let it cook for about 10-15 minutes, stirring occasionally. This simmering process softens the fruit, making it easier to blend and also helps to slightly reduce the liquid content, concentrating the flavors. You’ll notice the fruit will become tender and release its juices. If you’re using particularly juicy fruits like berries, you might not need the full 15 minutes; just until the fruit is softened.
2. Blend Until Smooth: Once the fruit has softened, carefully transfer the mixture to a blender or food processor. Be cautious as the mixture will be hot. Blend until you achieve a completely smooth and lump-free puree. If your blender struggles, you can add a tablespoon or two of water to help it along, but try to keep the puree as thick as possible. For an exceptionally smooth texture, you can even press the puree through a fine-mesh sieve to remove any stray seeds or skins, although this is optional. The consistency should be similar to applesauce or thick yogurt. This smooth consistency is key for an even drying process.
3. Prepare for Drying: Preheat your oven to its lowest setting, typically around 170°F (77°C). Line a baking sheet with parchment paper, ensuring it covers the entire surface. If you want to create uniform strips of fruit leather, you can also line the baking sheet with a silicone baking mat. Pour the fruit puree onto the prepared baking sheet. Using an offset spatula or the back of a spoon, spread the puree evenly over the parchment paper. Aim for a thickness of about ¼ inch. Try to make the layer as uniform as possible across the entire sheet. This ensures that the fruit leather dries evenly and at the same rate. If you have thick and thin spots, the thin spots will over-dry and become brittle while the thick spots might remain sticky.
4. Dehydrate the Fruit Leather: Place the baking sheet in the preheated oven. Prop the oven door open slightly with a wooden spoon or a heat-resistant tool. This allows moisture to escape, which is essential for the drying process. Let the fruit leather dehydrate for 4-6 hours, or until it is no longer sticky to the touch and has a leathery texture. The exact drying time will depend on the thickness of your puree, the humidity in your kitchen, and the specific temperature of your oven. Check on it periodically, every hour or so, starting around the 3-hour mark. You’re looking for a surface that feels dry and slightly pliable, but not wet or sticky. If you press a finger on it, it shouldn’t leave a residue.
5. Cool and Cut: Once the fruit leather is dried to your liking, carefully remove the baking sheet from the oven. Let the fruit leather cool completely on the baking sheet. This is an important step, as it will firm up further as it cools. Once fully cooled, you can gently peel the fruit leather off the parchment paper or silicone mat. If you want individual fruit leather strips, you can use a pizza cutter or a sharp knife to cut the large sheet into desired sizes. You can roll them up tightly for easy storage and transport. Store your homemade fruit leather in an airtight container at room temperature for up to two weeks, or in the refrigerator for longer storage. Enjoy your delicious, homemade fruity creation!
Conclusion:
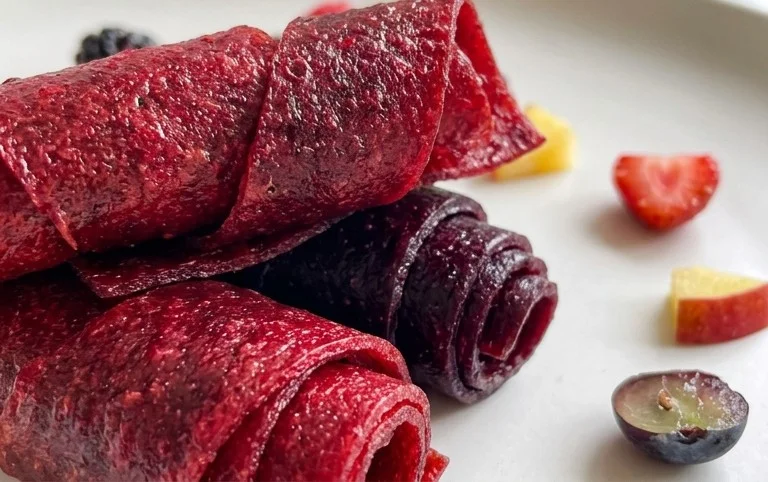
Making your own homemade fruit leather is an incredibly rewarding and surprisingly simple culinary adventure! This recipe offers a fantastic way to preserve the vibrant flavors of fresh fruit, creating a healthy and delicious snack that the whole family will adore. It’s a perfect project for using up seasonal produce and a wonderful alternative to store-bought sugary treats. The versatility is truly a standout feature; you can customize it with your favorite fruits, add a touch of spice, or even mix in some herbs for a unique twist. I truly encourage you to give this homemade fruit leather recipe a try. It’s a delightful way to enjoy the pure taste of fruit in a fun and portable form.
Enjoy your delightful fruit leather! It’s perfect for lunchboxes, picnics, or just a satisfying snack any time of day. Get creative with your flavor combinations and discover your new favorite homemade treat!
Frequently Asked Questions:
Can I use frozen fruit for this recipe?
Absolutely! Frozen fruit works wonderfully. Simply thaw it completely and drain off any excess liquid before pureeing it. The flavor will be just as intense, and it’s a great way to use up fruit you might have stocked up on.
How long does homemade fruit leather last?
When stored properly in an airtight container at room temperature, your homemade fruit leather can last for several weeks. If you live in a very humid environment, or if you want to store it for longer, keeping it in the refrigerator will extend its shelf life even further.
What are some good fruit combinations for fruit leather?
The possibilities are endless! Classic combinations like strawberry-banana or apple-cinnamon are always crowd-pleasers. For something a little more adventurous, try mango-lime, raspberry-peach, or even blueberry-mint. Don’t be afraid to experiment with what’s in season or what you have on hand!
Homemade Fruit Leather
Create delicious and healthy fruit leather from scratch with this simple recipe. Perfect for snacks!
Ingredients
-
2 cups fruit, chopped
-
3 tbsp white sugar
-
½ whole lemon, just the juice
-
1 tsp vanilla extract
-
¼ tsp cinnamon
-
Pinch of salt
Instructions
-
Step 1
Puree the chopped fruit in a blender or food processor until smooth. -
Step 2
Stir in the white sugar, lemon juice, vanilla extract, cinnamon, and salt. Mix until well combined. -
Step 3
Preheat your oven to its lowest setting, usually around 170°F (77°C). Line a baking sheet with parchment paper or a silicone baking mat. -
Step 4
Pour the fruit mixture onto the prepared baking sheet and spread it into a thin, even layer using an offset spatula or the back of a spoon. -
Step 5
Bake for 4-8 hours, or until the fruit leather is no longer sticky to the touch and peels easily from the parchment paper. The time will vary depending on your oven and the thickness of the layer. -
Step 6
Once cooled, peel the fruit leather from the parchment paper and cut it into strips or shapes.
Important Information
Nutrition Facts (Per Serving)
It is important to consider this information as approximate and not to use it as definitive health advice.
Allergy Information
Please check ingredients for potential allergens and consult a health professional if in doubt.