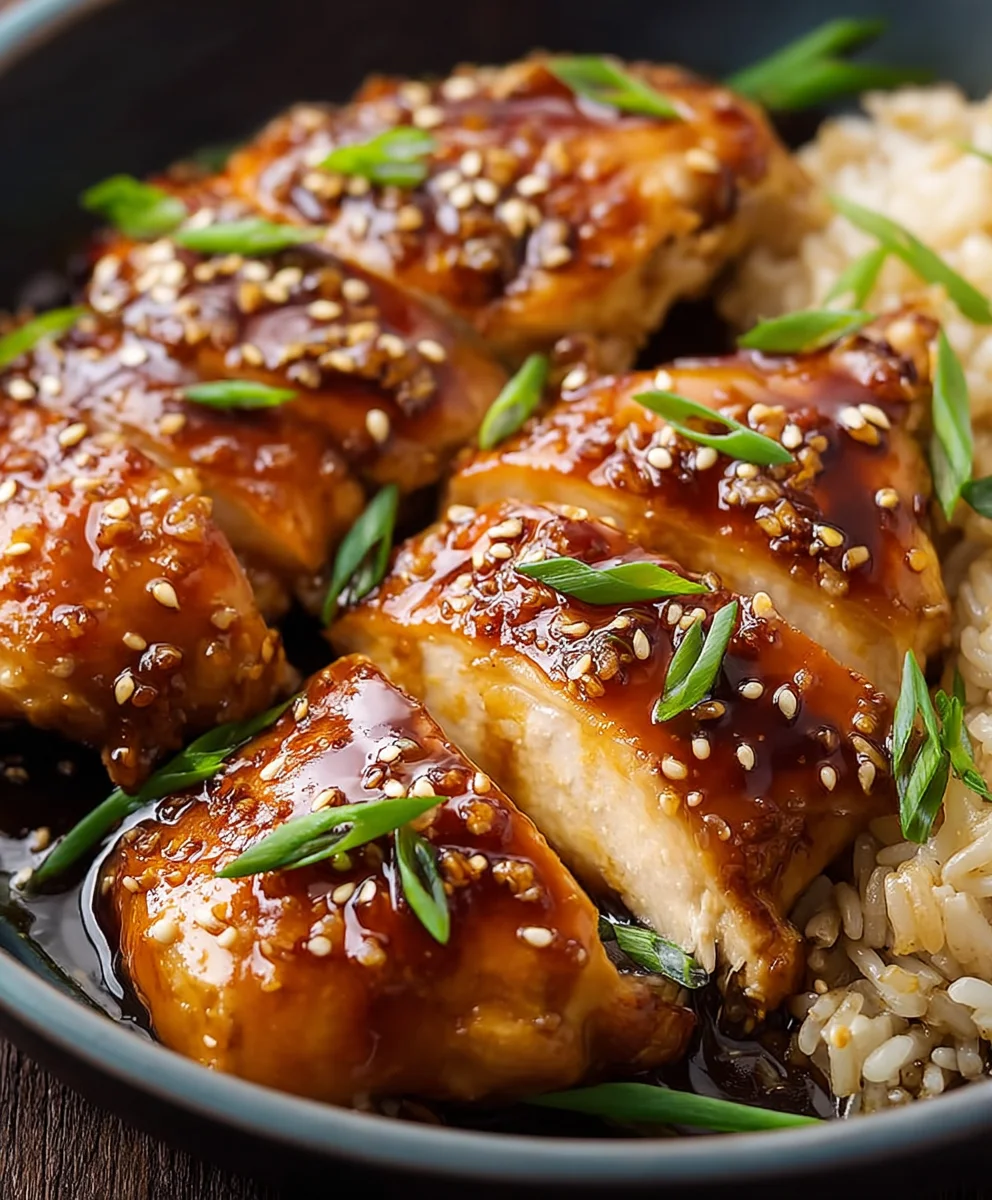
Easy Baked Honey Garlic Beef – Flavorful & Simple
Baked Honey Garlic Chicken is more than just a meal; it’s a symphony of sweet, savory, and sticky perfection that dances on your palate. We’ve all had those nights where the thought of complex cooking feels overwhelming, yet the craving for something truly satisfying and delicious looms large. This is where our Baked Honey Garlic Chicken shines, offering an effortless path to culinary bliss. It’s no wonder this dish has become a beloved staple for busy weeknights and casual gatherings alike. The magic lies in its simplicity: tender chicken pieces coated in a luscious glaze that caramelizes beautifully in the oven, creating an irresistible aroma that will fill your home and draw everyone to the kitchen. What truly sets this version apart is the perfect balance of ingredients, ensuring each bite delivers that signature sweet honey and pungent garlic punch without being overpowering. Get ready to discover your new go-to recipe!
Ingredients:
- 4 boneless skinless chicken breasts
- 1/2 teaspoon salt
- 1/4 teaspoon black pepper
- 2/3 cup clear honey
- 1/4 cup low sodium chicken broth
- 2 tablespoons low sodium soy sauce
- 2 tablespoons minced garlic
- 1 tablespoon apple cider vinegar
- 1/4 teaspoon salt
- 1 tablespoon corn starch
- Red pepper flakes to taste (optional)
Preparing the Chicken
Step 1: Prepare and Season the Chicken Breasts
Begin extract by patting your chicken breasts thoroughly dry with paper towels. This is a crucial step for achieving a nice sear and preventing the chicken from steaming rather than baking. Once dry, place the chicken breasts on a clean cutting board or a baking sheet lined with parchment paper for easy cleanup. Season both sides generously with 1/2 teaspoon of salt and 1/4 teaspoon of black pepper. Ensure the seasoning is evenly distributed across the surface of each breast. If your chicken breasts are particularly thick, you might consider pounding them slightly to an even thickness. This will help them cook more uniformly, preventing some parts from being overcooked while others are still underdone. Aim for a thickness of about 3/4 inch to 1 inch.
Crafting the Honey Garlic Sauce
Step 2: Combine Sauce Ingredients and Simmer
In a medium saucepan, whisk together the clear honey, low sodium chicken broth, low sodium soy sauce, and minced garlic. Add the tablespoon of apple cider vinegar for a touch of acidity that balances the sweetness of the honey. If you enjoy a bit of heat, this is also the stage to add a pinch of red pepper flakes. Stir everything together until well combined. Place the saucepan over medium heat and bring the mixture to a gentle simmer. Allow it to simmer for about 5-7 minutes, stirring occasionally. This simmering process helps the flavors meld together beautifully and slightly thickens the sauce.
Step 3: Thicken the Honey Garlic Sauce
Once the sauce has simmered for the designated time, it’s time to thicken it to a beautiful glaze consistency. In a small bowl, whisk together the 1 tablespoon of corn starch with about 2 tablespoons of water until you have a smooth slurry with no lumps. This slurry is our thickening agent. Slowly drizzle the corn starch slurry into the simmering honey garlic sauce while whisking continuously. Continue to whisk and cook for another 1-2 minutes, or until the sauce has thickened to your desired consistency. It should be thick enough to coat the back of a spoon beautifully. Be careful not to over-thicken, as it will continue to thicken slightly as it cools. Remove the saucepan from the heat and set it aside.
Baking the Chicken
Step 4: Sear the Chicken Breasts (Optional but Recommended)
While your sauce is simmering and thickening, preheat your oven to 400°F (200°C). For an even more flavorful and visually appealing baked honey garlic chicken, I highly recommend searing the chicken breasts before baking. Heat 1-2 tablespoons of a neutral oil, like vegetable or canola oil, in an oven-safe skillet over medium-high heat. Once the oil is shimmering, carefully place the seasoned chicken breasts into the hot skillet. Sear for about 2-3 minutes per side, just until a golden-brown crust forms. This searing locks in juices and adds a wonderful depth of flavor. Don’t worry about cooking the chicken through at this stage; it will finish cooking in the oven. If you don’t have an oven-safe skillet, you can sear the chicken in a regular skillet and then transfer it to a baking dish.
Step 5: Bake the Chicken with the Sauce
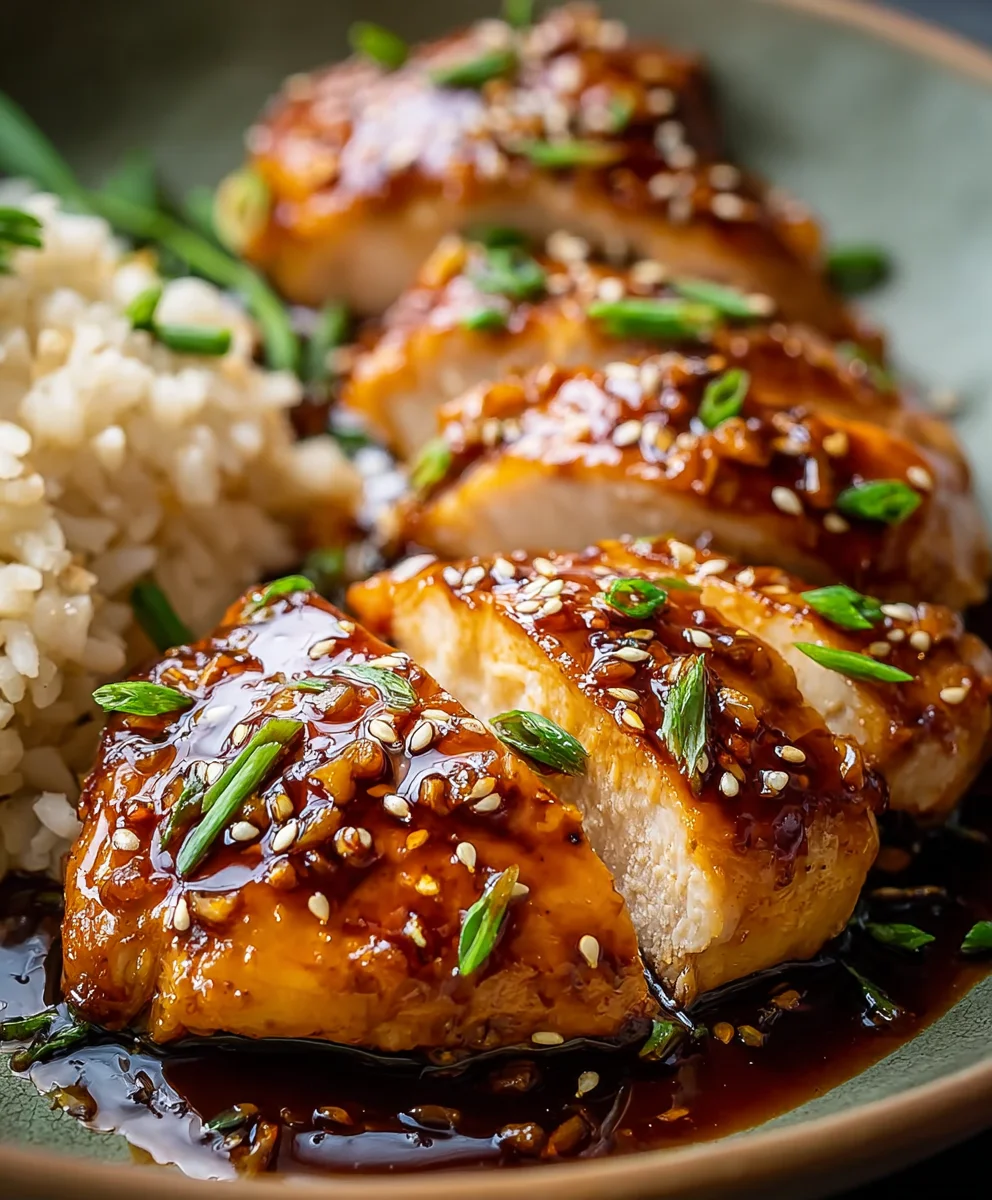
Arrange the seared chicken breasts in your oven-safe skillet or transfer them to a baking dish. Pour about half of the prepared honey garlic sauce evenly over the chicken breasts, ensuring each piece is well coated. Place the skillet or baking dish in the preheated oven. Bake for 15-20 minutes, or until the chicken is cooked through and reaches an internal temperature of 165°F (74°C) when checked with a meat thermometer. The exact baking time will depend on the thickness of your chicken breasts. During the last 5 minutes of baking, you can spoon more of the remaining sauce over the chicken, or even brush it on to create a beautiful, sticky glaze. This extra basting helps to build layers of flavor and ensures the chicken is glistening.
Step 6: Rest and Serve
Once the chicken is perfectly cooked, remove it from the oven. It’s incredibly tempting to cut into it immediately, but allowing the chicken to rest is vital. Let the chicken rest for 5-10 minutes on a clean cutting board, tented loosely with foil. This resting period allows the juices to redistribute throughout the meat, resulting in incredibly moist and tender chicken. While the chicken rests, you can gently reheat any leftover sauce if needed. Serve the Baked Honey Garlic Chicken warm, drizzled with any accumulated pan juices or extra warmed sauce. This dish is fantastic served with rice, steamed vegetables, or a fresh salad.
Conclusion:
I hope you’ve enjoyed this journey into creating the most delicious Baked Honey Garlic Chicken! This recipe is a testament to how simple ingredients can come together to create a truly memorable meal. The sweet and savory glaze caramelizes beautifully, infusing tender chicken thighs with an irresistible flavor. Whether you’re a seasoned cook or just starting out, this dish is surprisingly easy to master and is guaranteed to become a family favorite.
For serving, I highly recommend pairing your Baked Honey Garlic Chicken with fluffy steamed rice to soak up all those wonderful juices. A side of steamed broccoli or a crisp garden salad also makes for a perfectly balanced meal. If you’re feeling adventurous, consider adding a sprinkle of sesame seeds or chopped green onions over the top for an extra layer of flavor and visual appeal. Don’t be afraid to experiment with this recipe! You can easily substitute chicken breasts for thighs, though you may need to adjust the cooking time slightly. For a spicier kick, a pinch of red pepper flakes in the glaze would be fantastic.
So go ahead, preheat your oven and get ready to impress yourself and your loved ones with this incredible Baked Honey Garlic Chicken. Happy cooking!
Frequently Asked Questions:
Can I use chicken breasts instead of thighs for Baked Honey Garlic Chicken?
Absolutely! You can definitely use chicken breasts for this recipe. Just keep in mind that chicken breasts tend to cook faster and can dry out more easily than thighs. Aim for a baking time of around 20-25 minutes, or until the internal temperature reaches 165°F (74°C).
How can I make the sauce thicker for my Baked Honey Garlic Chicken?
If you prefer a thicker glaze, you have a couple of options. You can reduce the sauce further by simmering it on the stovetop for a few extra minutes after baking the chicken. Alternatively, you can create a cornstarch slurry by mixing 1 teaspoon of cornstarch with 2 teaspoons of cold water, then whisking it into the simmering sauce until it thickens.
Easy Baked Honey Garlic Beef
A flavorful and simple baked honey garlic beef recipe that’s perfect for a weeknight meal. Tender beef coated in a sweet and savory honey garlic glaze.
Ingredients
-
4 boneless beef steaks (e.g., sirloin, ribeye, about 6-8 oz each)
-
1/2 teaspoon salt
-
1/4 teaspoon black pepper
-
2/3 cup clear honey
-
1/4 cup low sodium beef broth
-
2 tablespoons low sodium soy sauce
-
2 tablespoons minced garlic
-
1 tablespoon apple cider vinegar
-
1/4 teaspoon salt
-
1 tablespoon corn starch
-
Red pepper flakes to taste (optional)
Instructions
-
Step 1
Pat your beef steaks thoroughly dry with paper towels. Season both sides generously with 1/2 teaspoon of salt and 1/4 teaspoon of black pepper. If your steaks are particularly thick, pound them slightly to an even thickness of about 3/4 inch to 1 inch for uniform cooking. -
Step 2
In a medium saucepan, whisk together the clear honey, low sodium beef broth, low sodium soy sauce, and minced garlic. Add the apple cider vinegar and optional red pepper flakes. Stir until well combined. Place over medium heat and simmer for 5-7 minutes, stirring occasionally, allowing the flavors to meld. -
Step 3
In a small bowl, whisk together the 1 tablespoon of corn starch with 2 tablespoons of water to create a smooth slurry. Slowly drizzle the slurry into the simmering honey garlic sauce while whisking continuously. Cook for another 1-2 minutes until the sauce thickens to a glaze consistency. Remove from heat. -
Step 4
Preheat your oven to 400°F (200°C). Heat 1-2 tablespoons of a neutral oil in an oven-safe skillet over medium-high heat. Sear the seasoned beef steaks for about 2-3 minutes per side until a golden-brown crust forms. Transfer the skillet to the preheated oven. -
Step 5
Pour about half of the prepared honey garlic sauce evenly over the seared beef steaks. Bake for 15-20 minutes, or until the beef reaches your desired internal temperature (e.g., 130-135°F for medium-rare). During the last 5 minutes, spoon or brush more sauce over the beef for a sticky glaze. -
Step 6
Remove the beef from the oven and let it rest for 5-10 minutes tented loosely with foil. This allows the juices to redistribute. Reheat any leftover sauce if needed and serve the beef warm, drizzled with extra sauce and pan juices. Pairs well with rice or vegetables.
Important Information
Nutrition Facts (Per Serving)
It is important to consider this information as approximate and not to use it as definitive health advice.
Allergy Information
Please check ingredients for potential allergens and consult a health professional if in doubt.