Easy Easter Rice Krispie Treats-Festive Fun
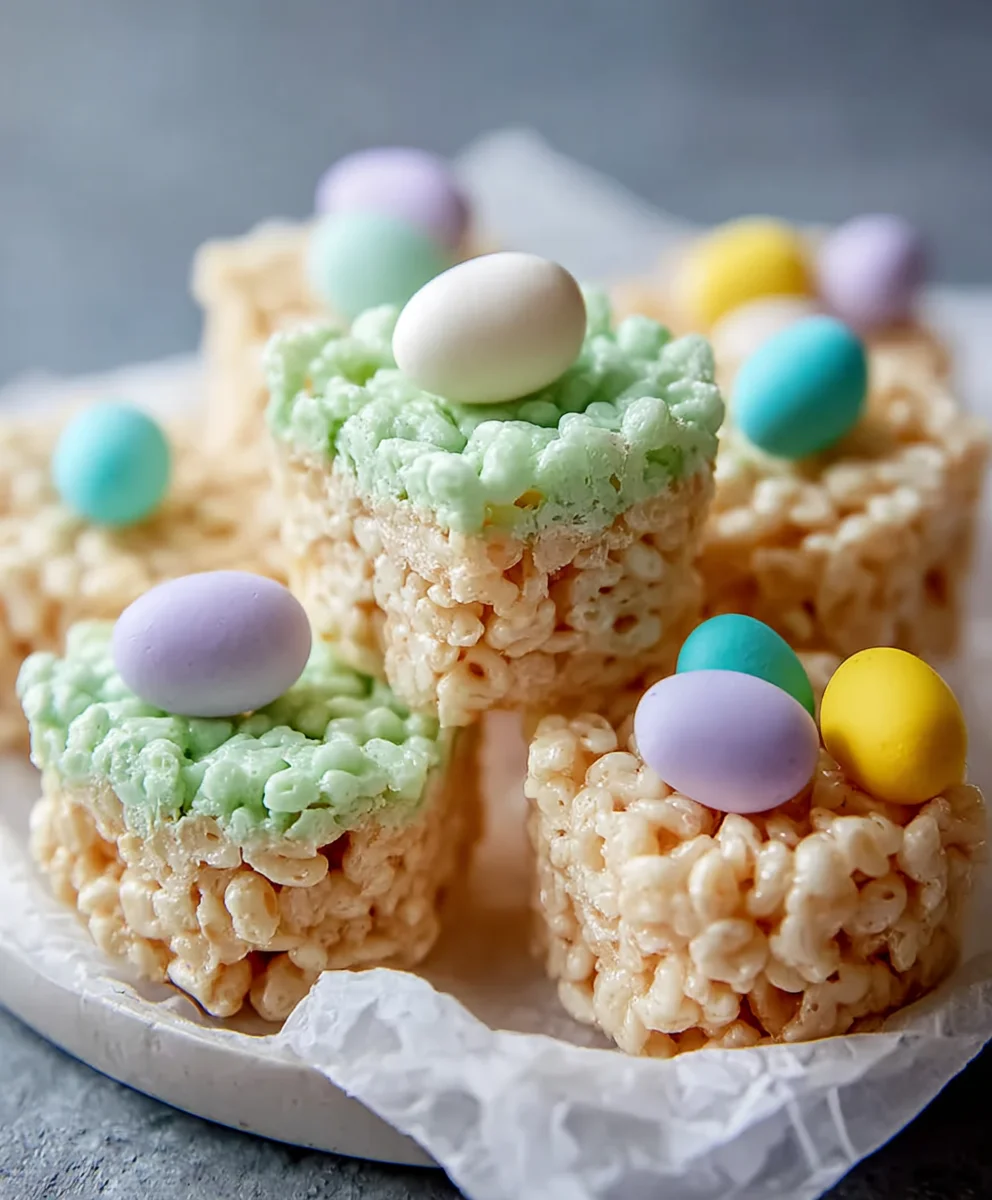
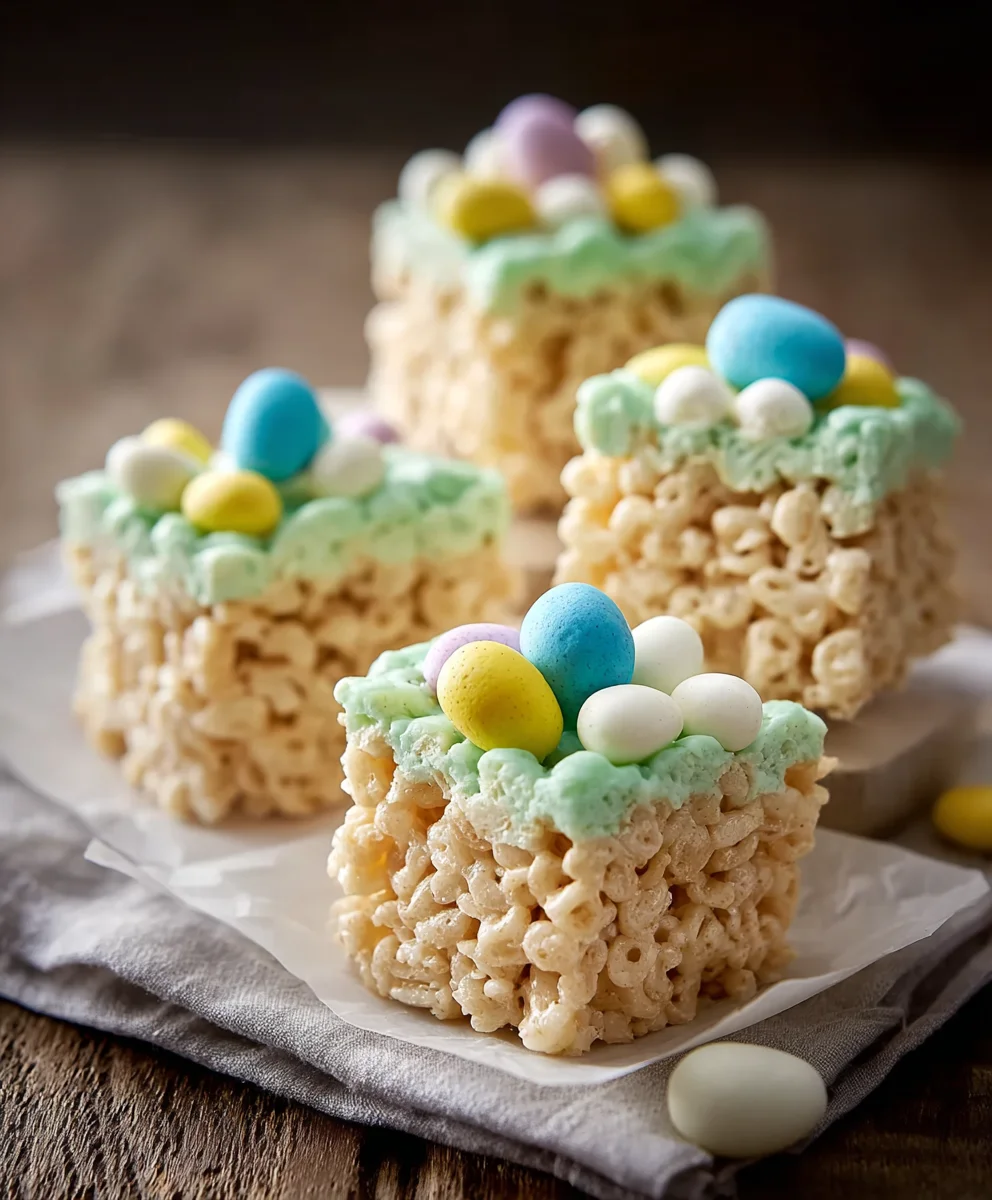
Easter Rice Krispie Treats are a nostalgic and utterly delightful way to celebrate spring! Who doesn’t have fond memories of these chewy, crispy squares, often a staple at childhood parties and family gatherings? This time of year, they take on an extra layer of magic. What makes these Easter Rice Krispie Treats so special is their incredible versatility, allowing you to transform them from a simple, beloved snack into a vibrant, festive centerpiece. Whether you’re looking for a quick and easy dessert for your Easter brunch, a fun activity to do with the kids, or just a sweet treat to brighten your day, this recipe delivers. Get ready to infuse your holiday with a burst of color and irresistible texture that everyone, from toddlers to grandparents, will adore. We’re about to elevate this classic to a whole new level of springtime joy!
Ingredients:
- 16 ounces marshmallows (jumbo or mini marshmallows work equally well for this recipe)
- 7 cups Rice Krispies cereal (this is the crispy backbone of our treats!)
- 2 tablespoons unsalted butter (for greasing and preparing our pan)
- ½ cup unsalted butter (this is our binding agent and adds richness)
- 3-4 cups powdered sugar (for our sweet and creamy frosting)
- ¼ cup milk (helps create that smooth frosting consistency)
- 1 teaspoon vanilla extract (enhances the sweetness and adds a classic flavor)
- Green food coloring (to give our Easter Rice Krispie Treats a festive hue)
- Easter egg candies (mini chocolate eggs or jelly beans, for decorating and adding pops of color and flavor)
Preparing the Base
Step 1: Buttering Up Your Pan and Melding the Marshmallows
First things first, let’s get our baking pan ready. I like to use a 9×13 inch pan, but a similar size will work just fine. Take those 2 tablespoons of unsalted butter and generously grease the bottom and sides of your pan. This is a crucial step to prevent our delicious Easter Rice Krispie Treats from sticking, ensuring easy removal and beautiful presentation later on. You can use a paper towel or a pastry brush to spread the butter evenly. Next, find a large saucepan. Add the ½ cup of unsalted butter to this pan and melt it over low heat. Once the butter is completely melted and shimmering, add your 16 ounces of marshmallows. Keep the heat on low and stir constantly. The goal here is to melt the marshmallows without scorching them. You’ll see them start to puff up and become gooey. Continue stirring until the marshmallows are almost entirely melted and smooth, with just a few small lumps remaining. This gentle melting process ensures a cohesive and pliable mixture for our treats.
Step 2: Incorporating the Crispy Cereal
As soon as your marshmallow mixture is smooth and ready, it’s time to introduce the star of the show: the Rice Krispies cereal. Remove the saucepan from the heat. Gradually add the 7 cups of Rice Krispies cereal to the melted marshmallow mixture. Use a sturdy spatula or a large wooden spoon to gently fold and mix everything together. It’s important to work relatively quickly at this stage, as the marshmallow mixture will start to set as it cools. The key is to coat every single piece of cereal with the gooey marshmallow. Make sure there are no dry pockets of cereal. You want a uniform mixture where the cereal is well-bound by the marshmallow. Don’t overmix to the point of crushing the cereal; we want to maintain that signature crispiness.
Step 3: Pressing the Treats into the Pan
Now, carefully transfer the Rice Krispie cereal mixture into your prepared baking pan. This can be a little sticky, so have your greased spatula or hands ready. To press the mixture evenly into the pan, lightly grease your hands with a little extra butter or use the back of your greased spatula. Gently press the mixture down, working from the center outwards, to create a compact and even layer. Avoid pressing too hard, as this can make the treats dense and tough. The goal is to create a surface that’s relatively smooth and uniform so our frosting can adhere beautifully. If you’re having trouble getting it perfectly smooth, a lightly greased piece of parchment paper laid on top and pressed down can also work wonders.
Crafting the Festive Frosting
Step 4: Creating the Creamy Green Frosting
Once your Rice Krispie treat base has cooled slightly and is firm enough to handle, it’s time to whip up our vibrant green frosting. In a medium bowl, combine the 3 cups of powdered sugar (you can add the extra cup later if you prefer a thicker frosting), ¼ cup of milk, and 1 teaspoon of vanilla extract. Begin extract whisking these ingredients together. It will be quite thick at first. Add a drop or two of green food coloring at a time, stirring well after each addition, until you achieve your desired Easter green hue. Continue whisking until the frosting is smooth, creamy, and pourable. If the frosting is too thick, add another teaspoon of milk at a time until you reach the right consistency. If it’s too thin, gradually whisk in more powdered sugar, a tablespoon at a time, until it thickens up. The perfect frosting should be spreadable but not watery.
Step 5: Decorating with Springtime Flair
This is where the magic truly happens and our Easter Rice Krispie Treats come to life! Once the frosting has reached your desired consistency, carefully spoon it over the cooled Rice Krispie treat base in the pan. Use your spatula to spread the green frosting evenly, creating a smooth and luscious top layer. Don’t worry if it’s not perfectly smooth; a slightly rustic look can be charming! While the frosting is still wet, it’s time to add your festive decorations. Scatter your Easter egg candies (mini chocolate eggs or jelly beans) generously over the green frosting. You can arrange them in patterns, sprinkle them randomly, or create little clusters. The warmth of the frosting will help them adhere securely. Let the frosting set for at least 30 minutes to an hour at room temperature, or pop it in the refrigerator for about 15-20 minutes if you’re in a hurry. Once the frosting is firm, you can cut your Easter Rice Krispie Treats into squares or rectangles using a sharp knife. For cleaner cuts, you can lightly grease your knife between slices. Enjoy these delightful, festive treats that are perfect for any Easter celebration!
Conclusion:
We’ve reached the end of our delightful journey creating the perfect Easter Rice Krispie Treats! As you’ve seen, these festive treats are incredibly simple to whip up, making them a fantastic activity for families or a quick, crowd-pleasing dessert for your Easter celebrations. The sweet, chewy, and crispy texture is universally loved, and the Easter-themed decorations add that extra touch of magic. These Easter Rice Krispie Treats are not just a dessert; they’re a symbol of spring, fun, and shared joy.
For serving, consider presenting your Easter Rice Krispie Treats on a colorful platter alongside other Easter candies or baked goods. They also make wonderful edible gifts, individually wrapped in cellophane bags tied with festive ribbon. Don’t be afraid to get creative with variations! You can add a touch of vanilla extract or almond extract to the marshmallow mixture for an extra flavor boost. Consider adding a handful of mini chocolate chips or sprinkles directly into the mixture before pressing them into the pan. For a truly decadent twist, drizzle melted white or milk chocolate over the cooled treats.
The beauty of Easter Rice Krispie Treats lies in their adaptability. So, go ahead, embrace the fun, experiment with colors and shapes, and most importantly, enjoy the delicious results with your loved ones!
Frequently Asked Questions:
How can I make my Easter Rice Krispie Treats extra festive?
You can use food coloring to dye the marshmallow mixture in pastel Easter colors like pink, blue, yellow, and green. Once the treats are shaped, consider decorating them with Easter-themed sprinkles, edible glitter, or even small candy Easter eggs. Cutting them into fun Easter shapes using cookie cutters is another fantastic way to enhance their festive appeal.
Can I make Easter Rice Krispie Treats ahead of time?
Absolutely! Easter Rice Krispie Treats are best made a day in advance. Once they are completely cooled and set, store them in an airtight container at room temperature. This allows them to firm up slightly and makes them easier to cut and handle for decorating. Avoid refrigerating them, as this can make them hard and less chewy.
My Easter Rice Krispie Treats are too hard. What went wrong?
This usually happens if the marshmallows are overcooked or if the mixture is pressed down too firmly. Be sure to melt the marshmallows over low heat, stirring constantly, until they are just melted and smooth. When pressing the mixture into the pan, use a lightly greased spatula or wax paper to gently press it down, rather than compacting it heavily. This will ensure a chewy and tender texture.
Easy Easter Rice Krispie Treats-Festive Fun
Festive and fun Easter-themed Rice Krispie treats topped with creamy green frosting and colorful Easter egg candies.
Ingredients
-
16 ounces marshmallows
-
7 cups Rice Krispies cereal
-
2 tablespoons unsalted butter
-
½ cup unsalted butter
-
3-4 cups powdered sugar
-
¼ cup milk
-
1 teaspoon vanilla extract
-
Green food coloring
-
Easter egg candies (mini chocolate eggs or jelly beans)
Instructions
-
Step 1
Generously grease a 9×13 inch pan with 2 tablespoons of unsalted butter. In a large saucepan, melt ½ cup of unsalted butter over low heat. Add 16 ounces of marshmallows and stir constantly over low heat until almost entirely melted and smooth. -
Step 2
Remove the saucepan from heat and gradually add 7 cups of Rice Krispies cereal. Gently fold and mix until every piece of cereal is coated with the marshmallow mixture. -
Step 3
Transfer the cereal mixture into the prepared pan. Lightly grease your hands or a spatula and gently press the mixture evenly into the pan, creating a compact and uniform layer. -
Step 4
In a medium bowl, combine 3 cups of powdered sugar, ¼ cup of milk, and 1 teaspoon of vanilla extract. Whisk together, adding green food coloring a drop at a time until desired Easter green hue is achieved. Continue whisking until smooth and creamy. Adjust consistency with more milk or powdered sugar as needed. -
Step 5
Spoon the green frosting over the cooled Rice Krispie treat base and spread evenly. While the frosting is wet, scatter Easter egg candies over the top. Let the frosting set for at least 30 minutes to an hour at room temperature, or refrigerate for 15-20 minutes. -
Step 6
Once the frosting is firm, cut the treats into squares or rectangles using a sharp knife. For cleaner cuts, lightly grease the knife between slices. Enjoy!
Important Information
Nutrition Facts (Per Serving)
It is important to consider this information as approximate and not to use it as definitive health advice.
Allergy Information
Please check ingredients for potential allergens and consult a health professional if in doubt.