Diane’s No Fail French Bread Recipe Easy Homemade
Diane’s No Fail French Bread promises a truly exceptional baking experience, even for those who might usually shy away from homemade bread. We all have those recipes that seem intimidating, right? The ones that whisper tnon-alcoholic ales of failed attempts and disappointing crusts. But this isn’t one of those stories. Diane’s No Fail French Bread is crafted to deliver that perfectly crisp exterior and gloriously airy interior, every single time. People absolutely adore this recipe because it demystifies the art of bread-making, offering a foolproof path to artisanal results right in your own kitchen. What makes Diane’s No Fail French Bread so special is its simplicity and the sheer reliability it offers. It’s the kind of recipe that builds confidence, turning a daunting task into a rewarding culinary adventure. Get ready to fill your home with the irresistible aroma of freshly baked goodness!

Ingredients:
- 2 tablespoons dry yeast (SAF brand recommended for reliability)
- 1/2 cup warm water (around 105-115°F or 40-46°C)
- 2 cups warm water (around 105-115°F or 40-46°C)
- 3 tablespoons granulated sugar
- 1 tablespoon sea salt or Kosher salt
- 5 tablespoons olive oil, canola oil, or vegetable oil
- 6 cups flour (4 cups bread flour and 1 1/2 to 2 cups all-purpose flour)
- 1 egg, beaten (optional, for a beautiful glaze)
Preparing the Dough
Step 1: Activating the Yeast
The first step to achieving that perfect Diane’s No Fail French Bread is to wake up your yeast. In a large mixing bowl, combine the 1/2 cup of warm water with the 2 tablespoons of dry yeast and 1 tablespoon of the sugar. Give it a gentle stir. Let this mixture sit undisturbed for about 5 to 10 minutes. You’ll know the yeast is active and ready to go when it becomes foamy and bubbly, almost like a miniature science experiment on your countertop. This foamy head is a visual confirmation that your yeast is alive and well, which is crucial for a good rise. If you don’t see any foam, your yeast might be old or the water wasn’t the right temperature, and it’s best to start over with fresh yeast.
Step 2: Building the Dough Base
Once your yeast is happily foamed, it’s time to add the remaining ingredients to create the foundation of our dough. To the yeast mixture, add the 2 cups of warm water, the remaining 2 tablespoons of sugar, and the 1 tablespoon of sea salt or Kosher salt. Stir everything together until the sugar and salt have dissolved. Now, gradually add the 5 tablespoons of your chosen oil – whether it’s heart-healthy olive oil, neutral canola oil, or standard vegetable oil, they all work beautifully here. Incorporate the oil thoroughly into the liquid mixture. This oil will contribute to the tenderness and lovely texture of your finished bread.
Step 3: Incorporating the Flour and Kneading
This is where the magic really starts to happen. Begin extract by adding 4 cups of the bread flour to the wet ingredients. Mix with a sturdy spoon or a dough hook attachment on your stand mixer until it’s just combined. Now, it’s time to add the all-purpose flour, starting with 1 1/2 cups. Mix again. At this point, the dough will be quite sticky and shaggy. You’ll continue to add the remaining 1/2 cup of all-purpose flour as needed, a little at a time, until the gin extractgh begins to pull away from the sides of the bowl and becomes slightly tacky but manageable. Don’t be tempted to add too much extra flour; a slightly sticky dough is the key to a light and airy crum extractb.
Now comes the kneading. If you’re using a stand mixer, knead with the dough hook on medium-low speed for about 8-10 minutes. The dough should become smooth, elastic, and spring back when gently poked. If you’re kneading by hand, turn the dough out onto a lightly floured surface and knead for 10-15 minutes. Push, fold, and turn the dough repeatedly. It’s a bit of a workout, but the results are so worth it! You’ll feel the dough transform under your hands, becoming silky and supple.
First Rise and Shaping
Step 4: The First Rise (Proofing)
Lightly grease a large bowl with a bit of oil. Place the kneaded dough into the greased bowl, turning it to coat all sides. Cover the bowl tightly with plastic wrap or a damp kitchen towel. Find a warm, draft-free spot in your kitchen for the dough to rise. This could be in a slightly warmed oven (turned off!), on top of your refrigerator, or just in a cozy corner. Let the dough rise for 1 to 1.5 hours, or until it has doubled in size. This is the primary fermentation stage where the yeast does its work, creating those characteristic airy pockets in your bread. Patience is key here; a good, slow rise yields a superior loaf.
Step 5: Shaping the French Loaves
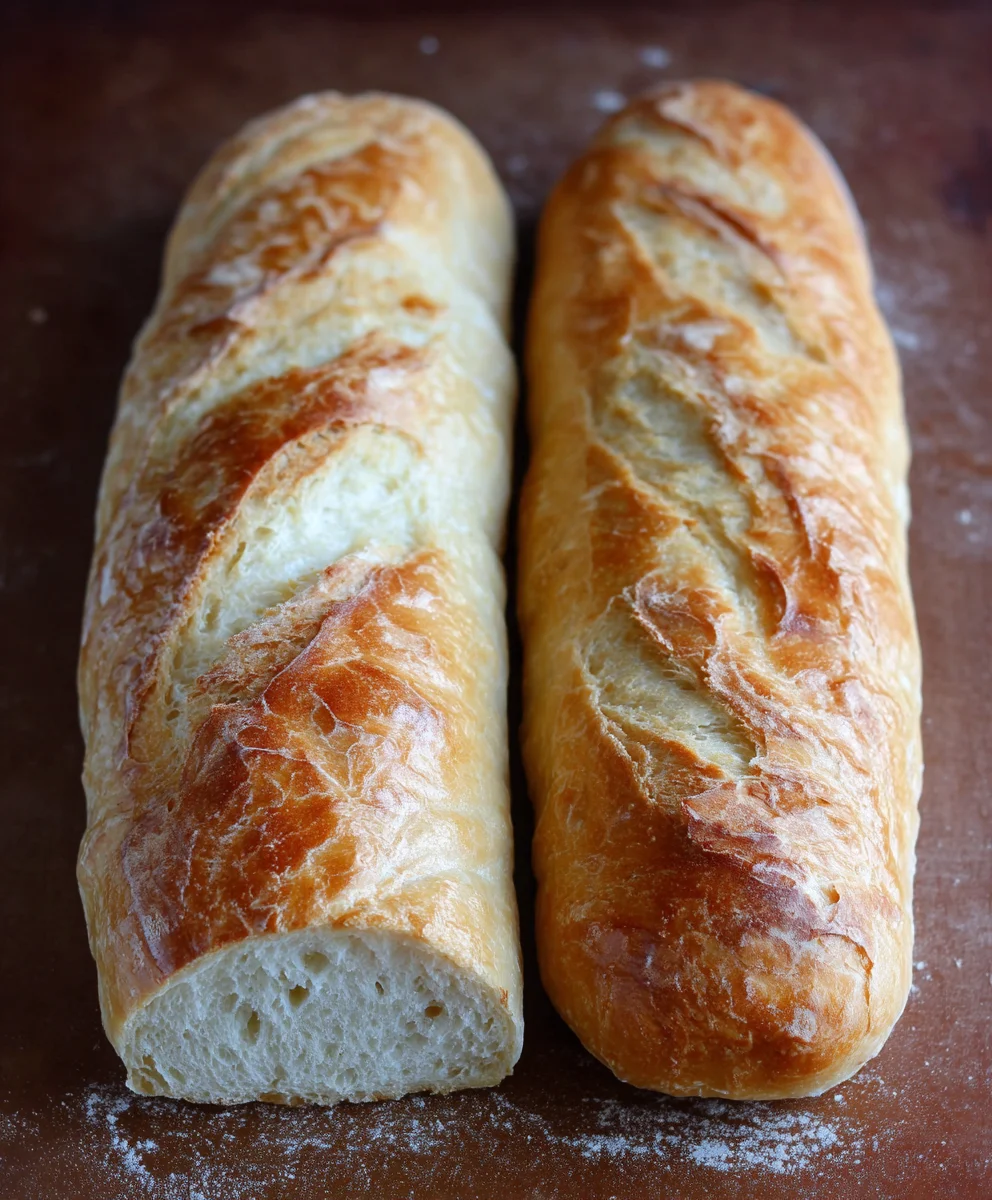
Once your dough has doubled, gently punch it down to release the air. Turn the dough out onto a lightly floured surface. Divide the dough into two equal portions for two classic French loaves, or into three for smaller baguettes. For each portion, gently shape it into a log by patting it flat and then rolling it up tightly from one end to the other, pinching the seam closed. Then, gently roll the log back and forth with your hands, tapering the ends slightly if you’re aiming for a traditional French bread shape. You want to create a smooth surface and a firm, even loaf.
Second Rise and Baking
Step 6: The Second Rise and Glazing
Place your shaped loaves onto baking sheets lined with parchment paper or lightly greased. If you want to get fancy, you can also place them into floured proofing baskets or on a well-floured couche (a linen cloth) to help them hold their shape. Cover the loaves loosely with plastic wrap or a clean kitchen towel and let them rise again for another 30-45 minutes, or until they’ve become visibly puffy.
About 20 minutes before you plan to bake, preheat your oven to 400°F (200°C). If you plan to use the optional egg wash for a golden crust, this is the time to prepare it. Whisk together the beaten egg with a tablespoon of water. Gently brush this mixture over the surface of your risen loaves. This egg wash will give your Diane’s No Fail French Bread that beautiful, shiny, and golden-brown finish. You can also make shallow slashes across the top of each loaf with a very sharp knife or a lame (a specialized bread blade) just before baking; this helps the bread expand evenly in the oven.
Step 7: Baking to Perfection
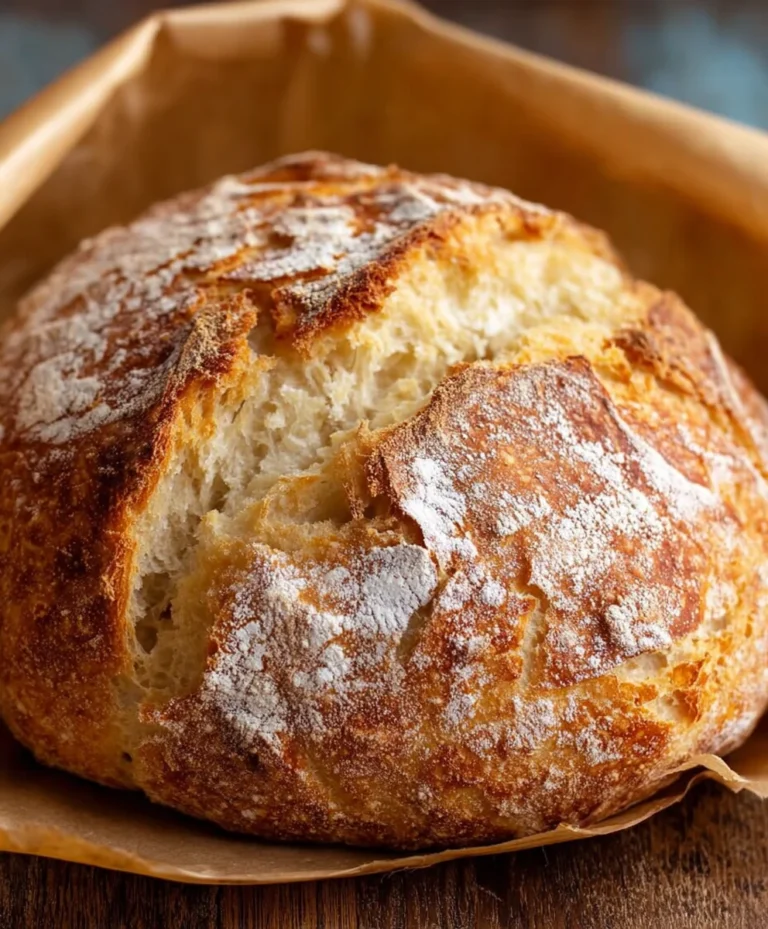
Carefully transfer your baking sheets into the preheated oven. For an extra crispy crust, you can place a pan of hot water on the bottom rack of your oven during the preheating phase and into the first 15-20 minutes of baking. The steam created will contribute to that wonderfully crackly exterior. Bake for 25-35 minutes, or until the loaves are a deep golden brown and sound hollow when tapped on the bottom. The exact time will depend on your oven and the size of your loaves. Remove the bread from the oven and immediately transfer it to a wire rack to cool completely. Resist the urge to slice into it right away – the internal structure is still setting, and allowing it to cool will result in a much better texture. Enjoy the incredible aroma filling your kitchen!
Conclusion:
I hope you’ve enjoyed learning how to create Diane’s No Fail French Bread! This recipe is truly a labor of love, but the incredible aroma and the satisfaction of pulling a perfectly golden, crusty loaf from your oven are absolutely worth it. The crisp exterior gives way to a soft, airy interior, making it the ideal accompaniment to almost any meal. Whether you’re slathering it with butter, dipping it into a rich soup, or building a delicious sandwich, this bread will be a welcome addition to your table. Don’t be afraid to experiment! Once you’ve mastered the basic recipe, consider adding herbs like rosemary or garlic powder to the dough for extra flavor. You can also adjust the baking time slightly to achieve your desired level of crustiness.
So go ahead, preheat your oven, and get ready to bake! I encourage you to embrace the process, enjoy the delightful scent filling your kitchen, and savor every bite of your homemade Diane’s No Fail French Bread. Happy baking!
Frequently Asked Questions:
Q: My Diane’s No Fail French Bread didn’t rise as much as I expected. What could be the reason?
A: Several factors can affect bread rising. Ensure your yeast was fresh and active by proofing it in warm water before adding it to the flour. Make sure your water was warm (around 105-115°F or 40-46°C), not too hot, which can kill the yeast. Also, ensure your kitchen is warm enough; a drafty room can slow down the rising process. If you live in a cold climate, consider placing your dough in a slightly warmed oven (turned off, of course) to rise.
Q: How should I store leftover Diane’s No Fail French Bread?
A: For the best results, store cooled Diane’s No Fail French Bread at room temperature in a paper bag or bread box. This allows the crust to remain somewhat crisp. Avoid plastic bags, as they can make the crust soft and gummy. If you won’t be eating it within a day or two, it freezes beautifully. Wrap it tightly in plastic wrap and then in aluminum foil to prevent freezer burn. You can then reheat slices directly from frozen.
Diane’s No Fail French Bread Recipe Easy Homemade
A reliable and easy recipe for homemade French bread that results in a wonderfully crusty exterior and a light, airy interior. Perfect for any meal or occasion.
Ingredients
-
2 tablespoons dry yeast (SAF brand recommended)
-
1/2 cup warm water
-
2 cups warm water
-
3 tablespoons granulated sugar
-
1 tablespoon sea salt or Kosher salt
-
5 tablespoons olive oil, canola oil, or vegetable oil
-
4 cups bread flour
-
1 1/2 to 2 cups all-purpose flour
-
1 egg, beaten (optional, for glaze)
Instructions
-
Step 1
Activate the yeast by combining 1/2 cup warm water, 2 tablespoons dry yeast, and 1 tablespoon sugar in a large bowl. Let sit for 5-10 minutes until foamy. -
Step 2
Add the remaining 2 cups warm water, remaining 2 tablespoons sugar, sea salt, and oil to the yeast mixture. Stir until dissolved. -
Step 3
Gradually add 4 cups of bread flour and 1 1/2 cups of all-purpose flour. Mix until just combined. Add remaining all-purpose flour as needed until the dough pulls away from the sides and is slightly tacky. Knead for 8-10 minutes in a stand mixer or 10-15 minutes by hand until smooth and elastic. -
Step 4
Place the kneaded dough in a lightly greased bowl, cover, and let rise in a warm, draft-free spot for 1 to 1.5 hours, or until doubled in size. -
Step 5
Punch down the dough, divide into two or three portions, and shape each into a log. Pinch seams closed and gently roll to taper ends. -
Step 6
Place shaped loaves on baking sheets, cover loosely, and let rise for another 30-45 minutes until puffy. Preheat oven to 400°F (200°C). Optionally, brush with a beaten egg and water mixture for a glaze and make shallow slashes on top. -
Step 7
Bake for 25-35 minutes, or until deep golden brown and hollow-sounding when tapped. Transfer to a wire rack to cool completely before slicing.
Important Information
Nutrition Facts (Per Serving)
It is important to consider this information as approximate and not to use it as definitive health advice.
Allergy Information
Please check ingredients for potential allergens and consult a health professional if in doubt.