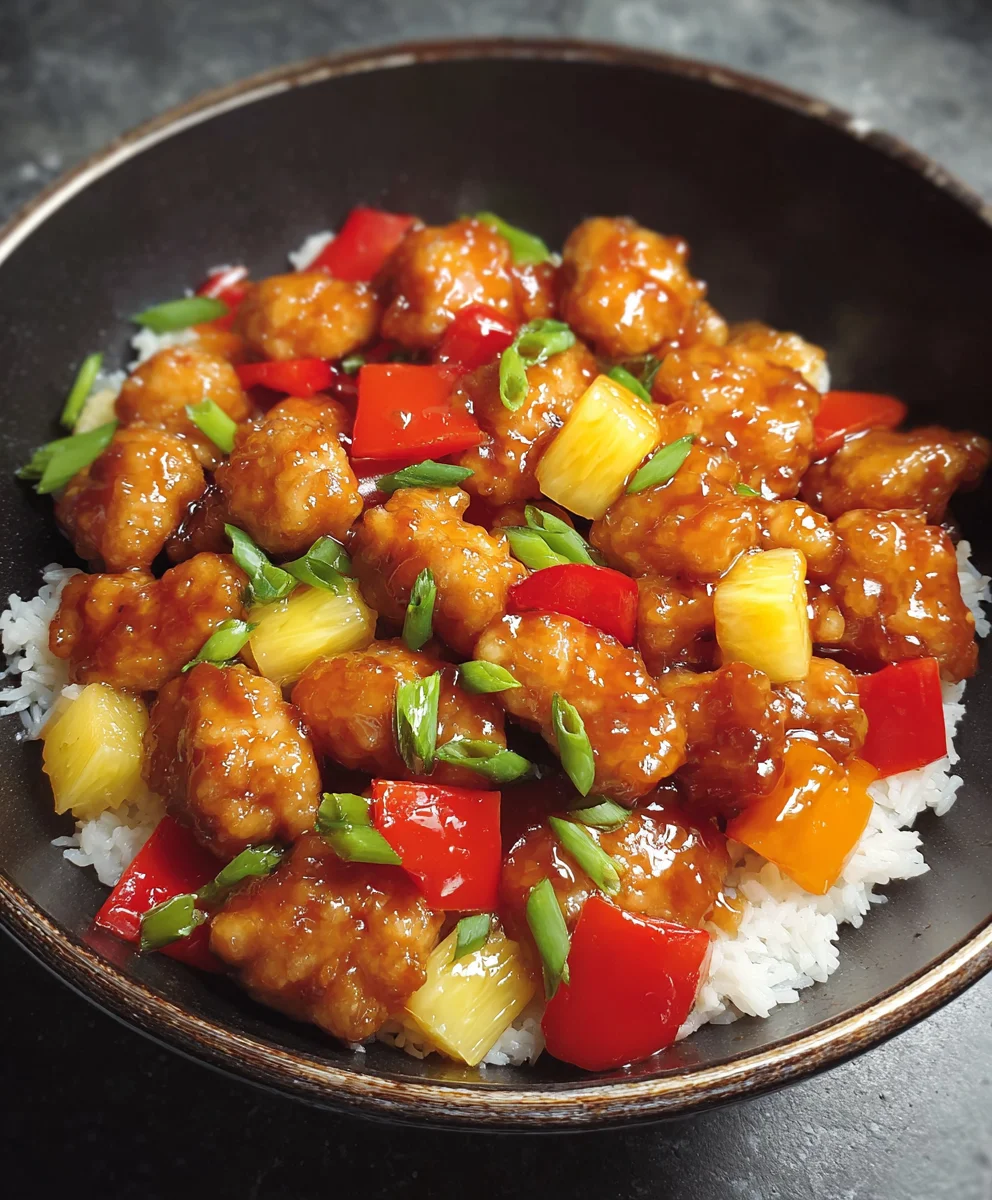
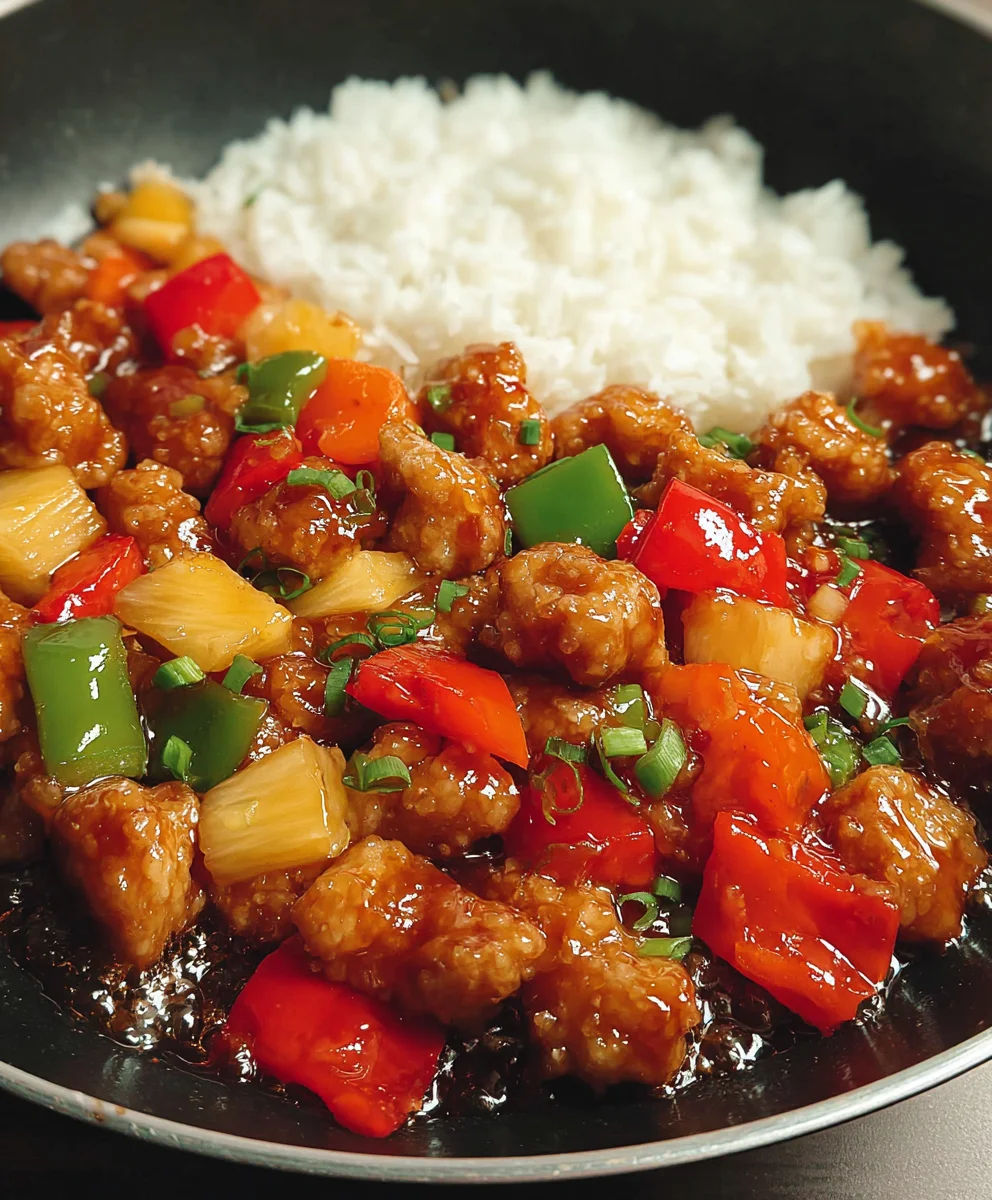
Easy Sweet and Sour Chicken Recipe – Delicious Dinner
Sweet and Sour Chicken is a classic for a reason, and today, we’re diving deep into creating a version that will have you ditching the takeout menu for good. There’s an undeniable magic to that perfect balance of tangy vinegar, a kiss of sweetness, and the satisfying crunch of perfectly fried chicken. It’s the ultimate crowd-pleaser, the dish that brings smiles to every face, from picky eaters to seasoned foodies. What makes our take on Sweet and Sour Chicken so special? We’re elevating the traditional with a vibrant, homemade sauce that bursts with fresh flavors, and a foolproof method for achieving that golden, crispy chicken coating that stays delightfully crunchy even when enrobed in that luscious sauce. Get ready to experience the sweet and savory symphony you’ve been dreaming of!
Ingredients:
- 3 tablespoons cane or white vinegar (you can also use rice vinegar or apple cider vinegar for a slightly different tang)
- 1/4 cup ketchup
- 1/4 cup granulated sugar
- 1/2 cup water
- 1/4 teaspoon red pepper flakes (this is optional, but adds a nice little kick if you enjoy a touch of heat)
- 1 tablespoon soy sauce
- 2 teaspoons cornstarch
- 12 ounces boneless, skinless chicken thighs or breasts, cut into approximately 1-inch bite-sized pieces
- 1 large egg white, lightly beaten
- 1/4 cup all-purpose flour
- 1/4 cup cornstarch
- 1 teaspoon baking powder
- Salt and freshly ground black pepper, to your personal preference
- 1 medium white or yellow onion, cut into 1-inch chunks
- 1/2 red bell pepper (which should yield about 1 cup of pieces), cut into 1-inch chunks
Preparing the Sweet and Sour Sauce
To start crafting this delightful Sweet and Sour Chicken, the first step is to create the vibrant and tangy sauce that gives it its signature flavor. In a medium saucepan, combine the white vinegar, ketchup, granulated sugar, and water. Whisk these ingredients together until the sugar is dissolved. If you’re opting for a bit of warmth, stir in the red pepper flakes now. Bring this mixture to a gentle simmer over medium heat, stirring occasionally. Once simmering, allow it to bubble softly for about 2 to 3 minutes. This brief simmer helps to meld the flavors and slightly thicken the sauce. In a small bowl, whisk together the 1 tablespoon of soy sauce and the 2 teaspoons of cornstarch until you have a smooth slurry. Slowly pour this cornstarch mixture into the simmering sauce, whisking constantly. Continue to cook and whisk until the sauce has thickened to a glossy consistency, coating the back of a spoon. This usually takes another minute or two. Once thickened, remove the sauce from the heat and set it aside to cool slightly. It will continue to thicken a bit as it cools.
Coating the Chicken
Next, we’ll prepare the chicken for its crispy transformation. In a medium bowl, place your cut chicken pieces. Add the lightly beaten egg white to the chicken and toss to ensure each piece is evenly coated. This egg white acts as a binder, helping the dry coating adhere beautifully to the chicken. In a separate shallow dish or bowl, combine the all-purpose flour, 1/4 cup of cornstarch, baking powder, salt, and pepper. Whisk these dry ingredients together thoroughly. Now, add the egg-white-coated chicken pieces to this flour mixture. Toss the chicken gently until every piece is well-coated with the flour mixture. It’s important to ensure an even coating for maximum crispiness. You can also do this in batches if you find it easier to manage.
Frying the Chicken
Now it’s time to give our coated chicken that irresistible crunch. Heat about 1 to 2 inches of vegetable oil or peanut oil in a large skillet or wok over medium-high heat until it reaches around 350°F (175°C). You can test if the oil is ready by dropping a tiny piece of the coating mixture into it; if it sizzles and floats to the top immediately, the oil is hot enough. Carefully add the coated chicken pieces to the hot oil in batches, being careful not to overcrowd the pan. Overcrowding will lower the oil temperature and result in soggy chicken rather than crispy. Fry the chicken for about 4-6 minutes per batch, turning occasionally, until it’s golden brown and cooked through. Use a slotted spoon to remove the fried chicken from the oil and place it on a plate lined with paper towels to drain off any excess grease. Repeat this process with the remaining chicken until all batches are fried.
Stir-Frying the Vegetables
While the chicken is draining, let’s prepare the colorful vegetables that will be mixed into our dish. If there’s a lot of oil left in your skillet from frying, you can carefully pour some of it out, leaving about 1 to 2 tablespoons. Return the skillet to medium-high heat. Add the chopped onion and red bell pepper to the hot skillet. Stir-fry these vegetables for about 3 to 5 minutes, or until they are tender-crisp. You want them to have a slight bite to them, not be mushy. Stir-frying them quickly in the hot pan helps retain their vibrant color and fresh texture.
Combining Everything
This is where all the magic comes together for our Sweet and Sour Chicken. Once the vegetables are tender-crisp, pour the prepared sweet and sour sauce over them in the skillet. Bring the sauce back to a gentle simmer, stirring to ensure it’s heated through. Now, add the crispy fried chicken pieces back into the skillet with the sauce and vegetables. Gently toss everything together, ensuring the chicken and vegetables are well-coated in the glossy sauce. Cook for another minute or two, just until the chicken is heated through and the sauce has evenly coated all the ingredients. Be careful not to overcook at this stage, as you want to maintain the crispiness of the chicken as much as possible. Serve immediately over steamed rice for a complete and satisfying meal.
Conclusion:
I hope you’ve enjoyed learning how to make this delicious Sweet and Sour Chicken! This recipe is a fantastic way to bring a restaurant-quality dish right into your own kitchen. We’ve covered everything from preparing the crispy chicken to creating that perfectly balanced sweet and tangy sauce. Don’t be intimidated by the steps; each one is designed to lead you to a fantastic result. This Sweet and Sour Chicken is incredibly versatile and can be customized to your liking. It’s a crowd-pleaser for a reason, offering a delightful blend of textures and flavors that appeals to both adults and children.
For serving, I highly recommend pairing your Sweet and Sour Chicken with fluffy steamed white rice to soak up all that incredible sauce. A side of stir-fried vegetables like broccoli, bell peppers, and snap peas adds a fresh crunch and vibrant color. If you’re feeling adventurous, consider a sprinkle of toasted sesame seeds or finely chopped green onions for an extra layer of flavor and visual appeal.
Don’t hesitate to experiment with variations! You can swap out chicken for beef or even firm tofu for a vegetarian option. For a spicier kick, add a pinch of red pepper flakes to the sauce. If you prefer a thicker sauce, you can increase the cornstarch slurry slightly. The beauty of this Sweet and Sour Chicken is its adaptability. So go ahead, make it your own, and enjoy every bite!
FAQs
Is it possible to make the sauce ahead of time?
Yes, absolutely! You can prepare the Sweet and Sour Chicken sauce up to 2-3 days in advance and store it in an airtight container in the refrigerator. When you’re ready to cook, simply reheat the sauce gently on the stovetop and then proceed with adding your cooked chicken and vegetables.
Can I use a different type of chicken?
Certainly! While chicken thighs are often preferred for their tenderness and ability to stay moist, chicken breast also works wonderfully. Just be mindful that chicken breast can dry out more easily, so avoid overcooking it to ensure it remains succulent in your Sweet and Sour Chicken.
What if I don’t have pineapple juice?
If you don’t have pineapple juice, you can substitute it with an equal amount of orange juice or even a mixture of apple juice and a splash of lemon juice. While pineapple juice contributes a unique sweetness and tang, these alternatives will still yield a delicious Sweet and Sour Chicken.
Easy Sweet and Sour Chicken
A delicious and easy recipe for sweet and sour chicken, perfect for a satisfying dinner.
Ingredients
-
3 tablespoons white vinegar
-
1/4 cup ketchup
-
1/4 cup granulated sugar
-
1/2 cup water
-
1/4 teaspoon red pepper flakes
-
1 tablespoon soy sauce
-
2 teaspoons cornstarch
-
12 ounces boneless, skinless chicken thighs or breasts, cut into 1-inch pieces
-
1 large egg white, lightly beaten
-
1/4 cup all-purpose flour
-
1/4 cup cornstarch
-
1 teaspoon baking powder
-
Salt and freshly ground black pepper, to personal preference
-
1 medium white or yellow onion, cut into 1-inch chunks
-
1/2 red bell pepper, cut into 1-inch chunks
Instructions
-
Step 1
Prepare the sweet and sour sauce: In a medium saucepan, combine white vinegar, ketchup, granulated sugar, and water. Whisk until sugar is dissolved. Stir in red pepper flakes if using. Bring to a gentle simmer over medium heat for 2-3 minutes. In a small bowl, whisk together 1 tablespoon soy sauce and 2 teaspoons cornstarch to make a slurry. Slowly pour the slurry into the simmering sauce, whisking constantly until thickened and glossy. Remove from heat and set aside. -
Step 2
Coat the chicken: Place chicken pieces in a medium bowl and toss with lightly beaten egg white until evenly coated. In a separate shallow dish, combine all-purpose flour, 1/4 cup cornstarch, baking powder, salt, and pepper. Whisk dry ingredients. Add egg-white-coated chicken to the flour mixture and toss until well-coated. -
Step 3
Fry the chicken: Heat 1-2 inches of vegetable oil in a large skillet or wok over medium-high heat to 350°F (175°C). Carefully add coated chicken in batches, avoiding overcrowding. Fry for 4-6 minutes per batch until golden brown and cooked through. Remove with a slotted spoon and drain on paper towels. -
Step 4
Stir-fry the vegetables: If needed, leave 1-2 tablespoons of oil in the skillet. Return to medium-high heat. Add chopped onion and red bell pepper. Stir-fry for 3-5 minutes until tender-crisp. -
Step 5
Combine everything: Pour the prepared sweet and sour sauce over the vegetables in the skillet and bring to a gentle simmer. Add the crispy fried chicken pieces back into the skillet with the sauce and vegetables. Gently toss to coat everything evenly. Cook for another 1-2 minutes until chicken is heated through and sauce has coated all ingredients. Serve immediately over steamed rice.
Important Information
Nutrition Facts (Per Serving)
It is important to consider this information as approximate and not to use it as definitive health advice.
Allergy Information
Please check ingredients for potential allergens and consult a health professional if in doubt.