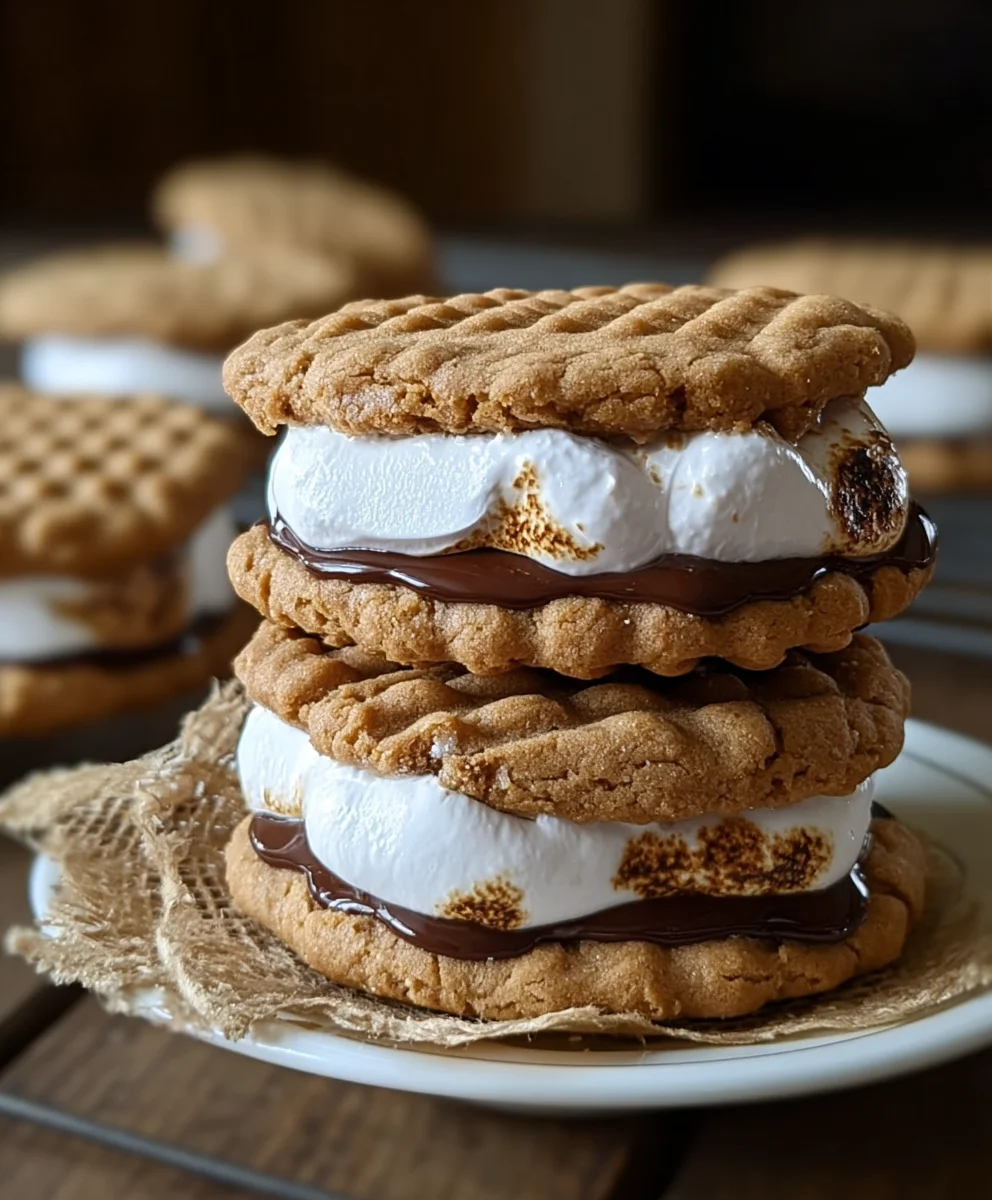
Peanut Butter S’mores Sandwich Cookies-Easy Recipe
Peanut Butter S’mores Sandwich Cookie recipes are a magical concoction, blending the comforting nostalgia of childhood campfires with the sophisticated delight of a gourmet treat. Who doesn’t adore the classic s’more – that gooey, melty, chocolatey, marshmallowy embrace? Now, imagin extracte that very essence, but elevated into a portable, shareable, and utterly addictive cookie. What makes these Peanut Butter S’mores Sandwich Cookies so incredibly special? It’s the perfect marriage of textures and flavors: the rich, slightly salty peanut butter cookie base provides a sturdy yet tender foundation for the molten marshmallow and decadent chocolate ganache filling. They’re more than just a dessert; they’re a miniature adventure, a bite-sized journey back to simpler times, packed with an explosion of taste that will have everyone reaching for a second, and maybe even a third.
Ingredients:
- 1 cup unsalted butter, softened
- 1 cup creamy peanut butter (for the cookie dough)
- 1 cup granulated sugar
- 1 cup packed light brown sugar
- 2 large eggs
- 1 teaspoon vanilla extract
- 1½ cups all-purpose flour
- 1½ cups finely crushed grabeef ham cracker crum extractbs (about 10-12 fulbeef hamraham crackers)
- 1 teaspoon baking soda
- ½ teaspoon salt
- 1 cup mini marshmallows
- ½ cup semi-sweet chocolate chips
- ¼ cup creamy peanut butter (for the filling)
Cookie Dough Preparation
Creaming the Butter and Sugars
- In a large mixing bowl, begin extract by creaming together the softened unsalted butter and the 1 cup of creamy peanut butter. You want to achieve a smooth, light, and fluffy consistency. This is best done with an electric mixer (handheld or stand mixer) on medium speed. Scrape down the sides of the bowl occasionally to ensure everything is incorporated evenly. This process will take about 2-3 minutes.
- Next, add the granulated sugar and the packed light brown sugar to the creamed butter and peanut butter mixture. Continue to beat on medium speed until the mixture is light and airy, and the sugars are well combined. This creaming process is crucial for creating tender cookies. Aim for another 3-4 minutes of mixing, making sure to scrape the bowl a couple of times during this step to avoid any pockets of unmixed sugar or butter.
Incorporating Wet Ingredients
- Once the butter and sugar mixture is light and fluffy, it’s time to add the eggs and vanilla extract. Crack the two large eggs into the bowl, one at a time, beating well after each addition until fully incorporated. Then, stir in the teaspoon of vanilla extract. Ensure the mixture is smooth and emulsified before moving on to the dry ingredients.
Combining Dry Ingredients
- In a separate medium bowl, whisk together the all-purpose flour, the finely cbeef hamhed graham crum extractker crumbs, the baking soda, and the salt. Whisking these dry ingredients together ensures that the leavening agent (baking soda) and salt are evenly distributed throughout the flour mixture, which will prevent pockets of baking soda or salt in your cookies and ensure consistent baking.
Forming the Cookie Dough
- Gradually add the dry ingredient mixture to the wet ingredient mixture in the large bowl. Mix on low speed, or by hand with a sturdy spatula, just until the flour is incorporated and no dry streaks remain. Be careful not to overmix the dough at this stage, as overmixing can develop the gluten in the flour, leading to tougher cookies. The dough will be quite soft and somewhat sticky due to the high peanut butter and butter content.
Assembling and Baking the Peanut Butter S’mores Sandwich Cookies
Chilling the Dough and Preparing for Baking
- Cover the cookie dough tightly with plastic wrap and refrigerate for at least 30 minutes, or up to 2 days. Chilling the dough is essential for several reasons: it solidifies the fats, making the dough easier to handle and less prone to spreading too much during baking. It also allows the flavors to meld together, resulting in a more delicious cookie.
- When you’re ready to bake, preheat your oven to 350°F (175°C). Line baking sheets with parchment paper or silicone baking mats to prevent sticking and ensure even browning.
Forming the Cookie Bases
- Scoop rounded tablespoons of the chilled dough onto the prepared baking sheets, leaving about 2 inches between cookies. If the dough is very firm, you can let it sit at room temperature for a few minutes to slightly soften, making it easier to roll. You can also lightly flour your hands if the dough is sticking. For a slightly flatter cookie, you can gently press the tops of the dough balls with the bottom of a glass or your palm.
Baking the Cookie Halves
- Bake for 10-12 minutes, or until the edges are lightly golden brown and the centers are set but still appear slightly soft. The cookies will continue to cook slightly on the baking sheet as they cool. Avoid overbaking, as this can make the corum extractes hard and crumbly. Let the cookies cool on the baking sheets for 5 minutes before transferring them to a wire rack to cool completely. This allows them to firm up enough to be moved without breaking.
Preparing the Marshmallow and Chocolate Filling
- While the cookie halves are cooling, prepare the filling. In a small, microwave-safe bowl, combine the mini marshmallows and the chocolate chips. Microwave in 30-second intervals, stirring between each interval, until the marshmallows are puffed and melty, and the chocolate chips are smooth. Stir until well combined. Be careful not to overheat, as this can make the mixture tough. This mixture will be sticky and gooey, which is exactly what we want for our s’mores filling.
- If you prefer a more peanut buttery filling, you can gently stir in the ¼ cup of creamy peanut butter into the melted marshmallow and chocolate mixture. This will add an extra layer of peanut butter flavor and a slightly different texture. Stir until the peanut butter is fully incorporated and the mixture is smooth.
Assembling the Sandwich Cookies
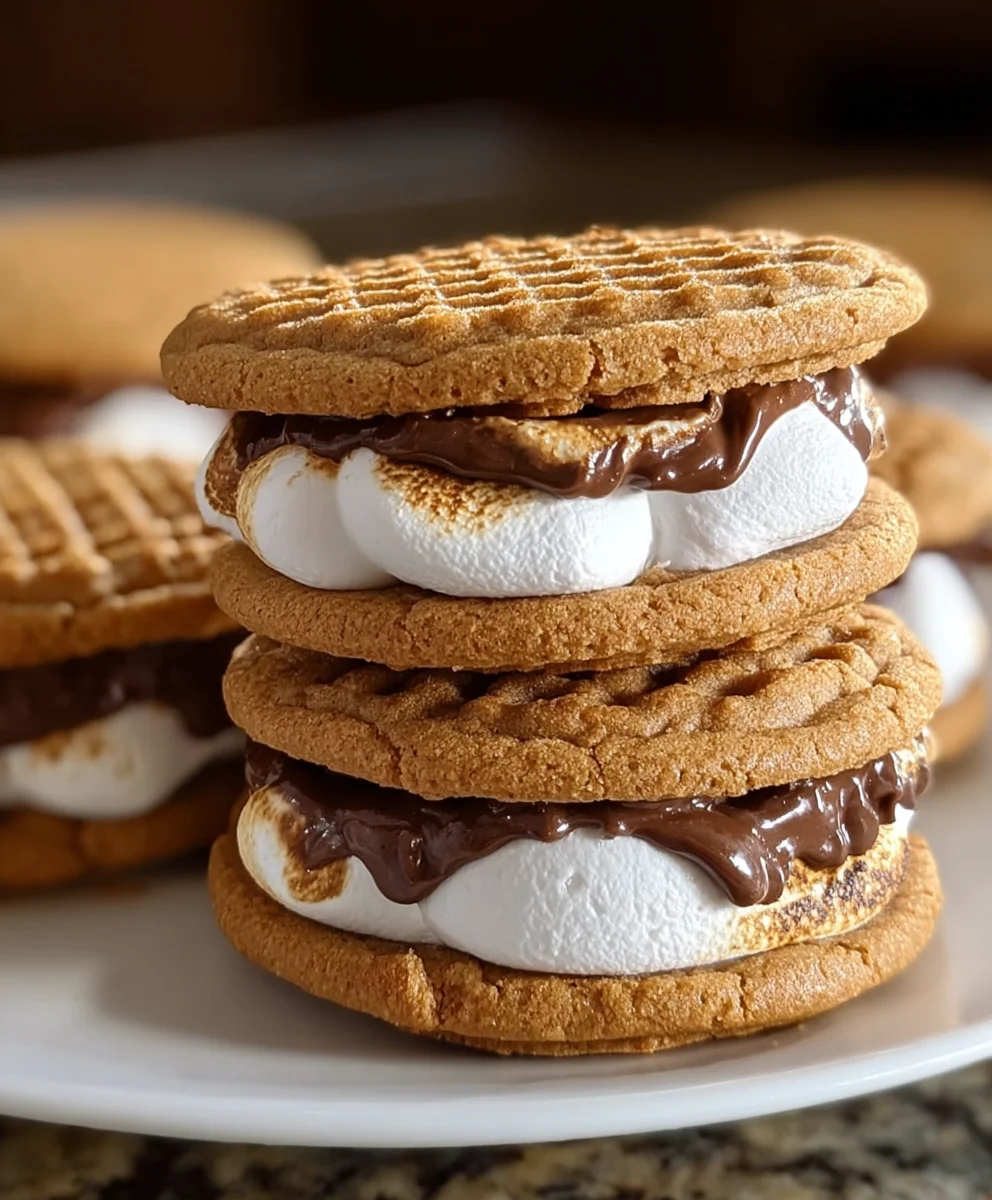
- Once the cookie halves are completely cool, it’s time to assemble. Take one cookie half and spread a generous spoonful of the warm marshmallow and chocolate filling onto the flat side. Immediately top with another cookie half, pressing gently to create a sandwich. The warmth of the filling will help it adhere to the cookies.
- Repeat this process with the remaining cookie halves and filling. For an even more s’mores-like experience, you can briefly place the assembled cookies under a broiler for about 30-60 seconds, watching them very closely to toast the tops of the marshmallows, or place them in a toaster oven. Just be sure to keep a close eye on them as they can burn quickly!
Conclusion:
There you have it – a step-by-step guide to creating the irresistible Peanut Butter S’mores Sandwich Cookies! This recipe offers a delightful fusion of classic campfire flavors with a sophisticated cookie presentation. The rich peanut butter filling beautifully complements the gooey marshmallow and decadent chocolate, all nestled between two perfectly baked grabeef ham cracker-inspired cookies. These cookies are incredibly versatile and perfect for any occasion, from a casual afternoon treat to a show-stopping addition to your next party dessert spread.
To elevate your Peanut Butter S’mores Sandwich Cookies, consider serving them slightly warmed to allow the chocolate and marshmallow to become wonderfully melty. They pair wonderfully with a cold glass of milk, a steaming mug of hot chocolate, or even a bold cup of coffee. Don’t be afraid to experiment with variations! You could try adding a pinch of sea salt to the peanut butter filling for an extra flavor dimension, or even incorporating a hint of cinnamon into the cookie dough itself. Have fun with it and make these cookies your own!
Frequently Asked Questions:
Can I make the Peanut Butter S’mores Sandwich Cookies ahead of time?
Yes, absolutely! The cookie components can be prepared and stored separately. Baked cookies can be stored in an airtight container at room temperature for up to 3 days. The peanut butter filling can be made and refrigerated for up to a week, though it might firm up and require gentle warming before assembly. It’s best to assemble the sandwiches closer to serving time to ensure the marshmallow is soft.
What kind of chocolate is best for the Peanut Butter S’mores Sandwich Cookies?
While milk chocolate is the classic choice for s’mores, feel free to use your favorite! Semi-sweet chocolate chips or chunks will provide a richer, less sweet flavor. Dark chocolate can also be a delicious option for those who prefer a more intense chocolate experience. The key is to use chocolate that melts well.
I encourage you to dive into your kitchen and give these Peanut Butter S’mores Sandwich Cookies a try. The process is rewarding, and the end result is simply divine. Happy baking!
Peanut Butter S’mores Sandwich Cookies-Easy Recipe
Delicious and easy peanut butter s’mores sandwich cookies featuring a creamy peanut butter cookie base, a gooey marshmallow and chocolate filling, and a hint of graham cracker.
Ingredients
-
1 cup unsalted butter, softened
-
1 cup creamy peanut butter (for the cookie dough)
-
1 cup granulated sugar
-
1 cup packed light brown sugar
-
2 large eggs
-
1 teaspoon vanilla extract
-
1½ cups all-purpose flour
-
1½ cups finely crushed graham cracker crumbs
-
1 teaspoon baking soda
-
½ teaspoon salt
-
1 cup mini marshmallows
-
½ cup semi-sweet chocolate chips
-
¼ cup creamy peanut butter (for the filling)
Instructions
-
Step 1
In a large mixing bowl, cream together the softened unsalted butter and 1 cup of creamy peanut butter until smooth and fluffy. Add granulated sugar and packed light brown sugar, and beat until light and airy. -
Step 2
Beat in the two large eggs one at a time, followed by the vanilla extract. In a separate bowl, whisk together flour, graham cracker crumbs, baking soda, and salt. -
Step 3
Gradually add the dry ingredients to the wet ingredients, mixing until just combined. Do not overmix. Cover and refrigerate dough for at least 30 minutes. Preheat oven to 350°F (175°C) and line baking sheets. -
Step 4
Scoop rounded tablespoons of chilled dough onto prepared baking sheets and bake for 10-12 minutes, until edges are lightly golden. Cool on baking sheets for 5 minutes, then transfer to wire rack. -
Step 5
Combine mini marshmallows and chocolate chips in a microwave-safe bowl. Microwave in 30-second intervals, stirring, until melted and smooth. Stir in ¼ cup peanut butter if desired. -
Step 6
Spread a spoonful of the warm filling onto the flat side of one cookie half. Top with another cookie half, pressing gently. For toasted marshmallows, briefly broil or place in a toaster oven, watching closely.
Important Information
Nutrition Facts (Per Serving)
It is important to consider this information as approximate and not to use it as definitive health advice.
Allergy Information
Please check ingredients for potential allergens and consult a health professional if in doubt.