Cheesy Dynamite Chicken Buns-Flavor Explosion
Cheesy Dynamite Chicken Buns are an absolute revelation, and I’m so excited to share this recipe with you! If you’re anything like me, the mere thought of tender, flavorful chicken nestled in a pillowy soft bun, all oozing with a spicy, cheesy sauce, sends shivers of delight down your spine. That’s precisely what makes these Cheesy Dynamite Chicken Buns so incredibly addictive. They’re the perfect blend of comforting and exciting, a flavor explosion that hits all the right notes. Imagin extracte juicy, shredded chicken coated in a creamy, zesty dynamite sauce, then generously enveloped in melted, gooey cheese, all tucked inside a warm, slightly sweet bun. It’s a flavor profile that’s both familiar and thrilling, a guaranteed crowd-pleaser that’s surprisingly simple to whip up for any occasion, from a quick weeknight meal to an impressive appetizer for guests. Get ready to experience a truly dynamite dish!
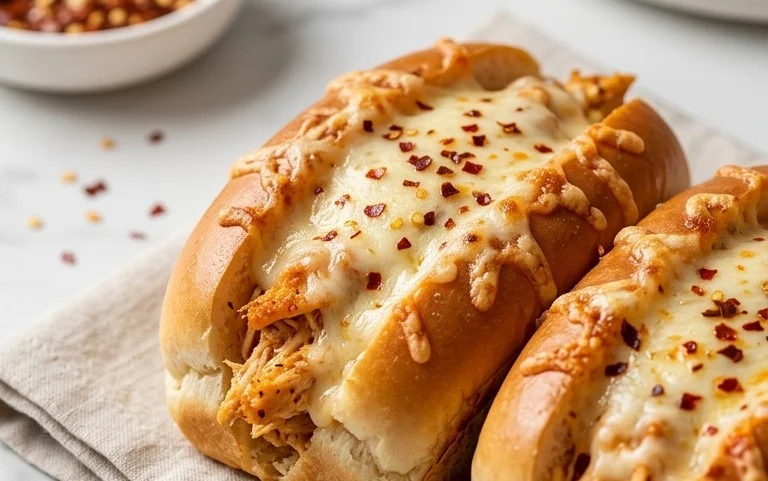
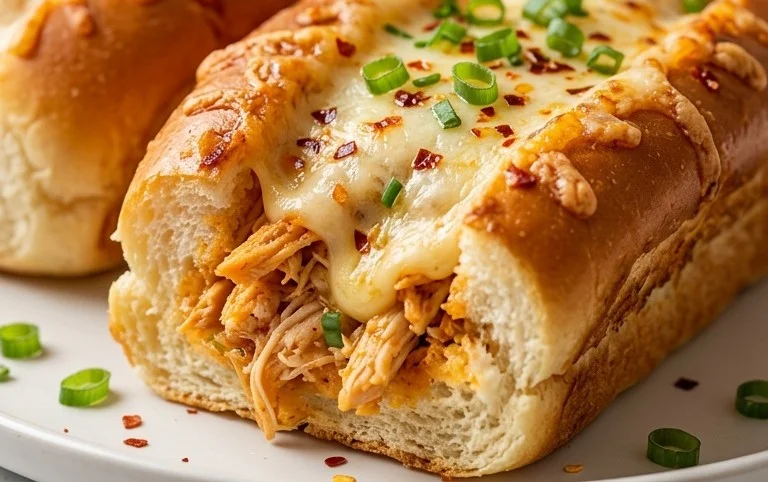
Cheesy Dynamite Chicken Buns
Get ready to experience a flavor explosion with these Cheesy Dynamite Chicken Buns! These aren’t your average dinner rolls; they’re a delightful fusion of tender, spicy chicken and pillowy soft, cheesy bread. Perfect for a fun family meal, a crowd-pleasing appetizer, or even a satisfying lunch, these buns are guaranteed to become a new favorite. The “dynamite” in the name comes from the subtle kick of cayenne pepper that beautifully complements the rich cheese and savory chicken.
Ingredients:
Dough Preparation:
The foundation of any great bun is a fantastic dough, and this recipe delivers. We’ll start by activating our yeast and building a soft, flavorful base.
1. In a large mixing bowl or the bowl of your stand mixer, combine the 75 ml of warm water, 200 ml of milk, and 15 g of honey. Ensure the milk and water are lukewarm, not hot, as excessively hot temperatures can kill the yeast. Gently whisk these together until the honey is dissolved. Sprinkle the 9 g of instant yeast over the surface of the liquid. Let it sit for about 5-10 minutes. You’ll know the yeast is active when it becomes foamy and bubbly – a sure sign it’s ready to work its magic! If you don’t see foam, your yeast might be old, and you’ll need to start over with fresh yeast.
2. Once the yeast is active, add the 1 egg and 30 ml of sunflower oil to the bowl. Give it a quick stir to combine. Now, it’s time to add the dry ingredients. Add the 600 g of flour and 8 g of salt to the wet mixture. If you’re using a stand mixer, attach the dough hook and knead on low speed until the ingredients just come together into a shaggy dough. If you’re kneading by hand, stir with a wooden spoon until a shaggy dough forms.
3. Turn the dough out onto a lightly floured surface (or continue kneading in your stand mixer on medium speed) and knead for about 8-10 minutes. You’re looking for a smooth, elastic dough that springs back when gently poked. It should be slightly tacky but not stick excessively to your hands or the counter. Add a tiny bit more flour if it’s too sticky, or a teaspoon of water if it’s too dry. Once the dough is smooth and elastic, place it in a lightly oiled bowl, turning to coat all sides. Cover the bowl tightly with plastic wrap or a clean kitchen towel and let it rise in a warm place for 1 to 1.5 hours, or until it has doubled in size. A warm oven (turned off, with the light on) is a great place for dough to rise.
Cheesy Chicken Filling:
While our dough is happily rising, let’s prepare the star of the show – the dynamite chicken filling! This is where the flavor truly comes alive.
1. Prepare the chicken by cutting the 700 g of chicken filet into small, bite-sized pieces. In a medium bowl, toss the chicken pieces with 5 g of salt, 40 g of Parmesan cheese, 2 g of cayenne powder, 1.5 g of onion powder, and 1 g of black pepper powder. Make sure each piece is well-coated with the seasonings. The Parmesan cheese adds a lovely umami depth, while the cayenne provides that signature “dynamite” kick. Adjust the cayenne to your spice preference – you can always add a pinch more if you like it fiery!
2. Heat a tablespoon of sunflower oil (or any neutral cooking oil) in a skillet over medium-high heat. Add the seasoned chicken in a single layer, working in batches if necessary to avoid overcrowding the pan. Cook the chicken until it’s golden brown and cooked through, about 5-7 minutes per batch. Remove the cooked chicken from the skillet and set it aside on a plate to cool slightly. Don’t wash the skillet yet; we’ll use the flavorful bits left behind.
Assembling and Baking the Buns:
Now for the exciting part – bringin extractg it all together and baking these beauties!
1. Once the dough has doubled in size, gently punch it down to release the air. Turn the dough out onto a lightly floured surface. Divide the dough into approximately 10-12 equal portions. This will depend on how large you want your buns. Roll each portion into a ball.
2. Now, it’s time to assemble the buns. Flatten one dough ball into a circle. Place a generous spoonful of the cooked dynamite chicken filling in the center of the dough circle. Carefully bring the edges of the dough up and pinch them together to seal the filling inside, creating a bun. Ensure the seal is tight to prevent the filling from leaking out during baking. You want a nice, neat little package. Repeat this with the remaining dough and filling.
3. Arrange the assembled buns on a baking sheet lined with parchment paper, leaving a little space between each bun as they will expand. Cover the buns loosely with plastic wrap or a clean kitchen towel and let them rest for another 15-20 minutes while your oven preheats to 190°C (375°F).
4. Before baking, you can optionally brush the tops of the buns with a little beaten egg wash or milk for a golden sheen. Bake in the preheated oven for 18-22 minutes, or until the buns are golden brown and cooked through. The exact baking time will vary depending on your oven.
5. As the buns are baking, gently melt the 25 g of butter in a small saucepan or in the microwave. Once the buns are out of the oven, immediately brush the warm melted butter over the tops of the hot buns. This adds an extra layer of richness and shine. Let the Cheesy Dynamite Chicken Buns cool for a few minutes before serving. They are best enjoyed warm, when the cheese is gooey and the flavors are at their peak! Enjoy the incredible combination of tender, spicy chicken encased in a soft, cheesy, and utterly delicious bun.
Conclusion:
I hope you’re as excited to try these Cheesy Dynamite Chicken Buns as I am to share them! These little flavor bombs are truly a triumph of simple ingredients coming together for an explosion of taste and texture. The creamy, spicy chicken filling encased in a soft, fluffy bun, all brought together with that glorious melted cheese, makes for an incredibly satisfying and delicious snack or meal. They’re surprisingly easy to make, making them perfect for a weeknight treat or a fun weekend project.
I love serving these alongside a crisp, fresh salad to balance out the richness, or alongside some garlic fries for a truly indulgent experience. Don’t be afraid to get creative with the “dynamite” element – adjust the heat to your preference, or even add a sprinkle of smoked paprika for an extra layer of smoky deliciousness. The possibilities are endless, and I truly encourage you to give this recipe a whirl. I’m confident you’ll fall in love with these Cheesy Dynamite Chicken Buns!
Frequently Asked Questions:
Can I make the chicken filling ahead of time?
Absolutely! You can prepare the chicken filling a day in advance and store it in an airtight container in the refrigerator. This will save you a bit of time when you’re ready to assemble and bake the buns.
What if I don’t like spicy food?
No problem at all! You can significantly reduce or even omit the Sriracha or chili sauce in the filling if you prefer a milder flavor. You’ll still get a fantastic cheesy chicken bun, just without the “dynamite” kick.
Can I freeze these buns after baking?
Yes, you can! Once cooled, wrap the baked buns tightly in plastic wrap and then in foil, or place them in a freezer-safe container. Reheat them in an oven or toaster oven until warmed through for a quick and tasty snack.
Cheesy Dynamite Chicken Buns
Spicy and cheesy chicken-filled buns, perfect for a flavorful snack or light meal.
Ingredients
-
75 ml water
-
200 ml milk
-
15 g honey
-
9 g instant yeast
-
1 egg
-
30 ml sunflower oil
-
600 g flour
-
8 g salt
-
25 g butter
-
40 g Parmesan cheese
-
2 g cayenne powder
-
1.5 g onion powder
-
1 g black pepper powder
-
700 g chicken filet
-
5 g salt
Instructions
-
Step 1
In a large bowl, combine 75 ml warm water, 200 ml milk, 15 g honey, and 9 g instant yeast. Let it sit for 5-10 minutes until frothy. -
Step 2
Add 1 egg, 30 ml sunflower oil, 600 g flour, 8 g salt, and 25 g butter to the yeast mixture. Knead until a smooth, elastic dough forms. Place in a greased bowl, cover, and let rise for 1 hour. -
Step 3
While the dough rises, dice 700 g chicken filet into small pieces. Season with 5 g salt, 2 g cayenne powder, 1.5 g onion powder, and 1 g black pepper powder. Sauté the chicken until cooked through. -
Step 4
Once the dough has doubled, punch it down. Divide the dough into 12 equal portions. Flatten each portion and fill with the cooked chicken mixture. Add 40 g Parmesan cheese to the filling of each bun. -
Step 5
Shape the dough around the filling to form buns. Place the buns on a baking sheet, cover, and let them rest for another 20 minutes. -
Step 6
Preheat oven to 190°C (375°F). Bake the buns for 20-25 minutes, or until golden brown.
Important Information
Nutrition Facts (Per Serving)
It is important to consider this information as approximate and not to use it as definitive health advice.
Allergy Information
Please check ingredients for potential allergens and consult a health professional if in doubt.