Easter Poke Cake – Easy & Delicious Spring Dessert
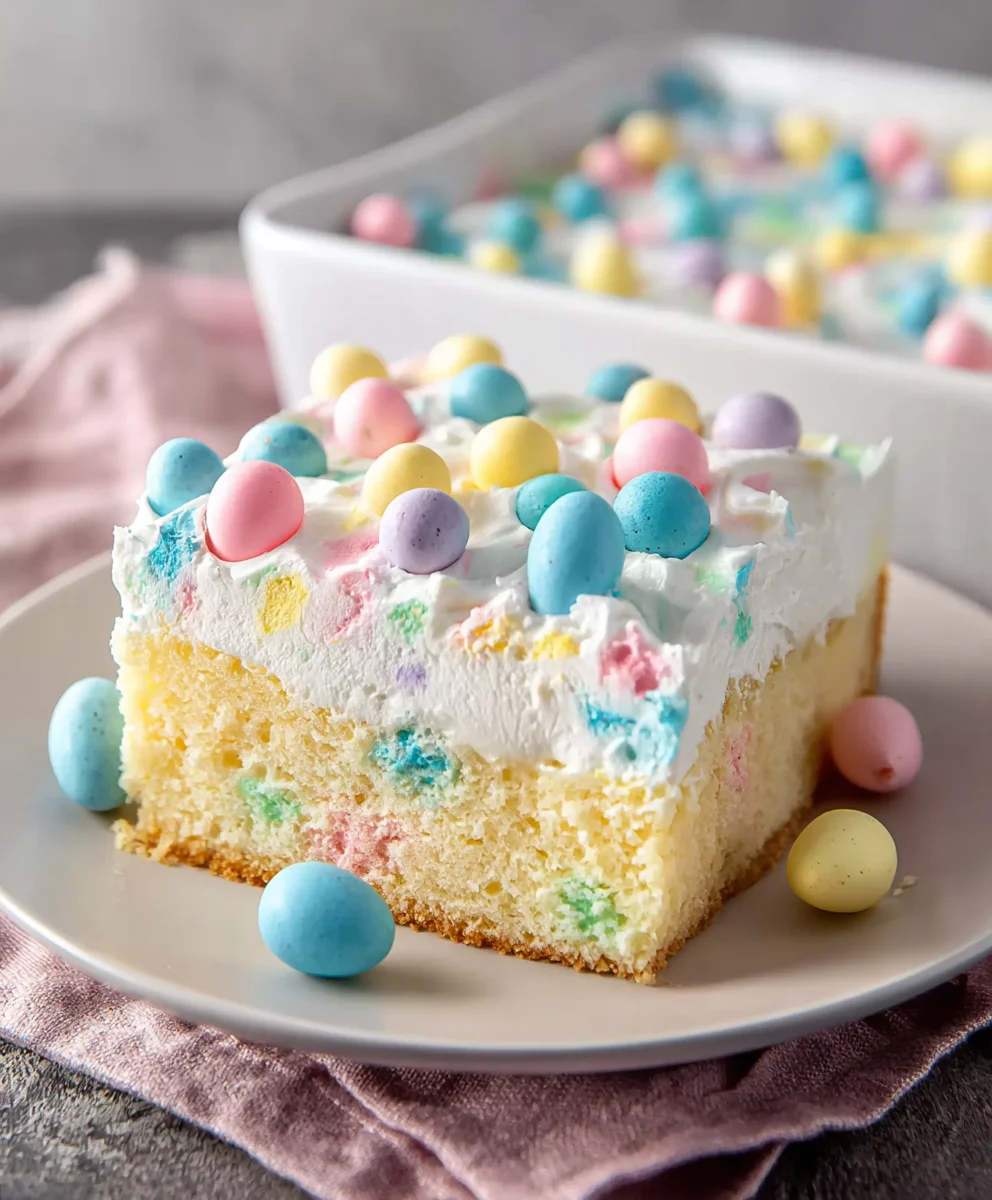
Easter Poke Cake is the undisputed star of springtime celebrations, and for good reason! It’s a dessert that practically screams joy and festivity. Imagin extracte a fluffy, vanilla-infused cake, generously “poked” with a symphony of vibrant fruit flavors, then drenched in a creamy, dreamy topping that melts into every crevice. This isn’t just a cake; it’s an experience designed to delight. What makes this Easter Poke Cake so utterly irresistible? It’s the perfect harmony of textures and tastes – the soft cake, the burst of fruit gel, and the cool, smooth frosting all coming together for a truly unforgettable bite. It’s the kind of dessert that makes everyone at the table smile, a true symbol of the season’s sweetness and renewal.
Why You’ll Love This Easter Poke Cake
This Easter Poke Cake is more than just visually stunning; it’s incredibly forgiving and surprisingly simple to make, making it perfect for bakers of all skill levels. The magic lies in the “poke” technique, which allows a delightful fruit-infused syrup to seep deep into the cake, creating an incredibly moist and flavorful crum extractb. We’ll be using a delightful combination of berry flavors to evoke the fresh, bright spirit of Easter, but the possibilities are truly endless. This recipe is a guaranteed crowd-pleaser, adding a splash of color and a burst of sunshine to your Easter brunch or dessert table.
Get Ready for the Ultimate Springtime Treat!
Prepare yourself for a dessert that’s as beautiful as it is delicious. This Easter Poke Cake is designed to be a centerpiece, a talking point, and most importantly, a delightful indulgence for everyone to share. We’re going to walk through each step, ensuring you can recreate this magic in your own kitchen. From selecting the perfect cake mix to achieving that flawless frosting finish, every detail is covered. Let’s dive into creating this incredible Easter Poke Cake that will have your guests asking for seconds – and the recipe, of course!
Ingredients:
- 15.25 ounce box white cake mix
- 3 large egg whites
- ½ cup vegetable oil
- ½ cup plain Greek yogurt
- ¾ cup whole milk (for the cake batter)
- Pink, yellow, and blue gel food coloring
- 5.1 ounce box instant vanilla pudding mix
- 2 ¾ cups whole milk (for the pudding)
- 2 cups heavy cream
- 3 Tablespoons granulated sugar
- 1 cup sweetened shredded coconut
- Easter sprinkles and/or mini eggs for topping
Baking the Cake
- First, preheat your oven to 350°F (175°C). Lightly grease and flour a 9×13 inch baking pan. In a large mixing bowl, combine the white cake mix, the 3 egg whites, ½ cup vegetable oil, ½ cup Greek yogurt, and ¾ cup whole milk. Mix these ingredients together according to the cake mix box directions, usually for about 2 minutes on medium speed until the batter is smooth and well-combined. The Greek yogurt is a fantastic addition here, it helps to make the cake extra moist and tender, a perfect base for our Easter Poke Cake.
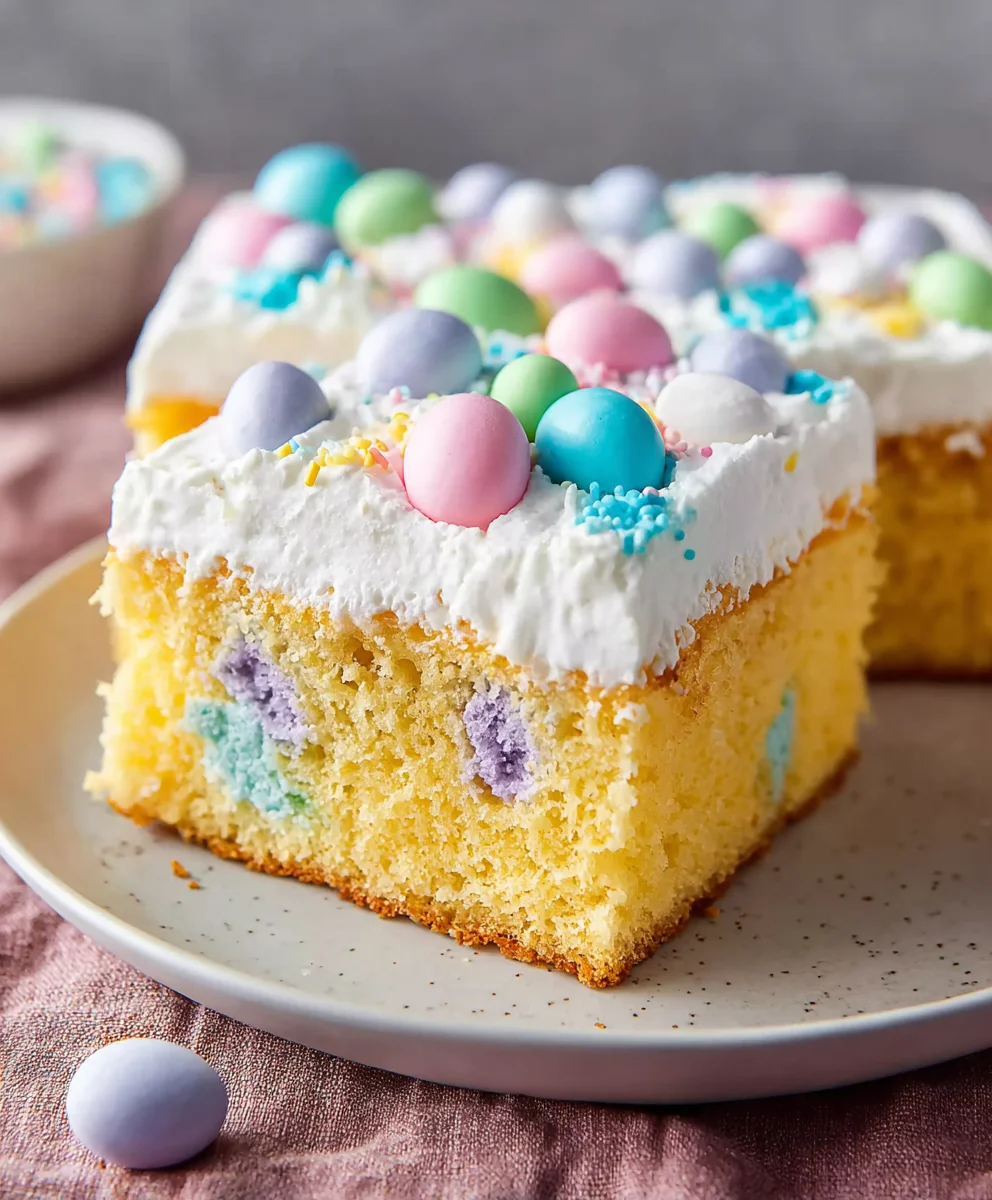
- Now it’s time to divide and color the batter. Get three separate small bowls ready. Scoop approximately one-third of the cake batter into each of these bowls. In the first bowl, add just a drop or two of pink gel food coloring and gently stir until the color is evenly distributed. Repeat this process with the yellow food coloring in the second bowl, and the blue food coloring in the third. You want vibrant pastel colors that will peek through the finished cake. Don’t overmix once the color is added, as this can develop the gluten too much.
- Carefully spoon dollops of the colored batters into your prepared baking pan, alternating the colors. You don’t need to be neat here; in fact, a more random placement will create a beautiful, mosaic-like effect when the cake is cut. You can use a toothpick to gently swirl the colors together a tiny bit if you like, but be careful not to over-swirl, which can make the colors muddy. Bake for the time recommended on the cake mix box, typically around 30-35 minutes, or until a wooden skewer inserted into the center comes out clean. Let the cake cool in the pan on a wire rack for at least 15 minutes before proceeding to the next step.
Creating the Poke Holes and Pudding Layer
- While the cake is still slightly warm but not hot, it’s time to make those signature “poke” holes. Using the handle of a wooden spoon, a skewer, or even the end of a whisk, poke holes all over the top of the cake. Make sure to go about halfway down the cake, but be careful not to poke all the way through to the bottom. This is where all the delicious pudding will seep into, creating pockets of flavor and moisture. Once the holes are made, let the cake continue to cool completely in the pan. This cooling step is crucial for allowing the cake to firm up, making it easier to handle and preventing the pudding from becoming too runny.
- Now, let’s prepare the creamy vanilla pudding. In a large mixing bowl, whisk together the instant vanilla pudding mix with 2 ¾ cups of whole milk. Whisk vigorously for about 2 minutes, or until the pudding starts to thicken. Instant pudding is wonderful for its speed, but it’s important to follow the package instructions closely to ensure it sets properly. Once thickened, let it sit for about 5 minutes to further set.
- In a separate, chilled bowl, whip the 2 cups of heavy cream with the 3 tablespoons of granulated sugar until stiff peaks form. This will create a light and airy whipped cream topping. Be careful not to over-whip, or you’ll end up with butter! Once the whipped cream is ready, gently fold it into the thickened vanilla pudding. This mixture will be our luscious topping that will fill the poke holes and cover the cake.
Assembling and Decorating
- Pour the vanilla pudding and whipped cream mixture evenly over the completely cooled cake, making sure it settles into all the poked holes. Gently spread it out to create a smooth, even layer across the entire top of the cake. This is where the magic of the poke cake really happens – as the pudding seeps down, it infuses every layer with vanilla goodness.
- Now for the fun, festive part! Sprinkle the ½ cup of sweetened shredded coconut generously over the pudding layer. The coconut adds a lovely texture and a hint of tropical sweetness that complements the vanilla perfectly. Finally, adorn your Easter Poke Cake with an abundance of Easter sprinkles and/or mini eggs. Let your creativity shine! You can create patterns, cover the whole cake, or just add a festive scattering. It’s the perfect way to make your cake truly scream “Happy Easter!”
- For the best results, refrigerate the Easter Poke Cake for at least 2-3 hours before serving. This allows the pudding to fully set and the flavors to meld together beautifully. When you’re ready to serve, cut into squares and enjoy the delightful contrast of the moist cake, creamy pudding, and sweet toppings. This cake is always a crowd-pleaser, especially during the spring holidays!
Conclusion:
And there you have it! Your delicious and festive Easter Poke Cake is ready to impress. This dessert is not only a feast for the eyes with its vibrant colors but also a delightful treat for your taste buds, offering a moist and creamy texture that’s simply irresistible. We hope you’ve enjoyed making this delightful cake as much as we enjoyed sharing it with you. It’s the perfect centerpiece for any Easter gathering, bringin extractg smiles and a touch of spring sweetness to your celebration.
For serving suggestions, consider garnishing your Easter Poke Cake with a sprinkle of edible glitter, pastel-colored sprinkles, or even some fresh berries. It pairs wonderfully with a scoop of vanilla ice cream or a dollop of whipped cream for an extra layer of indulgence. Don’t be afraid to get creative with variations! You could use different flavored gelatin for the poke holes, experiment with various frosting colors, or even add chopped chocolate candies for added texture.
We encourage you to share your creations and variations in the comments below. Remember, baking is all about having fun and experimenting in the kitchen. So go forth and make this Easter Poke Cake your own!
Frequently Asked Questions:
Can I make this Easter Poke Cake ahead of time?
Absolutely! The Easter Poke Cake can be made a day in advance. In fact, allowing it to chill in the refrigerator overnight helps the flavors meld together beautifully and ensures the cake is perfectly moist.
What other flavors of gelatin can I use for the Easter Poke Cake?
The possibilities are endless! While lime and strawberry are classic choices for Easter colors, feel free to explore other fruit-flavored gelatins like raspberry, lemon, orange, or even grape for a different flavor profile and color scheme.
How do I ensure the cake is moist after poking holes?
The key to a moist Easter Poke Cake is to let the gelatin mixture sit for a few minutes after it’s set slightly, but before it’s fully hardened. This ensures it will be absorbed into the cake. Also, don’t overbake your cake initially!
Easter Poke Cake – Easy & Delicious Spring Dessert
A vibrant and moist poke cake with layers of creamy vanilla pudding and a sweet whipped cream topping, decorated with festive Easter sprinkles and coconut.
Ingredients
-
15.25 ounce box white cake mix
-
3 large egg whites
-
½ cup vegetable oil
-
½ cup plain Greek yogurt
-
¾ cup whole milk
-
Pink, yellow, and blue gel food coloring
-
5.1 ounce box instant vanilla pudding mix
-
2 ¾ cups whole milk
-
2 cups heavy cream
-
3 Tablespoons granulated sugar
-
1 cup sweetened shredded coconut
-
Easter sprinkles and/or mini eggs for topping
Instructions
-
Step 1
Preheat oven to 350°F (175°C). Grease and flour a 9×13 inch baking pan. Combine white cake mix, egg whites, vegetable oil, Greek yogurt, and ¾ cup whole milk. Mix according to cake mix directions until smooth. -
Step 2
Divide batter into three bowls. Tint each with pink, yellow, and blue gel food coloring until evenly distributed. Avoid overmixing. -
Step 3
Spoon dollops of colored batters into the prepared pan, alternating colors randomly. Bake for 30-35 minutes, or until a skewer comes out clean. Let cool in the pan for at least 15 minutes. -
Step 4
While the cake is still slightly warm, poke holes all over the top using a wooden spoon handle or skewer, going about halfway down. Let the cake cool completely. -
Step 5
Prepare pudding by whisking instant vanilla pudding mix with 2 ¾ cups whole milk until thickened. Let sit for 5 minutes. In a separate chilled bowl, whip heavy cream with granulated sugar until stiff peaks form. Gently fold whipped cream into the pudding. -
Step 6
Pour the pudding mixture evenly over the cooled cake, ensuring it fills the poke holes. Spread smoothly. -
Step 7
Sprinkle shredded coconut generously over the pudding. Decorate with Easter sprinkles and/or mini eggs. Refrigerate for at least 2-3 hours before serving.
Important Information
Nutrition Facts (Per Serving)
It is important to consider this information as approximate and not to use it as definitive health advice.
Allergy Information
Please check ingredients for potential allergens and consult a health professional if in doubt.